· Katria Melrose · Smart Ovens · 18 min read
How To Use The Nuwave Bravo Xl Smart Oven
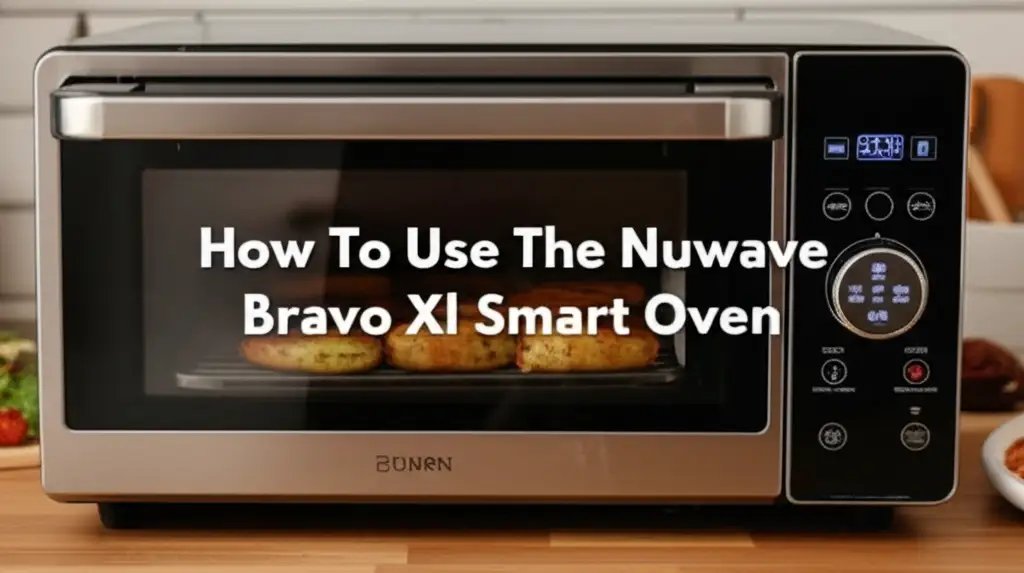
Mastering Your Nuwave Bravo XL Smart Oven: A Complete Usage Guide
The Nuwave Bravo XL Smart Oven is a powerful kitchen appliance. It combines several cooking functions into one compact unit. This includes air frying, baking, roasting, grilling, and dehydrating. Many people find it helpful for preparing various meals. This guide helps you understand how to use the Nuwave Bravo XL Smart Oven. We will cover everything from setting it up to cooking your favorite foods. You will learn about its controls, preset functions, and smart features. By the end, you will feel confident using your Nuwave Bravo XL Smart Oven for daily cooking.
Takeaway
- Setup Correctly: Place your Nuwave Bravo XL on a stable, heat-resistant surface. Ensure proper ventilation around the unit.
- Understand Controls: Familiarize yourself with the digital display and function buttons. Learn to adjust time, temperature, and presets.
- Utilize Presets: Use the pre-programmed settings for common tasks like air frying and baking. This simplifies cooking.
- Customize Settings: Adjust temperature, time, and fan speed for specific recipes. The internal temperature probe helps ensure food is cooked perfectly.
- Maintain Cleanliness: Regularly clean the oven interior and accessories. This ensures optimal performance and extends appliance life.
The Nuwave Bravo XL Smart Oven simplifies meal preparation. You use its digital controls and various cooking functions for many dishes. It bakes, roasts, air fries, and dehydrates food effectively.
Getting Started: Unboxing and Initial Setup of Your Nuwave Bravo XL
Setting up your new Nuwave Bravo XL Smart Oven is a simple process. First, carefully remove all packaging materials from the oven. Check inside the oven cavity for any protective inserts or accessories. Make sure you remove everything before plugging it in. This prevents issues during the first use.
The Nuwave Bravo XL comes with several useful accessories. These often include a cooking rack, a baking pan, an air fry basket, and a rotisserie kit. Your model might also include a temperature probe. Identify each accessory and understand its purpose. This helps you use the oven for different cooking methods.
Choose a suitable location for your oven. The Nuwave Bravo XL needs a stable, flat surface. This surface should be heat-resistant. Countertops are usually good choices. Ensure there is enough space around the oven for proper air circulation. Leave at least six inches of clear space on all sides and above the unit. This prevents overheating and allows hot air to escape.
Before cooking, always perform an initial cleaning. Wipe down the interior with a damp cloth. You can also run the oven empty for about 15-20 minutes at 350°F (175°C). This helps burn off any manufacturing oils or odors. A slight smell is normal during this first run. After cooling, wipe the interior again. This prepares your Nuwave Bravo XL for its first cooking task.
Understanding the Nuwave Bravo XL Control Panel and Functions
The Nuwave Bravo XL Smart Oven features an intuitive digital control panel. This panel lets you select cooking modes, adjust settings, and monitor progress. Familiarizing yourself with these controls makes cooking easy. The large LCD display shows temperature, time, and selected function. It gives you clear feedback at a glance.
Most models have dedicated buttons for common functions. These buttons might include “Air Fry,” “Bake,” “Roast,” “Broil,” “Grill,” “Dehydrate,” and “Warm.” Pressing a function button selects that cooking mode. The oven then defaults to a pre-set temperature and time for that mode. You can always change these default settings.
There are also buttons for adjusting time and temperature. Look for “Temp” and “Time” buttons, often with ”+” and ”-” controls. Press the “Temp” button to adjust the cooking temperature. Use the ”+” or ”-” buttons to increase or decrease the value. Similarly, press the “Time” button to change the cooking duration. This allows you to customize settings for any recipe.
The “Start/Pause” button controls the cooking cycle. Press it to begin cooking. Press it again to pause the cooking process if you need to check food or add ingredients. The “Cancel” button stops the current cooking cycle. It also clears any selected settings. Understanding these basic controls empowers you to operate your oven efficiently.
Some Nuwave Bravo XL models include a “Fan” button to control convection fan speed. A higher fan speed provides more even cooking and crispier results, especially for air frying. A lower speed is better for baking delicate items. This level of control helps you achieve perfect results for different dishes. Always consult your specific model’s user manual for precise button layouts and functions.
Utilizing Preset Functions for Popular Dishes
The Nuwave Bravo XL Smart Oven offers several convenient preset functions. These pre-programmed settings simplify cooking for many popular dishes. They set the ideal temperature and time automatically. This saves you guesswork. You just select the function, place your food inside, and press start.
Air Frying with the Bravo XL
Air frying is one of the most popular features of the Nuwave Bravo XL. It uses hot air circulation to cook food. This creates a crispy texture similar to deep frying, but with less oil. To air fry, you usually place food in the air fry basket. This basket allows air to circulate around all sides of the food.
Select the “Air Fry” button on the control panel. The oven will display a default temperature and time. For example, it might suggest 375°F (190°C) for 15-20 minutes. You can adjust these settings if your recipe requires different values. Common air-fried foods include chicken wings, french fries, and spring rolls. Using the air fry function is easy. You can learn more about air frying specific foods like chicken wings in similar appliances. How to cook chicken wings in Power XL Air Fryer Oven provides extra tips.
Baking and Roasting Meals
The Nuwave Bravo XL excels at baking and roasting. It bakes cookies, cakes, and bread evenly. For roasting, you can cook meats like chicken or vegetables. Place your food on the baking pan or cooking rack. Use the appropriate rack position for best results.
To bake, press the “Bake” button. The oven will set a default temperature and time. Common baking temperatures are around 350°F (175°C). Adjust the time based on your recipe. For roasting, select the “Roast” function. Roasting often uses higher temperatures than baking. This creates a flavorful crust on meats. The oven’s convection technology helps cook food evenly and more quickly than traditional ovens. This means you get delicious, well-cooked meals every time.
Other Useful Presets
Besides air frying and baking, the Nuwave Bravo XL may offer other presets. These include:
- Broil: This function uses high heat from the top element. It is perfect for browning the tops of casseroles or melting cheese. It provides quick, intense heat.
- Grill: Some models have a grill function. This helps you get grill marks and flavors similar to outdoor grilling. It works well for thin cuts of meat or vegetables.
- Dehydrate: This setting uses low, consistent heat and fan circulation. It removes moisture from foods. You can dehydrate fruits, vegetables, or make jerky. This process preserves food and creates healthy snacks. You can explore Can you dehydrate in the Breville Smart Oven Air Fryer for more insights into dehydrating with smart ovens.
- Warm: This function keeps food warm without further cooking. It is useful when you are preparing multiple dishes. It ensures everything stays hot until serving time.
Each preset is designed to optimize cooking for specific food types. Experiment with them to find your favorite settings. Remember to consult your user manual for the exact presets available on your Nuwave Bravo XL model.
Customizing Cooking Settings and Manual Modes
While presets offer convenience, the Nuwave Bravo XL Smart Oven also allows full manual control. This lets you tailor settings precisely to your recipe’s needs. Understanding manual mode gives you great flexibility. You can adjust temperature, time, and fan speed independently.
To manually set the oven, simply select a function like “Bake” or “Air Fry” first. Then, immediately use the “Temp” and “Time” buttons to adjust the values. You can change the temperature in small increments. The same applies to the cooking time. This granular control is useful for unique recipes. For example, if a recipe calls for a specific cooking temperature not covered by a preset, you can input it manually.
Many advanced recipes benefit from custom temperature and time settings. For example, some baking recipes require a specific temperature for a certain duration. Roasting larger cuts of meat often needs a lower temperature for a longer time. The Nuwave Bravo XL handles these custom demands easily. Its powerful heating elements and convection fan ensure consistent heat distribution.
The integrated temperature probe is a key smart feature of the Nuwave Bravo XL. It helps you cook meats to exact doneness. You insert the probe into the thickest part of the meat. Then, plug the probe into its dedicated port on the oven. Select the “Probe” function or a specific meat preset that uses the probe. The oven will cook until the internal temperature reaches your desired setting. This eliminates guesswork. It prevents both undercooked and overcooked food. The oven automatically switches to a “Warm” setting or shuts off when the target temperature is reached. This ensures food is perfectly cooked and safe to eat.
Controlling the convection fan speed also offers customization. For very crispy results, like certain air-fried foods, you might choose a higher fan speed. For delicate baking, a lower fan speed or no fan can be better. This prevents foods from drying out. The fan control ensures versatility. It supports various cooking styles and food textures. Always refer to your recipe for recommended fan settings. The Nuwave Bravo XL empowers you to be a master chef in your own kitchen.
Cooking Different Foods with Your Smart Oven
The Nuwave Bravo XL Smart Oven is versatile. It cooks a wide range of foods, from simple snacks to complex meals. Knowing how to use its functions for different food types helps you get the best results. I find it perfect for everyday cooking.
Perfecting Meats and Poultry
Cooking meats in the Bravo XL is very effective. For chicken, you can roast a whole bird using the rotisserie function. This ensures even cooking and a crispy skin. Small cuts like chicken breasts or thighs cook well with the “Roast” or “Air Fry” setting. Ensure the internal temperature reaches a safe level, often 165°F (74°C) for poultry. The built-in probe is excellent for this.
Steaks, pork chops, and fish fillets also cook nicely. Use the “Grill” or “Roast” setting for these. The high heat creates a good sear. Always preheat the oven for meats. This helps lock in juices. For bacon, the air fry basket works wonders. It cooks bacon evenly and crisply without excessive grease. How to cook bacon in Power XL Air Fryer Oven offers great tips that apply to the Bravo XL too. You should flip meats halfway through cooking for even browning.
Preparing Vegetables and Sides
Vegetables roast beautifully in the Nuwave Bravo XL. Toss cut vegetables like broccoli, carrots, or potatoes with oil and seasonings. Spread them on the baking pan. Use the “Roast” setting around 400°F (200°C) for 15-25 minutes. They will become tender inside and slightly crispy outside.
For side dishes, consider air frying french fries from frozen or making crispy sweet potato fries. The “Air Fry” preset works perfectly for these. You can also bake potatoes. Simply prick them with a fork and bake directly on the rack. The oven handles jacket potatoes well, giving them a fluffy interior. For quick meals, the Nuwave Bravo XL can also reheat leftovers, making them taste fresh again.
Baking Goods and Snacks
The Nuwave Bravo XL is excellent for baking. You can bake cookies, muffins, and small cakes. Use the “Bake” function. Adjust temperature and time according to your recipe. The convection fan helps ensure even baking. For pizza, the “Bake” or “Pizza” preset works well. It creates a crispy crust and melted cheese. Always preheat the oven thoroughly before baking. This promotes better rise and texture.
Making healthy snacks is also simple. Use the “Dehydrate” function for fruit slices or jerky. Arrange thinly sliced fruit on the racks. Set a low temperature for several hours. This creates chewy, natural snacks. Homemade granola also bakes well in the oven. The versatility of the Nuwave Bravo XL makes it a go-to appliance for many dishes.
Maintenance and Care: Tips for Optimal Performance and Longevity
Proper care and maintenance keep your Nuwave Bravo XL Smart Oven performing its best. Regular cleaning is essential. It prevents food buildup and ensures heating elements work efficiently. A clean oven also cooks food better and safer. I always clean mine after a few uses.
Always unplug the oven and let it cool completely before cleaning. Do not immerse the oven body in water. Use a damp cloth to wipe down the exterior. For the interior, use a soft, damp cloth with mild dish soap. Avoid abrasive cleaners or scouring pads. These can damage the non-stick coating or finish.
The accessories like the baking pan, air fry basket, and racks need cleaning too. Most are dishwasher-safe, but hand washing extends their life. Remove any stuck-on food bits promptly. Soaking them in warm, soapy water helps loosen grime. Pay attention to the crumb tray at the bottom. This tray collects fallen food particles. Empty and clean it regularly. This prevents burning odors and reduces fire risk. A thorough guide on How to clean Nuwave Bravo XL Smart Oven offers more detailed steps.
Periodically check the heating elements. Ensure they are free from food residue. If you see burned-on spots, gently wipe them when the oven is cold. Avoid bending or damaging the elements. Proper ventilation is also key. Ensure the air vents are not blocked during operation. This prevents overheating and extends the life of internal components.
When storing, ensure the oven is completely dry. Store it in a dry place. Following these simple maintenance tips keeps your Nuwave Bravo XL in excellent condition. It helps ensure it continues to be a valuable tool in your kitchen for years. Consistent care means consistent cooking performance.
Troubleshooting Common Issues with Your Nuwave Bravo XL
Even with proper use, you might encounter minor issues with your Nuwave Bravo XL Smart Oven. Knowing how to troubleshoot common problems saves you time and frustration. Most issues have simple solutions. I once thought mine was broken, but it was a quick fix.
If the oven does not turn on, first check the power cord. Ensure it is securely plugged into a working electrical outlet. Test the outlet with another appliance to confirm it has power. A tripped circuit breaker could also be the cause. Check your home’s breaker box and reset any tripped breakers. If the oven still does not power on, contact customer support.
If food is not cooking evenly, consider a few factors. Overcrowding the oven is a common reason. Do not pile food too high in the basket or on the pan. Leave space for air to circulate. Flipping or rotating food halfway through cooking also promotes evenness. Using the correct rack position is important. Consult your recipe or the oven manual for recommended rack levels. Uneven cooking can also happen if the oven needs preheating. Always preheat for consistent results, especially when baking or roasting.
Sometimes, the oven might produce unusual smells or smoke. A slight smell during the first few uses is normal. This is typically manufacturing oils burning off. Persistent smoke or strong odors usually indicate food spills or grease buildup. Stop cooking immediately. Let the oven cool, then clean the interior thoroughly. Pay special attention to the heating elements and the crumb tray. If smoke continues after cleaning, contact Nuwave customer service.
Error codes may appear on the display. These codes usually point to a specific problem. Consult your user manual for a list of error codes and their meanings. The manual provides specific steps to resolve each error. Often, simply unplugging the oven for a few minutes and plugging it back in can reset the system and clear temporary errors. For persistent issues or critical malfunctions, contact Nuwave customer support. They can offer professional guidance or arrange repairs.
Expanding Your Culinary Repertoire: Advanced Cooking with Bravo XL
The Nuwave Bravo XL is more than just an air fryer or toaster oven. It offers features that allow for advanced cooking techniques. Mastering these can elevate your meals. I love exploring new ways to use mine.
One advanced technique is slow cooking. While not a dedicated slow cooker, the Bravo XL can maintain low temperatures for extended periods. This is ideal for tenderizing tougher cuts of meat or making stews. You would set the oven to a low “Bake” temperature, perhaps 200-250°F (93-121°C), for several hours. Ensure you use an oven-safe pot or dutch oven. The even heat circulation helps to create fall-off-the-bone results.
Another valuable feature is proof mode for baking. Some Bravo XL models have a dedicated proofing setting. If not, you can manually set a very low temperature, around 85-100°F (30-38°C). This gentle warmth provides the perfect environment for yeast dough to rise. It speeds up the proofing process compared to leaving dough on the counter, especially in a cool kitchen. This results in lighter, airier breads and pastries.
The rotisserie function is a fantastic advanced tool. It allows you to cook whole chickens, roasts, or even gyros style meats. The continuous rotation ensures even cooking and browning on all sides. This results in perfectly crispy skin and juicy interiors. To use it, secure your food onto the rotisserie spit. Then insert the spit into the oven’s rotisserie mounts. Select the rotisserie function and set your desired temperature and time. The integrated probe can still be used for internal temperature monitoring, ensuring perfect doneness.
Utilizing the multi-stage cooking programs if your model offers them, is another advanced technique. Some smart ovens allow you to program different temperature and time settings in sequence. For example, you might start with a high temperature to sear a roast, then automatically drop to a lower temperature for the rest of the cooking time. This automated process means less manual intervention and more precise cooking results. Check your specific model’s manual for programming multi-stage options. These advanced features truly turn your Nuwave Bravo XL into a versatile kitchen workhorse.
FAQs About Using Your Nuwave Bravo XL Smart Oven
Q: Can I use aluminum foil in my Nuwave Bravo XL Smart Oven? A: Yes, you can use aluminum foil in your Nuwave Bravo XL. It is safe for lining the baking pan for easier cleanup or wrapping food. However, do not let foil touch the heating elements. Also, avoid lining the crumb tray or the bottom of the oven with foil. This can trap heat and damage the unit or block airflow.
Q: How do I preheat the Nuwave Bravo XL effectively? A: To preheat, simply select your desired cooking function and temperature. The oven will begin heating. It typically takes 5-10 minutes for the oven to reach the set temperature. Some models will beep or indicate when preheating is complete. Always preheat for best cooking results, especially for baking and roasting.
Q: What is the main difference between air fry and bake on this oven? A: Air fry uses a powerful convection fan to circulate hot air rapidly, creating a crispy exterior like deep frying. Bake uses radiant heat from the elements, with or without a fan, for more traditional cooking. Air fry often cooks faster and uses less oil. Bake is ideal for cakes, breads, and casseroles.
Q: Is the Nuwave Bravo XL easy to clean after cooking? A: Yes, the Nuwave Bravo XL is designed for easy cleaning. The interior often has a non-stick coating. Accessories like the baking pan and air fry basket are usually dishwasher-safe or easy to hand wash. The removable crumb tray simplifies cleanup of spills. Regular cleaning after each use prevents food buildup.
Q: Can I cook a whole chicken in the Nuwave Bravo XL? A: Yes, the Nuwave Bravo XL can cook a whole chicken. Many models include a rotisserie function and kit specifically for this purpose. The rotisserie ensures even cooking and a crispy skin. Ensure your chicken fits within the oven’s dimensions and weight limits. Use the temperature probe for perfect doneness.
Q: Does the Nuwave Bravo XL require special cookware? A: No, the Nuwave Bravo XL does not require special cookware. You can use most oven-safe dishes made of glass, ceramic, or metal. Avoid using plastic containers. The oven comes with standard accessories like a baking pan, rack, and air fry basket. These are suitable for most cooking tasks.
Conclusion: Embrace Your Nuwave Bravo XL Smart Oven
The Nuwave Bravo XL Smart Oven is a powerful and versatile appliance. It simplifies many kitchen tasks. We have explored how to use the Nuwave Bravo XL Smart Oven, from initial setup to advanced cooking. You now understand its controls, preset functions, and how to customize settings. This oven excels at air frying, baking, roasting, and more.
By following this guide, you can confidently prepare a wide variety of meals. Remember to clean your oven regularly for best performance. Experiment with different recipes and functions. Your Nuwave Bravo XL can help you create delicious, healthy food with ease. Start cooking with your Nuwave Bravo XL today and transform your kitchen experience.
- Nuwave Bravo XL
- Smart Oven
- Air Fryer Oven
- Cooking Guide
- Kitchen Appliance Usage
- Multi-function Oven

Katria Melrose
Cleaning Specialist
With over 12 years of experience in commercial cleaning and a certification in workplace ergonomics, I’ve developed a deep understanding of what makes a workspace truly productive. At HEG, I specialize in helping people transform their home offices into clean, efficient, and comfortable environments. Through smart cleaning routines and strategic organization solutions, I empower readers to create spaces that support focus, comfort, and success—one well-organized desk at a time.