· Todd Martin · Appliance Troubleshooting · 21 min read
Why Does Kitchenaid Oven Says Remove Meat Probe
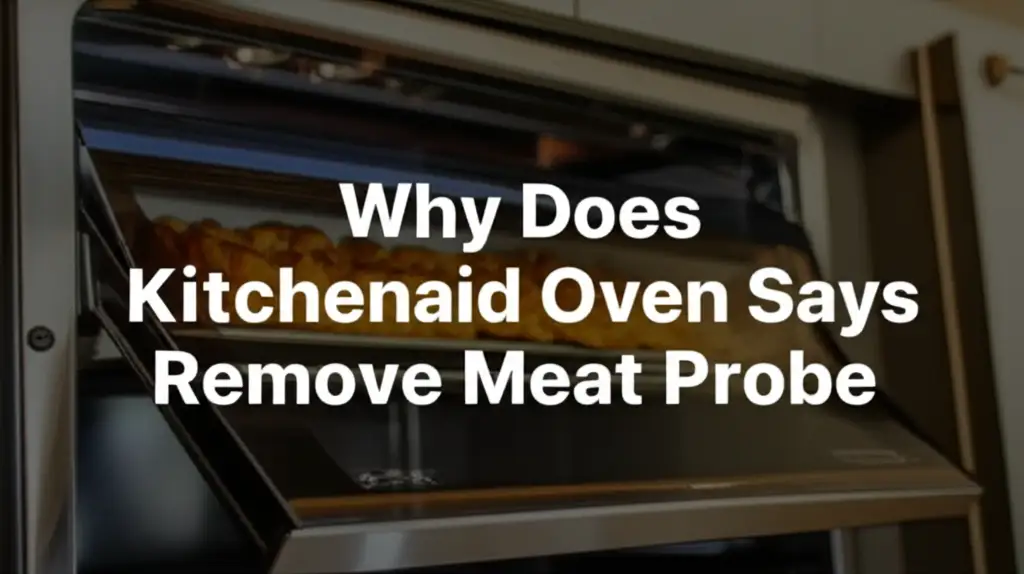
KitchenAid Oven Says ‘Remove Meat Probe’: What It Means
Imagine preparing a delicious roast, anticipating that perfect internal temperature, only for your KitchenAid oven to display an unexpected message: “Remove Meat Probe.” This can halt your cooking process and cause confusion. I understand how frustrating this can be when you just want a perfectly cooked meal. This message is more common than you think and usually points to simple issues with the meat probe or its connection.
This article will explain why your KitchenAid oven says ‘Remove Meat Probe’. We will look at common causes for this alert, from improper insertion to probe malfunction. You will learn how to troubleshoot the message effectively. We will also cover proper meat probe use and care. By the end, you will understand how to resolve this issue and ensure your oven’s meat probe works correctly for precise cooking.
Takeaway
- Check Probe Connection: Ensure the meat probe is fully inserted into both the meat and the oven jack.
- Verify Probe Condition: Inspect the probe and its cable for damage or bends.
- Clean the Jack: Make sure the oven’s probe jack is free of food debris or moisture.
- Restart the Oven: A power cycle can often clear temporary error messages.
- Consult Manual: Refer to your KitchenAid oven’s user manual for model-specific instructions.
Why Does KitchenAid Oven Say ‘Remove Meat Probe’?
Your KitchenAid oven says ‘Remove Meat Probe’ because its internal system detects an unexpected condition related to the temperature probe. This message often indicates improper probe insertion, a faulty probe, or an issue with the oven’s probe jack. The oven needs the probe removed to continue or start certain functions safely.
Understanding the “Remove Meat Probe” Message on Your KitchenAid Oven
The “Remove Meat Probe” message on your KitchenAid oven serves as an important signal. It tells you the oven has detected an issue with the meat temperature probe. This message does not always mean the probe is faulty. Often, it indicates a communication problem between the probe and the oven’s control system. The oven expects certain conditions from the probe, like a stable temperature reading or a proper connection. When these conditions are not met, the message appears.
For instance, if you start a conventional bake cycle, the oven may display this message. It does this because the meat probe is designed for specific cooking modes like “Roast” or “Convection Roast.” In these modes, the oven uses the probe to monitor the internal temperature of your food. In other modes, the probe may interfere with the oven’s operation. The oven wants you to remove the probe to avoid conflicts with its standard heating algorithms. This message helps prevent miscommunication and ensures safe, accurate cooking.
The oven’s software constantly monitors the probe’s presence and function. It checks if the probe is connected, if it is reading a plausible temperature, and if it is being used in the correct cooking mode. If any of these checks fail, the “Remove Meat Probe” message appears. This is a safety and functionality feature. It prevents the oven from misinterpreting temperature data or starting a cycle that requires the probe to be out. Understanding this helps you quickly resolve the alert.
Common Reasons for the KitchenAid Oven Meat Probe Alert
Several factors can cause your KitchenAid oven to display the “Remove Meat Probe” message. These reasons range from simple user errors to minor hardware issues. Identifying the specific cause is the first step toward resolving the alert. I have encountered these issues myself, and they are usually straightforward to fix.
Improper Probe Insertion
One of the most common reasons is incorrect insertion of the meat probe. The probe has two main connection points: one end goes into the meat, and the other into a jack inside the oven cavity. If either end is not fully or correctly seated, the oven cannot read the signal.
- Into the Meat: Ensure the probe tip is fully inserted into the thickest part of the meat, avoiding bone or gristle. Bone can conduct heat differently and give inaccurate readings. Gristle can prevent full contact with the meat’s flesh.
- Into the Oven Jack: The probe’s plug must be pushed firmly into the oven’s internal jack. You should feel a slight click or resistance when it’s properly seated. A loose connection will cause the “Remove Meat Probe” error.
Using Probe in Incorrect Mode
KitchenAid ovens are designed with specific cooking modes that utilize the meat probe. The “Roast,” “Convection Roast,” or “Meat Probe” modes are typically where the probe functions as intended. If you insert the meat probe and then select a mode like “Bake,” “Broil,” or “Warm,” the oven will display the “Remove Meat Probe” message. It does this because these modes do not integrate with the probe’s temperature monitoring function. The oven’s system recognizes the probe is present but not configured for the chosen operation. Always ensure you are in the correct mode before inserting the probe and starting the cycle.
Faulty or Damaged Meat Probe
Over time, meat probes can become damaged. The probe itself is a delicate instrument. The cable can fray, kink, or break, especially if it gets pinched by the oven door or exposed to excessive heat.
- Cable Damage: Look for visible signs of wear on the cable, such as cuts, bends, or brittle spots. Internal wires can break without external damage.
- Probe Tip Damage: The metal tip can bend or become corroded. This affects its ability to read temperature accurately.
- Loose Connection at Probe Base: The point where the cable meets the probe’s metal tip can loosen, breaking the circuit.
A damaged probe will send inconsistent or no signals to the oven, triggering the error. If you suspect damage, testing with a multimeter or trying a new probe can confirm.
Debris or Moisture in Oven Jack
The jack inside your oven where the probe plugs in can accumulate food debris, grease, or moisture. This buildup can create a poor electrical connection. Even a small amount of residue can disrupt the signal flow from the probe to the oven’s control board.
- Cleaning the Jack: Always ensure the jack is clean and dry before inserting the probe. You can gently wipe it with a dry cloth or a cotton swab. Do not use any liquids.
- Inspection: Shine a flashlight into the jack to check for any obstructions. Food particles or even a tiny amount of liquid can cause connection issues.
A clean connection ensures clear communication between the probe and the oven. This helps prevent the “Remove Meat Probe” message from appearing.
Troubleshooting Your KitchenAid Oven Meat Probe Connection
When your KitchenAid oven says ‘Remove Meat Probe’, troubleshooting involves a few simple steps. Most issues are minor and can be resolved quickly at home. I find that a systematic approach works best.
Re-insert the Meat Probe Correctly
The first and easiest step is to remove and re-insert the meat probe. Ensure it’s done precisely.
- Power Off Oven: Turn off the oven, or unplug it from the wall outlet for a moment. This resets the system.
- Remove Probe: Pull the probe out completely from both the meat and the oven jack.
- Inspect Probe and Jack: Check the probe’s metal tip, cable, and the oven jack for any visible damage, kinks, or debris. If you need to clean the jack, ensure it is completely dry before proceeding.
- Insert into Meat: Carefully insert the probe into the thickest part of the meat, avoiding bones. It should go in at least 2-3 inches, or as deep as your probe allows, for an accurate reading.
- Insert into Oven Jack: Firmly push the probe’s plug into the oven’s internal jack. Make sure it clicks into place and feels secure. Do not force it.
- Select Correct Mode: Turn the oven back on and select the appropriate cooking mode that uses the meat probe, such as “Roast” or “Convection Roast.”
- Set Temperature: Input your desired target internal temperature for the meat.
This simple re-insertion often resolves the communication error.
Power Cycle Your KitchenAid Oven
A power cycle can clear temporary glitches in the oven’s electronic control board. This is a common troubleshooting step for many appliance issues, including when your KitchenAid oven takes too long to cool down or displays other error messages.
- Unplug the Oven: Locate the oven’s power cord and unplug it from the wall outlet. If your oven is hard-wired, you will need to turn off the circuit breaker for the oven at your home’s electrical panel.
- Wait: Wait for about 5-10 minutes. This allows any residual power to drain from the control board, ensuring a full reset.
- Restore Power: Plug the oven back in or flip the circuit breaker back on.
- Test: Try using the meat probe again to see if the message has cleared.
This simple reset can often resolve software-related errors that cause the “Remove Meat Probe” message.
Check for Physical Damage to the Probe or Cable
A damaged probe or cable is a frequent culprit. Visual inspection is key here.
- Cable Integrity: Carefully run your fingers along the entire length of the probe cable. Look for any cuts, frays, exposed wires, severe kinks, or pinch marks. Even a small break in the internal wiring can disrupt the signal.
- Probe Tip and Body: Examine the metal tip of the probe for bends, corrosion, or pitting. Check the plastic or silicone housing where the cable connects to the metal probe for cracks or looseness. If the probe has been dropped or bent, its internal components may be compromised.
- Plug Pins: Look at the metal pins on the probe’s plug that connect to the oven jack. Ensure they are straight and free of any bends or corrosion. Bent pins will not make proper contact.
If you find any significant damage, the probe likely needs replacement. A new probe ensures accurate temperature readings and proper communication with your oven.
Clean the Oven Probe Jack
A dirty or obstructed probe jack prevents a good connection.
- Ensure Oven is Off and Cool: Safety first. Make sure the oven is completely off and cool to the touch.
- Inspect: Use a flashlight to look inside the probe jack. Search for any food particles, grease residue, crumbs, or moisture.
- Clean: Use a dry, clean cotton swab or a soft, dry cloth to gently wipe out any visible debris. For stubborn grease, you can slightly dampen the cotton swab with rubbing alcohol, but ensure the jack is completely dry before re-inserting the probe or turning on the oven. Do not spray anything directly into the jack.
- Avoid Metal Objects: Never use metal objects to clean the jack, as this can damage the electrical contacts.
A clean, dry jack ensures proper electrical contact between the probe and the oven’s internal wiring, allowing for accurate temperature data transmission.
Proper Use and Care of Your Oven Meat Probe
Taking good care of your KitchenAid oven meat probe extends its lifespan and ensures accurate readings. Proper use also prevents the “Remove Meat Probe” message from appearing unnecessarily. I make sure to follow these steps every time I use my probe.
Correct Insertion into Food
Accurate temperature readings depend on proper probe placement within the food.
- Thickest Part: Always insert the probe into the thickest part of the meat. This is where the internal temperature will be lowest and most indicative of doneness.
- Avoid Bone and Fat: Ensure the probe tip does not touch bone, gristle, or large pockets of fat. Bones conduct heat differently and can give a falsely high reading. Fat also heats differently and can provide an inaccurate reading.
- Center Placement: Aim for the center of the thickest portion. The probe should be fully submerged in the meat, usually a few inches deep, with only the base and cable visible outside.
This precise placement is crucial for the oven to correctly track the cooking progress and avoid the “Remove Meat Probe” error due to erratic readings.
Recommended Cooking Modes for Probe Use
Your KitchenAid oven’s meat probe is designed to work seamlessly with specific cooking modes. Using it in other modes can trigger the “Remove Meat Probe” warning.
- Roast Mode: This is the primary mode for using your meat probe. It allows the oven to cook the food to a specific internal temperature you set.
- Convection Roast Mode: Similar to roast mode, but uses convection heat for faster, more even cooking. The probe also works in this mode.
- Specific Probe Modes: Some KitchenAid models might have a dedicated “Probe” or “Temperature Probe” setting. Always refer to your oven’s user manual for the exact modes compatible with your meat probe. For example, knowing how to change KitchenAid oven from C to F can also be helpful for temperature settings.
Avoid using the probe in modes like “Bake,” “Broil,” “Warm,” or “Proof.” The oven’s system expects different operating parameters in these modes.
Cleaning and Storage Best Practices
Proper cleaning and storage are vital for probe longevity and accuracy. This also includes knowing how to clean a meat thermometer in general.
- Cool Down First: Allow the probe to cool completely after use before handling or cleaning.
- Hand Wash Only: Most meat probes are NOT dishwasher safe. Hand wash the metal probe tip and cable with warm, soapy water.
- Avoid Submerging Plug: Never submerge the probe’s plug end or the cable connection point into water. This can damage internal electronics.
- Wipe Dry: Thoroughly dry the entire probe, especially the plug, before storing it. Moisture can corrode contacts.
- Proper Storage: Store the probe carefully. Do not coil the cable too tightly, as this can damage internal wires over time. Avoid placing heavy objects on top of it. Some ovens come with a designated storage spot; use it if available.
Following these practices prevents damage, corrosion, and ensures your probe remains accurate. This minimizes the chances of the “Remove Meat Probe” message appearing due to a faulty probe.
When to Calibrate or Replace Your Meat Probe
Sometimes, the “Remove Meat Probe” message might indicate an issue beyond simple connection problems. Your meat probe might need calibration or replacement. I consider these steps when basic troubleshooting fails.
Checking Probe Accuracy (Calibration)
A meat probe that gives inaccurate readings can sometimes confuse the oven, even if it’s connected. It might not trigger the “Remove Meat Probe” message directly but can cause other cooking issues.
- Ice Bath Test:
- Fill a glass with crushed ice and add a small amount of cold water.
- Insert the probe into the ice water, ensuring the tip is fully submerged but not touching the bottom or sides of the glass.
- Wait for the temperature reading to stabilize (usually a minute or two).
- A properly calibrated probe should read 32°F (0°C).
- Boiling Water Test (at sea level):
- Bring a pot of water to a rolling boil.
- Carefully insert the probe into the boiling water, again avoiding touching the bottom or sides of the pot.
- Wait for the temperature reading to stabilize.
- At sea level, a properly calibrated probe should read 212°F (100°C). Note that boiling points decrease at higher altitudes.
If your probe’s readings are consistently off by more than a few degrees, it may be faulty or require calibration if your oven model supports it. Many consumer-grade probes are not user-calibratable and simply need replacement if inaccurate.
Signs of a Failing Meat Probe
Beyond the “Remove Meat Probe” message, other signs suggest your probe is failing.
- Inconsistent Readings: The temperature jumps erratically, or different readings appear for the same piece of meat.
- Stuck Readings: The temperature never changes, or it gets stuck at a specific number regardless of heat.
- Does Not Register: The oven does not register the probe at all, even when correctly inserted, or constantly shows “Lo” or “Hi” temperature errors.
- Physical Damage: Visible kinks, cuts, or exposed wires on the cable, or a bent/corroded probe tip.
If you observe these signs, especially after trying basic troubleshooting, it is highly likely that your meat probe needs replacement. A new probe is a small investment for accurate cooking.
When to Consider a Replacement Probe
You should consider replacing your meat probe if:
- Troubleshooting Fails: You have tried all the troubleshooting steps (re-insertion, power cycling, cleaning jack) and the “Remove Meat Probe” message persists.
- Inaccurate Readings: The probe consistently fails the ice bath or boiling water test, indicating it is no longer accurate.
- Visible Damage: The probe or its cable shows clear signs of physical damage that cannot be repaired.
- Age: Probes, like any electronic accessory, have a lifespan. If your probe is many years old and used frequently, its components may simply wear out.
- Frequent Errors: If the oven is constantly displaying the error message, even with careful use, a replacement might be the most effective solution.
Always purchase a genuine KitchenAid replacement probe for your specific oven model. Third-party probes may not be fully compatible and could lead to continued issues or inaccurate readings.
Advanced Troubleshooting and Professional Help
If basic troubleshooting does not resolve the “Remove Meat Probe” message, you might be facing a more complex issue. These situations often require a deeper look into the oven’s components or professional assistance. I know it can be disheartening when simple fixes do not work.
Issues with the Oven’s Probe Receptacle (Jack)
The problem might not be with the probe itself, but with the oven’s internal probe jack.
- Loose Wiring: The wiring connecting the probe jack to the oven’s control board can become loose or damaged. This prevents the signal from reaching the main system.
- Damaged Contacts: The internal contacts within the jack can become bent, corroded, or broken. This can happen from repeated use or improper insertion of the probe.
- Control Board Issue: In rare cases, the part of the oven’s control board that processes the probe’s signal might be faulty. This means the oven cannot correctly interpret the temperature data.
Inspecting the probe jack beyond a simple clean often requires disassembling parts of the oven. This is best left to qualified technicians. They have the tools and expertise to safely check internal wiring and components.
Software Glitches or Firmware Issues
Modern KitchenAid ovens are controlled by complex software. Just like computers, this software can sometimes encounter glitches or bugs.
- Temporary Glitches: A minor software hiccup can cause the oven to misinterpret the probe’s status, leading to the “Remove Meat Probe” message. A power cycle (unplugging the oven for 5-10 minutes) often resolves these.
- Firmware Updates: Less commonly, an outdated or corrupted firmware version might be causing compatibility issues with the probe. Some smart oven models allow for firmware updates via Wi-Fi. Check your user manual or KitchenAid’s support website for information on updating your specific model’s firmware.
- Demo Mode: Sometimes, error messages can appear if the oven is inadvertently put into “Demo Mode.” This mode is for display in stores and disables heating functions. If your oven says ‘Demo Mode On’, you’ll need to know how to get KitchenAid oven out of demo mode to restore full functionality, which might affect probe messages.
Software issues are generally rare for consistent probe errors but are worth considering if all hardware checks fail.
When to Call a Certified KitchenAid Technician
If you have tried all troubleshooting steps and the “Remove Meat Probe” message persists, it’s time to call a professional.
- Persistent Error: The message keeps appearing despite correct probe insertion, a clean jack, and a known good probe.
- Internal Component Suspected: You suspect issues with the oven’s internal wiring, the probe jack’s connections, or the main control board. These require specialized tools and knowledge.
- Safety Concerns: If you are uncomfortable opening up your oven or working with electrical components, do not attempt repairs yourself. Safety should always be your top priority.
- Warranty: If your oven is still under warranty, attempting DIY repairs might void it. Contact KitchenAid customer service or an authorized service center.
A certified technician can diagnose complex electrical issues, replace faulty parts, and ensure your oven operates safely and correctly. They have access to diagnostic tools and genuine KitchenAid parts.
Preventing Future Meat Probe Issues
Preventing the “Remove Meat Probe” message from recurring involves consistent care and mindful usage. I always follow these practices to keep my oven working perfectly.
Consistent Proper Probe Handling
How you handle your meat probe directly impacts its lifespan and performance.
- Avoid Harsh Bending: Do not bend the probe cable sharply, especially near the probe tip or the plug. Sharp bends can break the delicate internal wires.
- Protect from Pinches: Be careful not to pinch the probe cable in the oven door. This is a common cause of damage and can lead to a faulty probe.
- Gentle Insertion: Insert the probe into the meat and the oven jack gently but firmly. Avoid forcing it, which can bend the probe tip or damage the oven jack.
- Cool Before Moving: Allow the probe to cool slightly before removing it from the meat or the oven. This prevents damage from extreme temperature changes or handling a hot object.
Treating your probe with care minimizes wear and tear, reducing the likelihood of future errors.
Regular Cleaning and Inspection
Routine cleaning and inspection prevent accumulation of debris and catch minor issues before they become major problems.
- Clean After Every Use: After each use, hand wash the metal probe and cable with warm, soapy water. Ensure the plug end remains dry.
- Dry Thoroughly: Always dry the probe completely before storing it. Moisture can lead to corrosion of the electrical contacts.
- Inspect Regularly: Before and after each use, quickly inspect the probe’s cable for any cuts, frays, or kinks. Check the probe tip for bends or corrosion and the plug pins for straightness.
- Clean Oven Jack: Periodically, use a dry cotton swab to clean inside the oven’s probe jack. This removes any accumulated grease or crumbs that could interfere with the connection.
These simple habits keep your probe in top condition and ensure reliable operation.
Storing the Probe Correctly
Proper storage protects your probe from damage when not in use.
- Loose Coiling: Coil the cable loosely rather than tightly winding it. Tight coiling puts stress on the internal wires.
- Protected Location: Store the probe in a dedicated drawer or container where it won’t be crushed, bent, or tangled with other utensils.
- Original Packaging: If you still have the original packaging, it often provides excellent protection for storage.
- Avoid Extremes: Do not store the probe in areas with extreme temperature fluctuations or high humidity, as this can degrade materials over time.
By storing your probe correctly, you prevent accidental damage that could lead to intermittent errors or complete probe failure.
FAQ Section
Q1: What exactly does “Remove Meat Probe” mean on my KitchenAid oven?
This message means the oven’s system has detected the meat probe is inserted, but there is an issue with its status. It could be improperly connected, damaged, or you might be trying to use it in a cooking mode that does not support the probe. The oven wants you to remove it to continue operation or to indicate a problem.
Q2: Can I still cook if the “Remove Meat Probe” message appears?
Usually, no. The oven’s safety features often prevent it from starting or continuing a cooking cycle when this message is active. You must resolve the probe issue and clear the message before you can resume normal oven operation. It ensures accurate temperature control during cooking.
Q3: How do I clean my meat probe correctly?
To clean your meat probe, wait for it to cool down. Then, hand wash the metal probe tip and cable with warm, soapy water. Do not submerge the plug end in water. Rinse thoroughly and dry completely with a clean cloth, especially the plug. For a more detailed guide, you can refer to how to clean a meat thermometer.
Q4: Why is my KitchenAid meat probe not reading correctly?
Incorrect readings can stem from several issues. The probe might be improperly inserted into the meat (touching bone or fat), damaged internally, or require recalibration. The oven’s internal probe jack could also be dirty or faulty, preventing a clear signal. Test the probe in ice water or boiling water for accuracy.
Q5: Is the meat probe specific to KitchenAid ovens, or are they universal?
While many meat probes look similar, it is best to use a genuine KitchenAid meat probe designed for your specific oven model. Universal probes may not have the correct resistance or plug configuration, leading to inaccurate readings or continuous “Remove Meat Probe” errors. Always check your oven’s manual for compatible accessories.
Q6: Can I bypass the meat probe message if I don’t want to use it?
If you do not want to use the meat probe, simply ensure it is not plugged into the oven’s internal jack. The “Remove Meat Probe” message specifically appears when the oven detects the probe is plugged in but something is wrong. By keeping it unplugged, the message should not appear during regular cooking.
Conclusion
Encountering the “Why Does Kitchenaid Oven Says Remove Meat Probe” message can be a minor hiccup in your cooking plans, but it is rarely a sign of a major problem. This guide has explained that the message typically points to issues with probe connection, damage, or improper use. We covered how to troubleshoot effectively, from re-inserting the probe and power cycling your oven to cleaning the probe jack.
Remember, proper care, including consistent cleaning and mindful storage, goes a long way in preventing these alerts. If basic troubleshooting does not resolve the issue, a faulty probe or a deeper oven component problem might be at play, warranting a call to a certified technician.
Your KitchenAid oven’s meat probe is a valuable tool for precise cooking. By understanding and addressing this common message, you can ensure your oven operates smoothly, helping you achieve perfectly cooked meals every time. If you face this message again, you now have the knowledge to address it confidently.
- KitchenAid Oven
- Meat Probe Error
- Oven Troubleshooting
- Appliance Repair
- Smart Oven Features

Todd Martin
Senior Writer
With over 15 years of experience in home renovation and design, I started HEG to share what I’ve learned with homeowners who want to create spaces that are both beautiful and functional. I’ve always believed in a hands-on approach, and over the years, I’ve picked up practical solutions that actually work. Through HEG, I aim to make home improvement more approachable, sharing real tips that help you create a home you truly love.