· Todd Martin · DIY Home Improvement · 19 min read
How To Add Legs To A Dresser
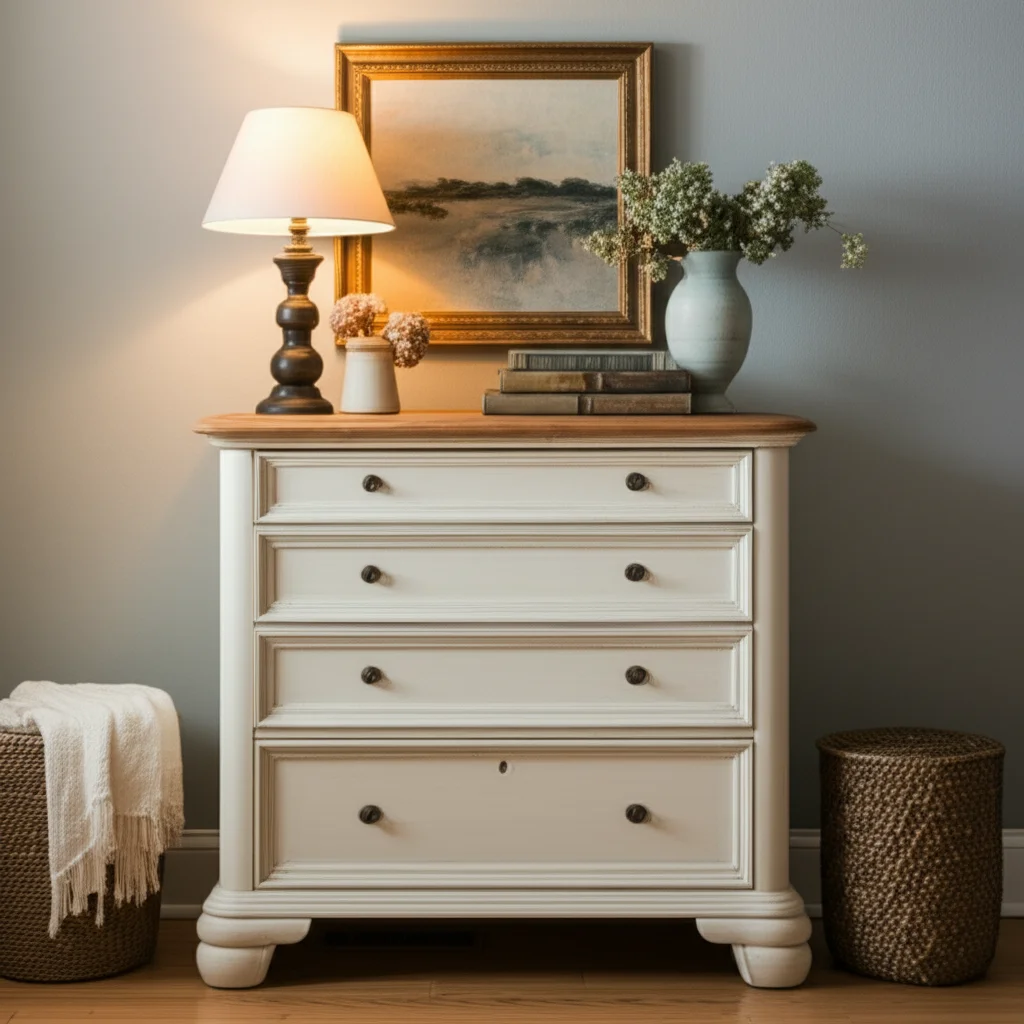
How to Add Legs to a Dresser for a Fresh Look
Have you ever looked at a flat-bottom dresser and wished it had more character? Many dressers come with a simple, solid base. Adding legs can completely transform its appearance. This simple DIY project offers a fresh, elevated style. It also adds a new level of functionality to an ordinary piece of furniture. You can customize your dresser to match any room’s decor.
In this comprehensive guide, we will explore everything you need to know about how to add legs to a dresser. We start by discussing the benefits of this upgrade. We then guide you through choosing the perfect legs. We also cover gathering the right tools. Finally, we provide step-by-step instructions for installation. Get ready to give your dresser a stylish and unique new life.
Takeaway
Adding legs to a dresser offers many benefits. You can easily upgrade its style and height. This project improves both aesthetics and function.
- Boost Aesthetics: Legs lift the dresser, creating a lighter, more open feel. They introduce a new design element.
- Increase Height: Taller legs make the dresser more accessible. This is great for taller users or specific room layouts.
- Improve Cleanliness: Legs create space beneath the dresser. This makes vacuuming and cleaning underneath much easier.
- Personalize Style: Choose from various leg styles to match your decor. This customizes a generic piece of furniture.
- Enhance Stability: Properly installed legs can add a new dimension of stability. They distribute weight effectively.
Adding legs to a dresser upgrades its style and height. This process involves selecting suitable legs, preparing the dresser’s base, securely attaching the new supports with appropriate hardware, and applying finishing touches for a cohesive, stable, and visually appealing piece of furniture.
Why Add Legs to Your Dresser? The Benefits Are Clear
Adding legs to a dresser is more than just a cosmetic change. It brings many practical and aesthetic benefits to your home. First, it significantly alters the visual weight of the furniture. A dresser without legs often looks heavy and solid on the floor. Adding legs lifts it, creating a sense of space and lightness in the room. This simple change can make your room feel larger and more open.
Beyond looks, functionality improves. Adding height makes accessing the top of the dresser easier. This is especially true for shorter dressers. It also allows for easier cleaning underneath the unit. No more struggling to reach dust bunnies in tight corners. The raised height also helps protect the dresser from moisture if there is a floor spill. This protects your investment.
Furthermore, adding legs lets you infuse personality into an otherwise generic piece. You can choose from various styles, materials, and finishes. This allows you to match existing decor or create a new focal point. It is a fantastic way to customize off-the-shelf furniture. This truly makes it your own.
Choosing the Right Legs for Your Dresser
Selecting the perfect legs for your dresser is an exciting step. Your choice impacts both the look and stability of the finished piece. Consider the overall style of your dresser and your room. Do you want a modern, mid-century, rustic, or traditional look? Different leg styles complement different aesthetics.
Think about the material of the legs. Wood legs offer warmth and classic appeal. Metal legs, like hairpin or tapered cylindrical ones, bring a sleek, industrial, or modern touch. Acrylic legs provide a contemporary, almost invisible look. The material choice should align with your design vision.
Height is another crucial factor. Measure your dresser and consider its intended use. Taller legs create a more elegant, elevated feel. Shorter legs maintain a more grounded presence while still adding detail. Ensure the chosen height works well with surrounding furniture. It should also be comfortable for daily use.
Types of Dresser Legs to Consider
There is a wide variety of leg styles available. Each style offers a distinct aesthetic. Knowing the common types helps you make an informed decision.
- Tapered Legs: These legs are thick at the top and gradually narrow towards the bottom. They are a classic choice. Tapered legs work well for mid-century modern or transitional styles. They offer a clean and elegant look.
- Hairpin Legs: Made from bent metal rods, hairpin legs provide a sleek, minimalist, and industrial appearance. They are very sturdy despite their slender design. These are popular for modern and contemporary furniture. They give a light, airy feel. You can learn more about how to stabilize a table with hairpin legs, as the principles often apply to dressers.
- Bun Feet: These are short, rounded, and often ornate legs. They resemble a bun or sphere. Bun feet are ideal for traditional, farmhouse, or cottage-style dressers. They add a touch of charm and formality.
- Saber Legs: These legs curve outward and then taper inward. They often appear on antique or formal furniture. Saber legs offer a sophisticated and elegant silhouette. They are typically made from wood.
- Block Legs: Simple, square, or rectangular blocks. These legs provide a sturdy and minimalist foundation. They suit contemporary and mission-style furniture. Block legs offer a very stable base.
- Adjustable Leveling Feet: While not always pretty, these are practical. They often combine with other leg types or are hidden. These feet help compensate for uneven floors. This ensures your dresser stays perfectly level and stable.
Consider the weight of your dresser and its contents. Heavy dressers need robust legs and strong mounting plates. Always ensure the chosen legs can support the full weight. This includes the dresser itself and everything inside its drawers.
Tools and Materials You Will Need
Before starting your project, gather all necessary tools and materials. Having everything ready saves time and frustration. It also ensures a smooth installation process.
Essential Tools
- Drill/Driver: This is crucial for pre-drilling pilot holes and driving screws. A cordless drill offers convenience and portability.
- Drill Bits: You will need bits appropriate for pilot holes. These match the screw gauge. You might also need a larger bit for a countersink if your hardware requires it.
- Measuring Tape: Accurate measurements are essential for proper leg placement. This ensures your dresser remains balanced.
- Pencil: For marking drill points and leg positions.
- Carpenter’s Square: To ensure legs are placed at perfect 90-degree angles. This prevents crooked installation.
- Safety Glasses: Always protect your eyes when drilling or cutting.
- Work Gloves: To protect your hands during handling of wood or metal.
- Level: To check the dresser’s stability and ensure it sits evenly after leg installation.
- Clamps (optional but recommended): To hold the leg or mounting plate in place while drilling.
- Furniture Dolly or Blanket: For safely tipping and moving the dresser without damage.
Necessary Materials
- New Dresser Legs: Choose your desired style, material, and height. Ensure they come with mounting hardware or purchase it separately.
- Mounting Plates/Brackets: Many legs screw directly into the dresser. Others require a mounting plate for a more secure attachment. Make sure these are sturdy.
- Screws: Use screws that are long enough to provide a secure hold. They should not be so long that they poke through the inside of the dresser. Stainless steel or rust-resistant screws are best.
- Wood Glue (optional): For added security if using certain types of wooden leg attachments or reinforcement.
- Sandpaper: For smoothing rough edges or preparing the surface for finishing.
- Wood Filler (optional): To fill any existing holes or imperfections on the dresser’s base.
- Stain, Paint, or Clear Coat (if finishing legs): To match or complement your dresser. You might need brushes or rags for application.
- Felt Pads: Attach these to the bottom of the new legs. They protect your floors from scratches. These are similar to pads used to protect vinyl flooring from chair legs.
Gathering these items before you start saves multiple trips to the hardware store. It makes the project much smoother.
Preparing Your Dresser for Leg Installation
Proper preparation is key to a successful and sturdy leg installation. This step ensures your dresser is ready for its new foundation. Take your time with these steps for the best results.
Empty and Clean the Dresser
First, completely empty all drawers of the dresser. Remove the drawers if possible. This makes the dresser lighter and easier to move. It also prevents items from shifting or breaking when you tip the dresser. Once empty, clean the underside of the dresser. Remove any dust, grime, or old felt pads. A clean surface helps new hardware adhere properly. You can also clean dresser hardware at this stage if you plan to reuse it or refresh its look.
Safely Flip the Dresser
You need to access the bottom of the dresser. Carefully flip it onto its back or side. If the dresser is heavy, ask for help. Use a blanket or cardboard to protect the dresser’s top and edges from scratches. You can place it on a furniture dolly if you need to move it around easily. This makes working on the base much more comfortable and safer.
Assess the Dresser’s Base Structure
Examine the bottom of your dresser. Most dressers have a solid wood frame around the perimeter. This frame is where the legs will attach. Some might have a thin plywood base or no strong perimeter. If your dresser has a thin base, you will need to add reinforcement. You can attach blocks of wood to the inside corners. These blocks provide a solid anchor point for the leg mounting plates. This step is critical for stability and longevity.
Mark Leg Placement
Decide exactly where each leg will go. Use your measuring tape and pencil to mark the spots.
- Corners: Most legs attach directly at the four corners of the dresser.
- Inward from Edge: For a slightly different look or added stability, place the legs a small distance inward from the edge. This provides a more balanced appearance.
- Center Mark: Find the exact center point for each leg or mounting plate. Use a carpenter’s square to ensure your marks are straight and even.
Measure the distance from each corner to your marked point. This ensures all legs are equidistant and symmetrical. Precise marking prevents a crooked or wobbly dresser.
Step-by-Step Guide: Attaching the Legs
Once your dresser is prepared and marked, it’s time to attach the new legs. The method varies slightly depending on the type of legs you have. However, the core principles remain the same: precision, security, and stability.
Installing Legs with Pre-Installed Hanger Bolts
Many wooden furniture legs come with a hanger bolt sticking out from the top. These are designed to screw directly into a threaded insert.
- Drill Pilot Holes: At each marked leg placement, use a drill bit slightly smaller than the hanger bolt’s diameter. Carefully drill a pilot hole into the dresser’s base. Ensure the hole is straight and deep enough for the bolt.
- Insert Threaded Inserts (if needed): If your dresser base is solid enough, some hanger bolts can self-tap. More often, you will need to install a threaded insert. Use a hex key or specific tool to screw the insert into the pilot hole until it is flush with the surface.
- Screw in Legs: Align the hanger bolt on the leg with the threaded insert. Rotate the leg clockwise until it is tight against the dresser base. Do not overtighten, as this can strip the threads or damage the wood. Repeat for all four legs.
Installing Legs with Mounting Plates
This method is common for hairpin legs, metal legs, or some wooden legs that don’t have hanger bolts. Mounting plates offer a very strong and stable connection.
- Position Mounting Plates: Place a mounting plate over each marked leg position. Ensure the plate’s screw holes are aligned with solid wood.
- Mark Screw Holes: Use a pencil to mark the exact locations for the plate’s screws through the plate’s holes.
- Drill Pilot Holes: Remove the plate and drill pilot holes for each screw. Choose a drill bit slightly smaller than your screw diameter.
- Attach Mounting Plates: Reposition the plate. Drive screws through the plate holes and into the pilot holes. Ensure the plate is flush and secure against the dresser.
- Attach Legs to Plates: The legs then attach to these plates. This often involves screwing the leg into a central threaded hole on the plate. Or, you might bolt the leg onto the plate using nuts and washers. Follow the specific instructions for your leg type.
Installing Simple Screw-On Legs
Some simpler, often shorter, legs come with a flat top and pre-drilled holes for screws.
- Position Legs: Place each leg at its marked position. Ensure it sits flat against the dresser base.
- Mark Screw Holes: Use a pencil to mark through the leg’s screw holes onto the dresser base.
- Drill Pilot Holes: Drill pilot holes at each marked screw point.
- Screw in Legs: Align the leg with its pilot holes. Drive appropriate screws through the leg and into the dresser base. Make sure the screws are long enough for a secure hold but not so long they pierce through the dresser’s interior.
Always double-check that each leg is securely fastened. Give each leg a gentle tug to test its stability. This helps ensure a strong connection before flipping the dresser back upright.
Finishing Touches and Stabilization
You have successfully attached the legs. Now it’s time for the final details. These steps ensure your dresser looks great and stands perfectly stable. Attention to these finishing touches elevates your DIY project to a professional level.
Finishing the Legs
If your new legs are unfinished wood, you have several options. You can stain them to match your dresser. Apply paint for a contrasting look. Or, use a clear coat to protect the natural wood grain.
- Sand the Legs: Use fine-grit sandpaper (around 180-220 grit) to smooth any rough spots. This prepares the surface for an even finish.
- Clean: Wipe away all dust with a tack cloth or damp rag.
- Apply Finish: Follow the directions for your chosen stain, paint, or clear coat. Apply in thin, even coats. Allow proper drying time between coats. Sand lightly between coats if recommended.
- Curing: Let the finish cure completely before heavy use. This ensures maximum durability.
Matching the leg finish to your dresser creates a cohesive look. Contrasting colors can add a bold statement. The choice is yours.
Adding Floor Protection
Protecting your floors is essential, especially with new, potentially sharp, leg bottoms. Felt pads are a simple and effective solution.
- Clean Leg Bottoms: Ensure the bottom of each leg is clean and dry.
- Attach Felt Pads: Peel the adhesive backing from the felt pads. Press them firmly onto the center of the bottom of each leg. For best adhesion, you can rough up the surface slightly with sandpaper first. These pads are similar to what you might use to protect vinyl flooring from chair legs or to help felt pads stick to chair legs.
Felt pads allow your dresser to slide smoothly without scratching floors. They also provide a slight buffer.
Testing for Stability and Leveling
Once the legs are attached and finished, carefully flip the dresser upright. Have someone help you if it is heavy.
- Initial Stability Check: Gently push and pull on the dresser from different angles. Does it wobble? Does it rock back and forth?
- Check for Level: Place a level on the top surface of the dresser. Check both horizontally and vertically. If it’s not level, this might indicate uneven leg lengths or an uneven floor.
- Adjusting for Wobbles:
- Uneven Legs: If a leg is slightly shorter, you can add shims under the felt pad. Small pieces of cardboard or specialized furniture shims work well.
- Uneven Floor: If your floor is the issue, adjustable leveling feet can be installed or small shims can be placed under the appropriate leg. This ensures stability.
- Loose Connections: If the wobble comes from a loose leg, gently tighten the screws or bolts holding the leg or mounting plate. Do not overtighten.
A stable and level dresser is safe and functional. Take the time to make these final adjustments.
Troubleshooting Common Issues
Even with careful planning, sometimes issues arise. Knowing how to address common problems helps you achieve a perfect result. Do not get discouraged if your dresser does not feel perfectly stable right away.
Wobbly Legs
A wobbly dresser is the most frequent problem. This can be due to several factors.
- Uneven Floor: The most common cause is an uneven floor. Use a level to check. If the floor is uneven, you can use furniture shims. Place small, thin shims under the shortest leg until the dresser is stable.
- Uneven Leg Lengths: Check each leg’s height. Even small differences can cause wobbles. If one leg is slightly shorter, add a shim. For wooden legs, you can sand down the longer ones.
- Loose Connections: The screws or bolts attaching the legs might not be tight enough. Carefully tighten them. Be careful not to overtighten and strip the wood. Use a washer if necessary to provide a better grip for the screw head.
- Weak Mounting Point: If the wood where the leg attaches is soft or damaged, the connection might be weak. You might need to add a larger mounting plate or a reinforcement block of wood from the inside of the dresser.
Legs Not Straight
Sometimes, legs appear crooked or not perfectly perpendicular to the dresser.
- Improper Pilot Holes: If pilot holes were drilled at an angle, the legs might follow that angle. You may need to redrill or fill the old hole with wood filler and drill a new, straight hole.
- Misaligned Mounting Plates: If you used mounting plates, they might not be perfectly square. Loosen the screws slightly, adjust the plate with a carpenter’s square, then retighten.
- Leg Design: Some leg designs naturally have a slight angle. Ensure this is intentional before trying to “correct” it.
Screws Stripping or Not Holding
This often happens if pilot holes are too large or screws are overtightened.
- Larger Screws: Use slightly larger diameter screws if the existing hole is stripped.
- Wood Filler/Dowel: Fill the stripped hole with wood filler or a wood dowel glued into place. Once dry, redrill a new pilot hole.
- Stronger Hardware: Consider using T-nuts or threaded inserts for a more robust connection, especially for heavy dressers.
Patience is key in troubleshooting. Small adjustments often make a big difference in stability and appearance.
Maintenance Tips for Your Newly Legged Dresser
You have put effort into adding legs to your dresser. Proper maintenance ensures your hard work lasts for years. A little care goes a long way in preserving both the dresser and its new foundation.
Regular Cleaning
Just like the rest of your furniture, the dresser and its legs will accumulate dust.
- Dust Regularly: Use a soft, dry cloth or a microfiber duster to wipe down the legs and the dresser’s base. This prevents dust buildup.
- Spot Clean: For any spills or marks on the legs, clean them promptly. Use a damp cloth with mild soap for finished wood or metal legs. Avoid harsh chemicals that could damage the finish. Dry thoroughly after cleaning.
Regular cleaning keeps your dresser looking fresh and new. It also helps you notice any potential issues early.
Checking for Stability
Periodically, check the stability of your dresser.
- Gentle Wobble Test: Every few months, give the dresser a gentle push to see if it wobbles.
- Tighten Connections: If you detect a wobble, carefully check the screws or bolts that attach the legs. Tighten any loose connections. Do this gently to avoid stripping the wood or overtightening.
- Inspect Mounting Plates: If your legs use mounting plates, ensure they are still flush and securely fastened to the dresser.
Proactive checks help prevent small issues from becoming larger problems. They ensure the dresser remains safe and functional.
Protecting Your Floors
The felt pads you added are essential for floor protection.
- Inspect Felt Pads: Over time, felt pads can wear down, compress, or fall off. Regularly inspect them.
- Replace Worn Pads: If a pad looks worn, thin, or has come loose, replace it immediately. Always keep a supply of extra felt pads on hand.
- Consider Alternatives: For very heavy dressers or high-traffic areas, consider more durable floor protectors. These include plastic glides or rubber feet. This prevents damage to your flooring.
Maintaining your felt pads protects your floors from scratches and scuffs. This is especially important if you have delicate flooring like hardwood or vinyl.
Frequently Asked Questions
You likely have more questions about adding legs to your dresser. Here are answers to common queries to help you with your project.
Can I add legs to any type of dresser?
Most dressers can have legs added. The key is a solid bottom structure. Dressers with a strong wood frame or solid wood base are ideal. Those with thin plywood bottoms might need reinforcement. You can add wood blocks inside the corners for better support.
How do I determine the right leg height for my dresser?
Consider the dresser’s original height and its intended use. Standard dresser heights with legs range from 30 to 36 inches. Measure your dresser’s current height and add the length of the legs you are considering. Taller legs can make a dresser feel lighter. Shorter legs provide a more grounded look.
What kind of screws should I use to attach the legs?
Use wood screws appropriate for the thickness of your dresser’s base and the leg’s mounting hardware. Choose screws that are long enough for a secure hold. Ensure they are not so long that they protrude inside the dresser. Pre-drilling pilot holes is crucial to prevent wood splitting.
How many legs should I add to a dresser?
Most dressers only need four legs, one at each corner. If your dresser is very long or exceptionally heavy, you might consider adding a fifth leg in the center of the longest side. This provides additional support and prevents sagging over time.
Can I reuse old legs from other furniture?
Yes, you can reuse old legs if they are in good condition. Inspect them for damage, rot, or weakness. You might need to adapt the mounting method. This could involve adding new mounting plates or drilling new pilot holes. Reusing legs is a great way to recycle and create a unique look.
How do I protect my newly leg-equipped dresser from tipping?
While legs add stability, a tall or heavily loaded dresser can still tip. Always secure dressers to the wall, especially if you have children or pets. Use furniture anti-tip kits. These typically involve straps or brackets that anchor the dresser to the wall studs.
Conclusion
You have learned how to add legs to a dresser. This project is a rewarding way to transform your furniture. It updates its style and improves its functionality. We covered everything from choosing the right legs to the final touches. You now have the knowledge to elevate an ordinary piece into a customized showstopper.
Remember, adding legs to a dresser offers numerous benefits. It creates an open, airy feel in your room. It also makes cleaning easier underneath. Most importantly, it lets you infuse your personal style into your home decor. Gather your tools, select your favorite legs, and get ready to create something beautiful. Your dresser is waiting for its exciting new look. Take the first step today and enjoy the transformation!
- dresser legs
- furniture makeover
- DIY furniture
- home decor
- furniture restoration
- custom dresser
- dresser upgrade

Todd Martin
Senior Writer
With over 15 years of experience in home renovation and design, I started HEG to share what I’ve learned with homeowners who want to create spaces that are both beautiful and functional. I’ve always believed in a hands-on approach, and over the years, I’ve picked up practical solutions that actually work. Through HEG, I aim to make home improvement more approachable, sharing real tips that help you create a home you truly love.