· Todd Martin · Outdoor Living · 20 min read
How To Build A Trex Table

Build Your Own Durable Trex Table for Outdoor Living
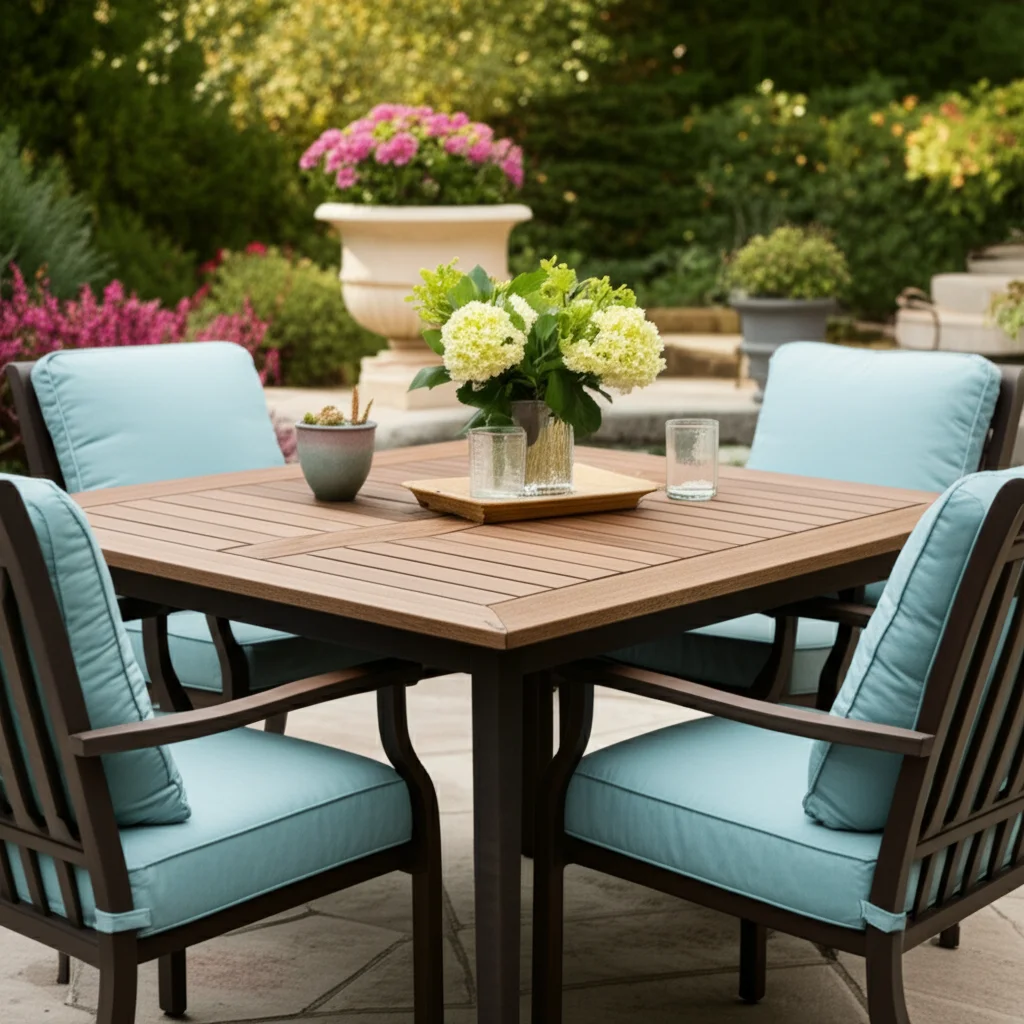
Dreaming of a beautiful, long-lasting outdoor table? Building a Trex table offers an excellent solution for your patio or deck. Trex composite decking material provides durability, resistance to weather, and minimal maintenance, making it ideal for outdoor furniture. This project allows you to customize a piece that perfectly fits your space and needs. I find it incredibly satisfying to create something useful and beautiful with my own hands, especially when it stands up to the elements. This guide will walk you through every step, from planning and material selection to construction and final touches, ensuring you can confidently build a Trex table that enhances your outdoor living area.
Takeaway
- Plan Thoroughly: Design your table with accurate measurements and a clear purpose.
- Choose Quality Materials: Select the right Trex boards and a sturdy frame material.
- Build a Strong Frame: Construct a robust base that supports the composite top.
- Properly Secure Trex: Fasten Trex boards correctly to prevent movement and warping.
- Maintain Your Table: Follow simple care routines for long-term enjoyment.
Building a Trex table involves selecting quality composite materials, designing a sturdy frame, precisely cutting and assembling components, and properly fastening the durable Trex tabletop for a long-lasting, low-maintenance outdoor furniture piece that withstands the elements.
Why Choose Trex for Your Outdoor Table?
Deciding on the right material for outdoor furniture is a big step. Trex composite decking stands out as a top choice for a new outdoor table. It offers many benefits that traditional wood simply cannot match in an outdoor setting. I always recommend it for projects that need to last a long time outside.
Trex material resists fading, staining, scratching, and mold. This means your Trex table will maintain its beautiful appearance for years, even with constant exposure to sun, rain, and snow. Unlike wood, it does not splinter, warp, or rot. This durability makes Trex an incredibly reliable material for any outdoor structure, including a custom table. You will not need to sand, stain, or paint your Trex table annually, saving you significant time and effort on upkeep. This low-maintenance aspect is a huge plus for busy homeowners. A simple soap and water wash usually suffices to keep it clean. Trex material is also eco-friendly, often made from recycled plastic and wood fibers. Building with Trex means you are choosing a sustainable option for your home. This commitment to sustainability aligns with many modern values.
Beyond its practical benefits, Trex offers a wide range of colors and finishes. This variety allows you to match your new table perfectly with existing patio decor or create a bold new focal point. You can design a Trex table that looks custom-made for your space. The uniform nature of Trex boards also makes working with them straightforward. You get consistent dimensions and quality, which helps ensure a smoother building process. The material’s inherent resistance to insect damage is another silent benefit. Termites and other pests that destroy wood have no interest in composite. This gives you extra peace of mind about the longevity of your investment. Its smooth surface is also comfortable and safe for family and guests, free from splinters. These combined advantages make Trex an intelligent choice for anyone looking to build a high-quality, durable, and attractive outdoor table.
Essential Tools and Materials for Your Trex Table Project
Before you start building your Trex table, gathering all the necessary tools and materials is critical. Having everything on hand makes the project smoother and more efficient. I find that proper preparation prevents many frustrations down the line. Missing a single item can stop work completely.
For tools, you will need a miter saw or circular saw for precise cuts. Trex material cuts similarly to wood, but a sharp, fine-tooth blade will yield cleaner edges. A drill/driver is essential for fastening screws. Make sure you have a good set of drill bits and driver bits. A tape measure, pencil, and speed square are crucial for accurate measurements and marking. Safety glasses and hearing protection are always a must when using power tools. A level will ensure your table is perfectly flat and stable. Clamps can also be very helpful for holding pieces in place while you assemble them. For the frame, a wood chisel and mallet might be useful if you plan to create specific joinery. You might also consider a routing tool if you wish to add decorative edges to your Trex tabletop. Remember to charge all your battery-powered tools before you begin.
When it comes to materials, the core component is Trex composite decking boards. The number and length of boards depend on your table design and dimensions. Consider using standard deck boards for the tabletop surface and potentially for leg cladding. For the table’s frame, pressure-treated lumber is an excellent choice. It is strong, durable, and resistant to rot, providing a solid foundation for your Trex tabletop. Common sizes include 2x4s, 2x6s, or 4x4s, depending on the desired stability and appearance. You will also need corrosion-resistant fasteners. Stainless steel or coated deck screws (compatible with composite materials) are ideal to prevent rust and staining. Trex specifically recommends certain types of screws for their boards to ensure proper installation and longevity. Look for composite deck screws designed to prevent mushrooming or dimpling around the screw head. If your design includes specific joinery, you may need bolts, nuts, and washers for extra strength. For leg stability, adjustable furniture feet can be useful, especially on uneven surfaces. Having all these items ready saves time and ensures a strong, beautiful Trex table.
Designing Your Perfect Trex Table: Concepts and Plans
Designing your Trex table is an exciting phase. It is where your vision takes shape on paper. A well-thought-out plan saves time and prevents material waste during construction. I always recommend spending ample time on this step; it pays off greatly. Consider how the table will fit into your outdoor space and what purpose it will serve.
First, determine the table’s primary function. Will it be an outdoor dining table for large gatherings, a compact coffee table for lounging, or a versatile side table? This decision dictates the ideal size and height. For example, a standard dining table is usually 28-30 inches high, while a coffee table is typically 16-18 inches. Measure your available space to ensure the table does not overcrowd the area. Think about how many people you want the table to seat comfortably if it is for dining. This helps you figure out the necessary tabletop dimensions.
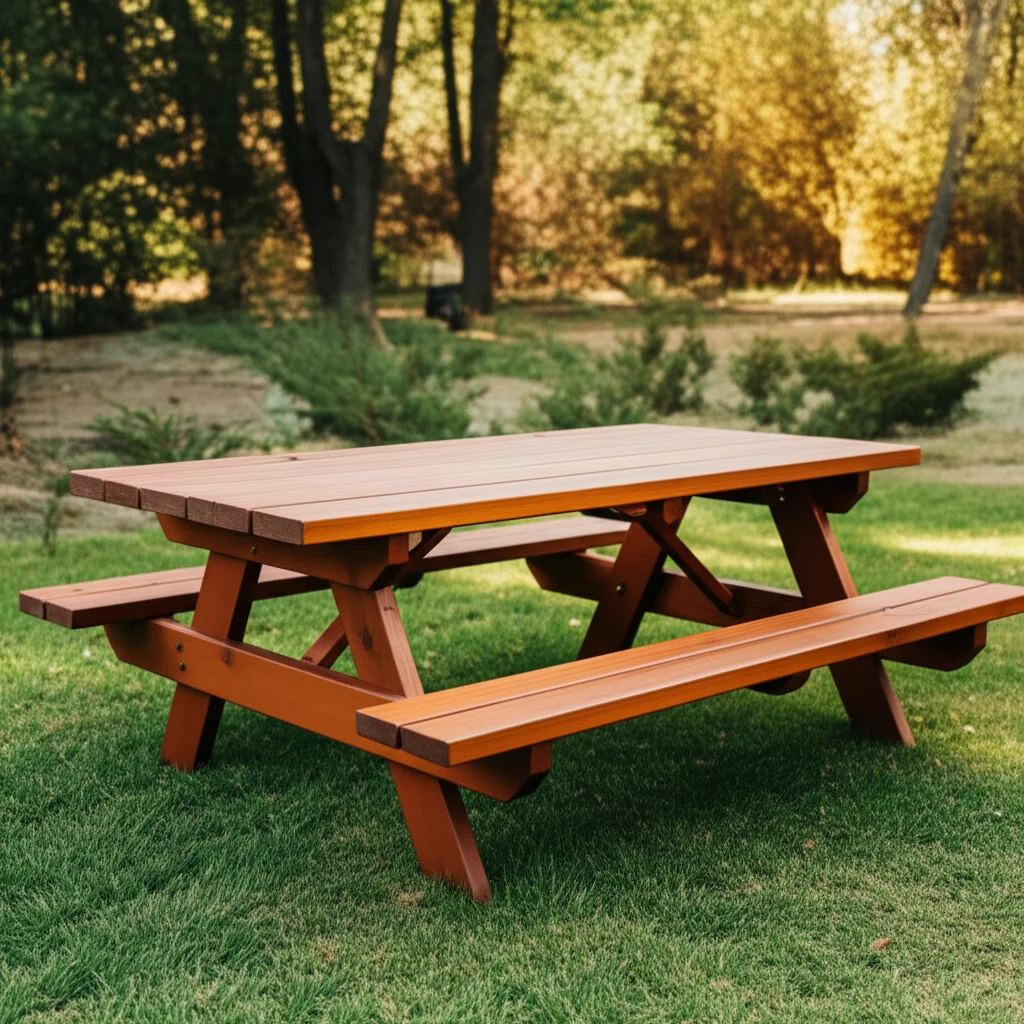
Next, consider the table’s shape and style. Rectangular and square tables are common and straightforward to build. Round or oval tables can offer a softer look but require more complex cutting. You could also explore unique designs, like an octagon picnic table. Think about the style of your existing outdoor furniture. Do you prefer a modern, minimalist look or something more rustic? Trex offers various colors and finishes, allowing you to complement or contrast your current decor. Sketch your design, including precise dimensions for the tabletop, legs, and support frame. Create a detailed cut list for all lumber and Trex boards. This list will be invaluable when you start cutting materials.
When planning the frame, stability is key. The frame provides the structural integrity for the Trex tabletop. Decide on the type of legs and supports you will use. A simple four-leg design with aprons connecting them is very common. You might consider adding a stretcher between the legs for extra stability, especially for longer tables. Think about the overall aesthetic. Will the frame be visible, or will it be mostly hidden by the Trex cladding? If visible, consider finishing it to match or complement your Trex boards. Remember to account for the thickness of the Trex boards when determining the final table height. A good plan will include not just measurements but also a list of materials. It should detail how each piece connects. A clear design plan is your roadmap to successfully building a durable and attractive Trex table that perfectly suits your outdoor living space. You might find inspiration by looking at designs for other outdoor tables, such as how to build an outdoor dining table or even considering how to create an outdoor table top to simplify your project.
Step-by-Step Guide to Building the Trex Table Frame
Building the frame is the foundational step for your Trex table. A strong, stable frame ensures your finished table will be durable and long-lasting. I always emphasize precision here, as any errors will affect the entire table. This section focuses on creating the sturdy base before adding the Trex boards.
Cut Your Lumber
Begin by cutting all your pressure-treated lumber according to your design plan. Use your miter saw or circular saw for accurate cuts. Double-check each measurement before cutting to avoid waste. For a standard rectangular table, you will typically need four legs, two long apron pieces, and two short apron pieces. You might also need additional support pieces for the tabletop substructure. Ensure all cuts are square to allow for tight, strong joints. Label each piece if necessary to keep track during assembly. Remember safety: wear your safety glasses and hearing protection.
Assemble the Leg Assemblies
Next, assemble the two leg assemblies. Each assembly consists of two legs connected by the short apron pieces. Apply exterior-grade wood glue to the joints for added strength. Then, use corrosion-resistant screws to fasten the apron pieces between the legs, creating two “H” shapes. Ensure the joints are perfectly square using a speed square before fully tightening the screws. This step creates the ends of your table. Check that both leg assemblies are identical in height and width. This consistency is crucial for a level table.
Connect the Leg Assemblies
Now, connect the two leg assemblies using the long apron pieces. Again, use wood glue on the joints and secure with corrosion-resistant screws. This creates a rectangular or square frame for your table’s base. Ensure the entire frame is square and level. You can do this by measuring diagonally from corner to corner; the measurements should be equal. If they are not, adjust until they are. This forms the basic structure of your table. Adding diagonal bracing or a stretcher between the legs can provide even more stability, especially for larger tables or if you anticipate heavy use. Consider if you want an expandable table or an extendable table as part of your design, as this will require a more complex frame system.
Build the Top Support Frame
Finally, construct the support frame for the tabletop. This frame sits on top of or within your main leg assembly. It provides the surface to which you will attach the Trex boards. This frame can be made from 2x4s or 2x6s, creating a grid or series of joists. Space these supports appropriately to prevent sagging of the Trex boards. Trex typically recommends supports every 16 inches on center. Attach this support frame securely to the main leg assembly using screws or appropriate hardware. Ensure it is level and flush with the top of the main frame if the Trex boards will rest directly on it. This solid subframe is what your durable Trex table surface will eventually sit upon. A well-built frame ensures your Trex table lasts for many years outdoors.
Installing the Trex Tabletop and Finishing Touches
With the frame sturdy and complete, it is time to install the Trex tabletop. This is where your Trex table truly begins to take its final form. Precision in this stage ensures a beautiful and functional surface. I always find this part very satisfying as the table starts to look finished.
Prepare the Trex Boards
Start by preparing your Trex boards. Cut them to the exact length required for your tabletop. Depending on your design, you might use full-width boards or rip them down to narrower strips. Use a fine-tooth blade on your miter or circular saw for clean cuts. If you plan to have an overhang, factor that into your measurements. Some designs might involve a picture frame border around the edge of the tabletop. If so, cut those pieces precisely, using mitered corners for a clean look. Lay out the boards on your support frame to visualize the final appearance and confirm the fit. Ensure consistent spacing between boards for drainage and aesthetic appeal; a small spacer (like a quarter-inch scrap of wood) can help maintain even gaps.
Fasten the Trex Boards to the Frame
Now, begin fastening the Trex boards to the support frame. Use the recommended composite deck screws. These screws are designed to resist rust and minimize mushrooming, which is when the material around the screw head pushes up. Pre-drilling pilot holes, especially near the ends of the boards, can help prevent splitting. Drive screws straight down, ensuring they are flush with the surface of the Trex board. Some Trex systems use hidden fasteners, which create a clean, screw-free surface. If you are using these, follow the manufacturer’s specific installation instructions carefully. Work your way across the table, securing each board firmly to the underlying frame joists. Ensure each board is straight and evenly spaced before moving to the next one. This systematic approach ensures a professional finish.
Add Edge Details and Trim
Once all the main tabletop boards are installed, you can add any desired edge details or trim. This often involves attaching a fascia board around the perimeter of the tabletop to hide the cut ends of the Trex boards and the underlying frame. These fascia boards are typically thinner Trex pieces or matching composite trim. Miter the corners for a seamless look. Secure these trim pieces with appropriate screws, ensuring they are flush and even. You can also round over the edges of the tabletop with a router for a softer, more finished appearance. This step enhances both safety and aesthetics. Some people like to use Trex post sleeves for the legs for a truly uniform look.
Final Inspection and Cleaning
With all components installed, perform a final inspection of your Trex table. Check all screws to ensure they are properly seated and secure. Confirm the table is level and stable. Look for any sharp edges or splinters (unlikely with Trex, but good practice). Finally, give your new Trex table a good cleaning. A simple soap and water solution is usually sufficient to remove any dust or marks from construction. Your durable, beautiful Trex table is now ready for enjoyment in your outdoor living space.
Caring for Your New Trex Table: Maintenance Tips
Once your Trex table is built, understanding how to care for it ensures its longevity and maintains its aesthetic appeal. The good news is Trex requires very little maintenance compared to traditional wood. This low-fuss aspect is one of the main reasons people choose it. I love how easy it is to keep Trex looking great.
Routine Cleaning
Regular cleaning is the most important part of Trex table care. For everyday dirt, dust, and light spills, a simple wash with soap and water is often enough. Use a soft-bristle brush or a sponge to scrub the surface gently. Rinse thoroughly with a garden hose. Avoid using harsh chemicals or abrasive cleaners, as these can damage the composite material. For stubborn spots, a pressure washer can be used, but always start with a low-pressure setting (below 1500 PSI) and keep the nozzle at least 8 inches from the surface to prevent damage. This gentle approach protects the surface while effectively removing grime.
Addressing Specific Stains
Different types of stains require specific approaches. For food and beverage spills, clean them up as quickly as possible. Many common household cleaners can work, but always test in an inconspicuous area first. For oil or grease stains, use a degreasing agent designed for decks or a mild household cleaner like dish soap. For mold or mildew, which can occur in damp, shady conditions, a composite deck cleaner specifically designed to kill mold spores is recommended. You can also use a mixture of bleach and water (one part bleach to two parts water) for tough mildew, but rinse thoroughly afterward. Never use anything containing acetone or other strong solvents, as they can damage the Trex surface. Remember that even though Trex resists stains, quick action is best. If you need a more general guide for cleaning Trex, consider reviewing tips on how to clean Trex deck for more details.
Preventing Damage and Wear
While Trex is durable, taking a few preventative measures can extend your table’s life. Place felt pads or rubber caps on the bottoms of chairs or other items that frequently move across the table to prevent scratches. Avoid dragging heavy objects across the surface. When using hot items, like pots or dishes straight from the oven, always use trivets to protect the tabletop from potential heat damage, as extreme heat can sometimes mark the material. In snowy climates, use a plastic shovel to clear snow, not a metal one, to avoid scratching. Store the table under cover or use a breathable cover during extreme weather conditions or extended periods of non-use. Following these simple care routines ensures your Trex table remains a beautiful and functional centerpiece in your outdoor living space for many years. Its low-maintenance nature means you spend more time enjoying it and less time worrying about upkeep.
Customizing Your Trex Table: Beyond the Basics
Building a Trex table allows for significant personalization, moving beyond a standard design. Customization makes your table truly unique and perfectly suited to your specific needs and outdoor aesthetic. I love exploring creative ways to make a piece of furniture truly my own.
Integrate Built-in Features
Consider adding built-in features to enhance functionality. A popular option for outdoor tables is an integrated cooler or planter box in the center. You can design a section of the tabletop to lift out, revealing a cooler space for drinks or a planter for herbs or flowers. This makes your table incredibly versatile for entertaining or adding natural elements. Another idea is to incorporate a power outlet or USB charging ports if the table will be near an outdoor power source. This provides convenience for laptops, speakers, or phone charging. You could also design a small storage compartment under the tabletop, perhaps for placemats or outdoor game pieces. For a dramatic touch, some builders integrate a fire pit feature, transforming it into a fire table, though this requires specialized knowledge and safety considerations.
Explore Different Leg Designs and Bases
The legs and base of your Trex table offer significant design opportunities. Instead of a simple four-leg structure, you could build a pedestal base for a more modern look, or a trestle style for a farmhouse feel. Consider cladding the frame in Trex for a cohesive, full-composite appearance, hiding the pressure-treated lumber base. You could also mix materials. For example, use sturdy metal legs or concrete bases with a Trex tabletop. This creates an industrial or mixed-media aesthetic. For larger tables, a central support column or cross-beam design can add visual interest and stability. Think about adding adjustable feet to the legs to ensure stability on uneven patio surfaces.
Vary Trex Board Orientation and Color Patterns
The way you lay your Trex boards on the tabletop can create striking patterns. Instead of laying them all in one direction, consider a herringbone pattern or a simple diagonal layout. This adds visual texture and design flair. You can also use different Trex colors to create patterns or borders. A contrasting color for the picture frame border around the main tabletop is a popular choice. Stripes of different colors within the main tabletop can also look very effective. Trex also offers various board widths and profiles; mixing these can create a dynamic surface. Experiment with different textures, such as wood grain or smooth finishes, to add tactile interest. These subtle variations can transform a simple table into a design statement.
Add Lighting or Unique Embellishments
For evening enjoyment, consider incorporating subtle lighting. You could install small LED strip lights under the tabletop edge or recessed puck lights within the table frame for ambient glow. This creates a magical atmosphere for evening gatherings. Other embellishments might include decorative metal accents, custom engraving, or even unique hardware for any built-in features. Remember, your Trex table is an extension of your outdoor living space. Take the time to infuse it with personal touches that reflect your style and enhance its utility. A customized Trex table becomes more than just furniture; it becomes a focal point for outdoor enjoyment.
Frequently Asked Questions About Building a Trex Table
What is the best type of wood to use for the frame of a Trex table?
The best type of wood for a Trex table frame is pressure-treated lumber. This material is specifically designed for outdoor use. It resists rot, decay, and insect damage. This ensures a strong, stable, and long-lasting foundation for your Trex tabletop, providing the necessary durability to withstand various weather conditions over many years.
Can I build a Trex table for indoor use?
While Trex is primarily an outdoor material, you can build a Trex table for indoor use. However, it is not common. Trex boards are heavier than typical indoor table materials. The aesthetic might also be too “outdoor” for most interior designs. Always ensure good ventilation if building indoors, as new composite materials can off-gas.
How do I prevent my Trex table from getting scratched?
Trex is scratch-resistant, but not scratch-proof. To prevent scratches on your Trex table, use coasters and trivets for drinks and hot items. Avoid dragging sharp or heavy objects across the surface. Place felt pads on the bottoms of chairs. Regular cleaning also helps prevent abrasive dirt particles from scratching the surface over time.
How much does it cost to build a Trex table?
The cost to build a Trex table varies widely. It depends on the size, design complexity, and type of Trex boards you choose. Generally, materials can range from a few hundred dollars to over a thousand. Trex boards themselves are an investment. However, this cost is often offset by the table’s extreme durability and low maintenance, making it a cost-effective choice in the long run.
Can I paint or stain a Trex table?
Trex composite material is designed to be low maintenance and does not require painting or staining. It comes in various colors and finishes that resist fading. Painting or staining Trex is generally not recommended, as paints or stains may not adhere well or could void the warranty. The beauty of Trex is its lasting color without additional finishes.
How long does a Trex table last?
A well-built Trex table can last for many decades. Trex composite decking often comes with a 25-year limited residential warranty against fading, staining, and material defects. This impressive lifespan is due to its durable composition, which resists the elements, insects, and rot far better than traditional wood. Proper construction and minimal maintenance ensure its longevity.
Your Durable Outdoor Trex Table Awaits
You have now explored the comprehensive journey of how to build a Trex table. From understanding the superior benefits of Trex composite material to gathering your tools, meticulously planning your design, and executing the step-by-step construction, you have the knowledge to create a truly exceptional piece of outdoor furniture. We covered critical aspects like selecting the right lumber for a sturdy frame and correctly fastening the durable Trex tabletop boards. This project empowers you to craft a custom table that not only withstands the elements but also enhances your outdoor living space with its beauty and minimal maintenance requirements.
Building a Trex table is a rewarding DIY endeavor. It provides a highly durable and stylish addition to your patio or deck. You will enjoy countless gatherings and quiet moments around a table you built yourself, confident in its strength and longevity. Remember, patience and precision are your best tools throughout the process. Now is the perfect time to bring your vision to life. Gather your materials, prepare your workspace, and embark on this fulfilling project. Your outdoor oasis is waiting for that perfect, custom-built Trex table. Start building today and transform your outdoor space!
- Trex table
- outdoor furniture
- DIY outdoor table
- composite decking
- patio table
- weatherproof table
- low maintenance furniture

Todd Martin
Senior Writer
With over 15 years of experience in home renovation and design, I started HEG to share what I’ve learned with homeowners who want to create spaces that are both beautiful and functional. I’ve always believed in a hands-on approach, and over the years, I’ve picked up practical solutions that actually work. Through HEG, I aim to make home improvement more approachable, sharing real tips that help you create a home you truly love.