· Todd Martin · Woodworking · 19 min read
How To Build Drawer Fronts

How To Build Drawer Fronts: A DIY Guide
Have you ever looked at your existing cabinets or furniture and wished for a fresh, new look? Sometimes, replacing entire units seems like a big task. However, you can achieve a significant transformation by focusing on one key element: the drawer fronts. I know this from personal experience, as I have updated many pieces myself. Building new drawer fronts can give old pieces a modern update or complete a new cabinet build with a professional finish.
Creating your own drawer fronts allows for complete control over design and material. You can match existing decor or create a bold new statement. This article helps you understand the process from start to finish. I will guide you through choosing materials, taking accurate measurements, cutting, assembling, and finishing. By the end, you will have the knowledge to create beautiful, functional drawer fronts for your home. Get ready to enhance your living space with custom-made details.
Takeaway
- Plan Carefully: Measure existing openings and decide on an overlay style (inset, full overlay, partial overlay).
- Gather Materials: Choose wood type, hardware, and finishes based on your design.
- Cut Precisely: Use accurate tools and techniques for clean, square cuts.
- Assemble Neatly: Join components for panel-style fronts with precision.
- Finish Smoothly: Sand thoroughly and apply your chosen stain or paint.
- Install Securely: Attach drawer fronts to boxes with proper alignment.
To build drawer fronts, measure your drawer openings precisely, select suitable wood, cut pieces according to your desired style (slab, shaker, or raised panel), assemble if necessary, sand thoroughly, and apply a finish. Finally, attach the finished front to your drawer box using screws from the inside, ensuring proper alignment and a consistent gap.
Understanding Drawer Front Styles and Design
Choosing the right style is the first step in creating new drawer fronts. Different styles create distinct looks for your cabinets or furniture. Understanding these options helps you select the best fit for your home decor. Each style requires specific cutting and assembly methods.
Common Drawer Front Styles
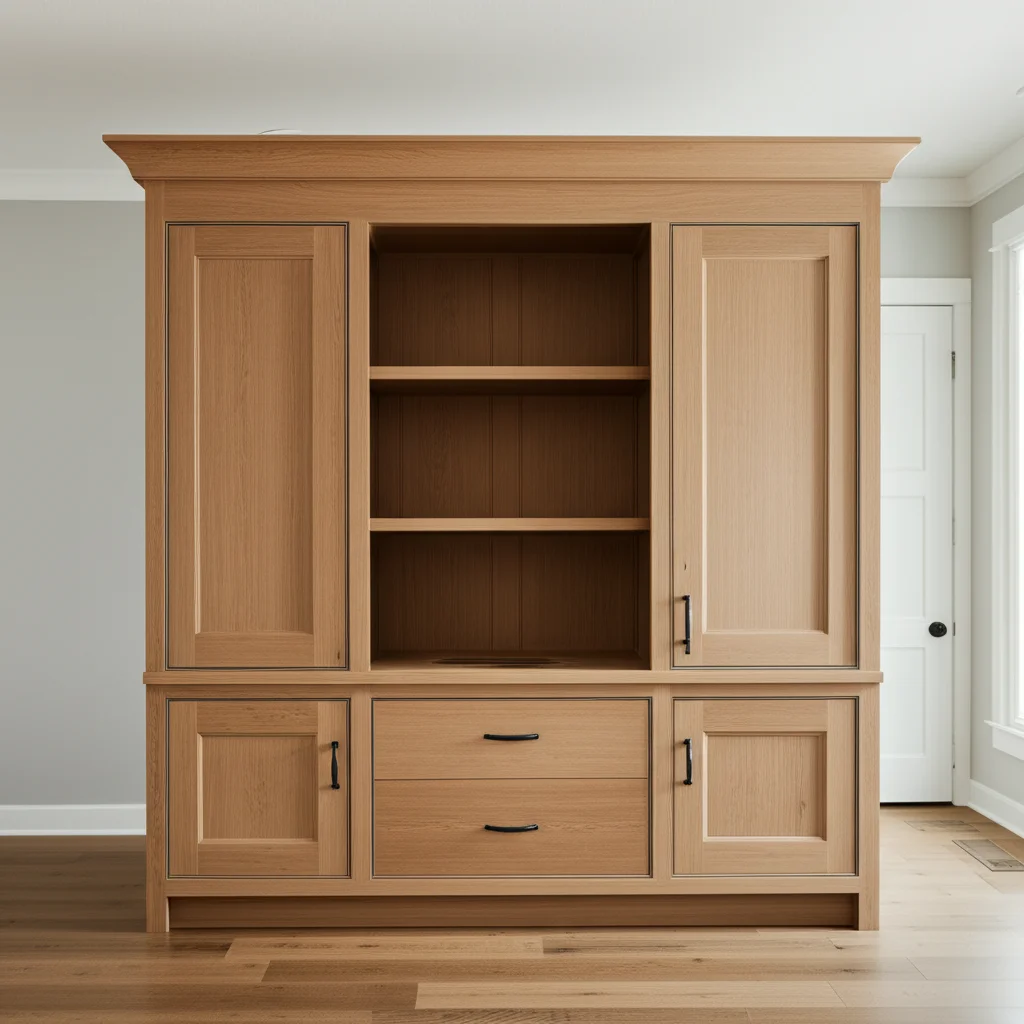
- Slab Drawer Fronts: These are single, flat pieces of wood. Slab fronts are simple and modern. They are the easiest to build. You just cut a piece of wood to size.
- Shaker Drawer Fronts: Shaker fronts feature a flat center panel with a raised frame around it. This style is timeless and popular. Building shaker fronts involves assembling four frame pieces around a central panel. You can learn more about similar construction for cabinet doors here: How To Make Shaker Cabinet Doors From Old Flat Fronts.
- Raised Panel Drawer Fronts: Similar to shaker, but the center panel is “raised” or beveled. This adds depth and a more traditional look. Raised panel fronts require specialized router bits for the panel.
- Recessed Panel Drawer Fronts: These are also similar to shaker, but the center panel sits deeper within the frame. This creates a shadowed effect. It offers a cleaner line than a raised panel.
Choosing Your Overlay Type
The overlay refers to how the drawer fronts sit in relation to the cabinet frame. Your choice affects both appearance and installation.
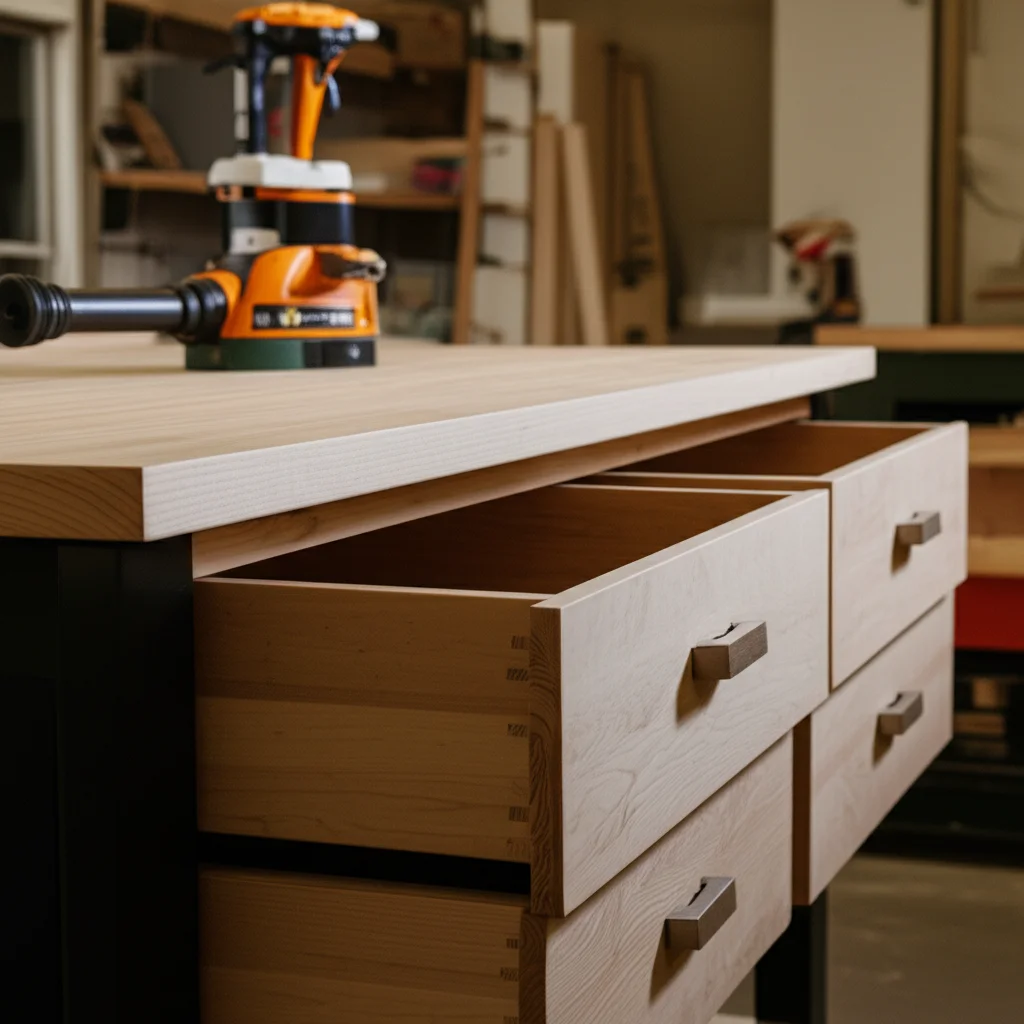
- Full Overlay: The drawer front covers the entire cabinet opening. It leaves only small, consistent gaps between fronts. This creates a sleek, modern look.
- Partial Overlay: The drawer front covers part of the cabinet frame. A portion of the frame remains visible around each front. This is a common traditional style.
- Inset: The drawer front sits inside the cabinet frame. It is flush with the frame. This style requires very precise measurements and cuts. It offers a classic, furniture-like appearance. When I build inset drawer fronts, I always double-check my measurements.
Your choice of style and overlay will guide your material selection and cutting dimensions. Consider the existing design elements in your room. Ensure your new drawer fronts complement your home’s aesthetic. This initial planning saves time and effort during the building process.
Essential Tools and Materials for Building Drawer Fronts
Building custom drawer fronts requires specific tools and materials. Having everything ready before you start makes the process smoother. I always lay out my tools beforehand. Using the right tools ensures accuracy and safety. The quality of your materials directly affects the final look and durability of your drawer fronts.
Tools You Will Need
- Measuring Tape: A good quality, reliable tape measure is critical. Precision is key when cutting wood for drawer fronts.
- Pencil: For marking cuts and layout lines.
- Safety Glasses and Hearing Protection: Always protect your eyes and ears when working with power tools.
- Circular Saw or Table Saw: A table saw provides the most accurate and repeatable cuts for wooden drawer fronts. A circular saw with a straight edge guide can also work for smaller projects.
- Miter Saw: Useful for precise crosscuts, especially for frame pieces of shaker or panel styles.
- Router and Router Table (Optional but Recommended for Panel Styles): Essential for creating the profiles on shaker or raised panel drawer fronts. You can use a hand-held router, but a router table offers better control.
- Clamps: Various clamps hold pieces securely during assembly and gluing.
- Wood Glue: High-quality wood glue creates strong joints.
- Drill: For pilot holes and attaching hardware.
- Screwdrivers: For installing hardware.
- Orbital Sander or Sanding Blocks: For preparing the wood for finishing.
- Shop Vacuum: To keep your workspace clean.
Materials for Your Drawer Fronts
- Wood: Choose the type of wood based on your desired style and finish.
- Solid Wood: Oak, maple, cherry, or poplar are popular choices. They offer durability and a classic look. Solid wood can be stained or painted.
- Plywood/MDF: For slab drawer fronts, high-quality plywood or MDF (medium-density fiberboard) can work. MDF is great for painting because it has a smooth surface. Plywood can be a good choice for staining if you select a veneer grade.
- Wood Screws: For attaching the drawer front to the drawer box. Ensure they are the correct length.
- Hardware: Drawer pulls, knobs, and hinges (if applicable) complete the look.
- Sandpaper: Start with a coarser grit (e.g., 100-120 grit) and progress to finer grits (e.g., 180-220 grit) for a smooth finish.
- Wood Filler (Optional): For filling small imperfections or nail holes if you plan to paint.
- Wood Finish: Stain, paint, polyurethane, or lacquer. Your choice depends on the desired aesthetic and durability.
Gathering these items before you begin will make the building process much more efficient. Remember that proper tools and quality materials are an investment in a professional result. For general drawer construction, you might find this article helpful: How To Make A Drawer Out Of Wood.
Precise Measurement and Cutting for Your Drawer Fronts
Accurate measurement and cutting are the most important steps in building drawer fronts. Even a small error can ruin the appearance of your final product. I always measure twice, sometimes three times, before making a cut. This prevents costly mistakes.
Taking Accurate Measurements
The dimensions of your drawer fronts depend on your chosen overlay style (full, partial, or inset) and the opening size.
Measure the Drawer Opening: Use your measuring tape to get the precise height and width of the cabinet opening where the drawer front will sit. Measure at multiple points to check for squareness.
Determine Your Overlay/Inset:
- Full Overlay: Add 1 inch to the height and width of the opening. This allows for a 1/2-inch overlap on all sides. For example, a 10” x 20” opening needs an 11” x 21” drawer front.
- Partial Overlay: Add 1/2 inch to the height and width for a 1/4-inch overlap. A 10” x 20” opening would get a 10 1/2” x 20 1/2” drawer front.
- Inset: Subtract a small margin (e.g., 1/16 inch) from the height and width of the opening. This provides a small gap for movement. A 10” x 20” opening would need a 9 15/16” x 19 15/16” drawer front.
Account for Gaps: When building multiple drawer fronts next to each other, ensure consistent gaps between them. Standard gaps are 1/16 inch or 1/8 inch. Factor these into your overall dimensions.
Marking and Cutting Your Wood
Once you have your final dimensions, it’s time to mark and cut your wood.
Mark Your Stock: Use your pencil and measuring tape to mark the dimensions on your chosen wood. Ensure your lines are square. A carpenter’s square helps with this.
Make Rip Cuts: Use a table saw or circular saw to cut the wood to the correct width. If making a slab front, this will be your final width. If making shaker or panel fronts, this is for the frame pieces (stiles and rails).
Make Cross Cuts: Use a miter saw or table saw with a crosscut sled to cut the wood to the correct length.
- For slab fronts, this gives you the finished height.
- For shaker/panel fronts, this creates your stiles (vertical pieces) and rails (horizontal pieces). The length of the rails will be the inside width of the frame plus the width of two stiles. The length of the stiles will be the overall height of the drawer front.
Cut Center Panels (for Shaker/Panel Styles): Calculate the size of your center panel based on the inside dimensions of your assembled frame. Cut the panel from thinner stock (e.g., 1/4 inch plywood or MDF).
Precision in these steps ensures your drawer fronts fit perfectly. Take your time. A straight, clean cut is fundamental to a professional-looking result.
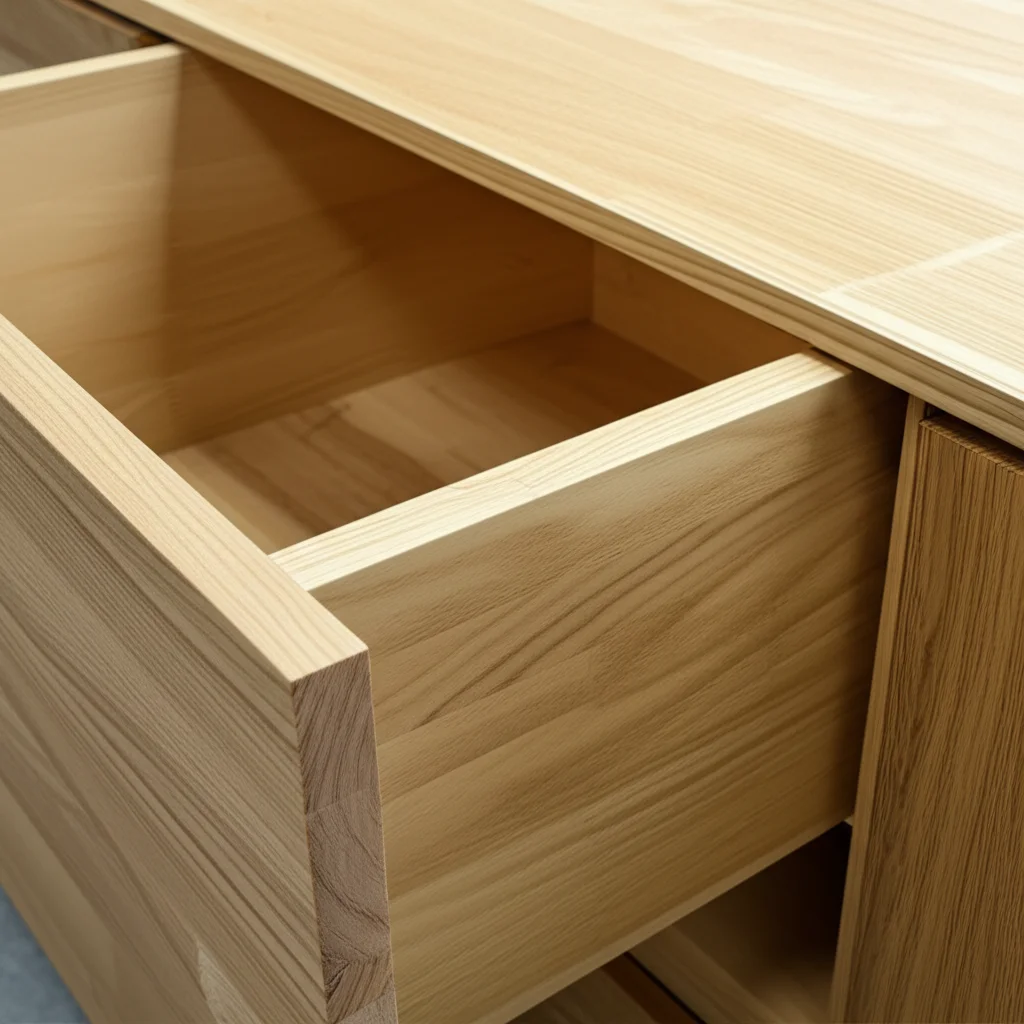
Assembling Your Drawer Front (for Panel Styles)
After cutting your wood pieces, the next step is assembly, especially for shaker or raised panel drawer fronts. Slab fronts do not require assembly beyond cutting to size. Assembly involves joining the frame pieces and inserting the center panel. This stage gives your drawer fronts their final structure.
Assembling Shaker or Recessed Panel Drawer Fronts
Shaker and recessed panel drawer fronts use a rail-and-stile construction. The frame consists of two stiles (vertical pieces) and two rails (horizontal pieces) joined together. The center panel floats within a groove.
- Cut Grooves: Use a router with a slot-cutting bit to create a groove along one edge of each rail and stile piece. This groove holds the center panel. Ensure the groove is centered on the thickness of your wood.
- Cut Tenons/Copes (Optional, for Stronger Joints): For traditional shaker construction, you might cut a tenon on the ends of the rails that fit into a mortise or cope on the stiles. This creates a strong, interlocking joint. Many DIYers use simpler butt joints with dowels or pocket screws.
- Prepare Center Panel: Cut your center panel to the exact size needed to fit into the grooves of the assembled frame. Ensure it is perfectly square.
- Dry Fit: Before applying glue, dry-fit all pieces together. Check that the frame is square and the center panel fits without binding. This is a critical step to identify any miscuts. I always dry-fit, as it saves headaches later.
- Apply Glue and Assemble: Apply wood glue to the mating surfaces of the rail-and-stile joints. Do not put glue in the center panel groove or on the panel itself. The panel needs to “float” to allow for wood expansion and contraction.
- Place the bottom rail into the grooves of the stiles.
- Slide the center panel into the grooves.
- Place the top rail into the grooves of the stiles.
- Clamp and Check for Squareness: Use clamps to hold the assembly together. Apply even pressure. Use a large carpenter’s square or a measuring tape (measuring diagonals) to ensure the frame is perfectly square. Adjust clamps as needed.
- Wipe Away Excess Glue: Use a damp cloth to immediately wipe away any glue squeeze-out. Dried glue can prevent stain from absorbing evenly.
- Allow Glue to Cure: Let the glue dry completely according to the manufacturer’s instructions. This usually takes several hours.
Assembling Raised Panel Drawer Fronts
Raised panel drawer fronts are similar, but the center panel has a decorative profile. This requires specialized router bits (a rail and stile set, and a raised panel bit). The assembly process is the same as shaker, but the center panel is routed before assembly. The raised panel bit creates the decorative edge on the panel.
Proper assembly creates a durable and aesthetically pleasing drawer front. Take your time with clamping and checking for squareness. This ensures your drawer fronts look professional and function correctly for many years.
Sanding and Finishing Your New Drawer Fronts
Once your drawer fronts are assembled (or cut, for slab styles), the next crucial step is sanding and finishing. This stage transforms raw wood into a smooth, protected, and attractive surface. A proper finish enhances the wood’s natural beauty or provides a durable painted surface. I find this part very satisfying, seeing the wood come to life.
Sanding for a Smooth Surface
Sanding removes tool marks, glue residue, and prepares the wood to accept a finish evenly.
- Start with Coarse Grit: Begin with 100 or 120-grit sandpaper. Use an orbital sander for large, flat surfaces. For edges and profiles, use a sanding block or hand-sand. Sand with the grain of the wood. Do not skip this step; coarse grit removes imperfections effectively.
- Progress to Finer Grits: Move to 150-grit, then 180-grit, and finally 220-grit sandpaper. Each successive grit removes the scratches left by the previous one. Ensure you sand uniformly across the entire surface.
- Check for Imperfections: After sanding with 220-grit, wipe the drawer front with a damp cloth. This raises the grain and highlights any missed spots or remaining marks. Lightly sand these areas again with 220-grit once dry.
- Clean Thoroughly: Before applying any finish, remove all dust. Use a shop vacuum, compressed air, or a tack cloth. Any remaining dust will get trapped in the finish.
Applying Your Chosen Finish
The type of finish depends on your desired look and durability needs.
- Staining (for natural wood look):
- Apply Pre-Stain Conditioner (Optional but Recommended): For woods like pine or cherry, a pre-stain conditioner helps the stain absorb more evenly, preventing blotchiness. Apply according to product instructions.
- Apply Stain: Apply a thin, even coat of wood stain with a brush or rag, working with the grain. Allow it to sit for the recommended time (check product instructions) for desired color depth.
- Wipe Off Excess: Use a clean rag to wipe off excess stain. This prevents a gummy finish.
- Allow to Dry: Let the stain dry completely. This can take 24-48 hours.
- Painting (for a solid color):
- Apply Primer: Apply a good quality wood primer. Primer helps the paint adhere better and provides a uniform base. Apply one or two thin coats, allowing drying time between coats.
- Light Sanding (after primer): Lightly sand with 220-grit sandpaper after the primer dries. This creates a smooth surface for the paint. Wipe off dust.
- Apply Paint: Apply thin, even coats of your chosen paint with a brush, roller, or sprayer. Two to three coats are usually needed for good coverage. Allow drying time between coats.
- Topcoat (for protection):
- Apply Polyurethane, Lacquer, or Varnish: Once your stain or paint is dry, apply a protective topcoat. This protects the wood from moisture, scratches, and wear. Apply thin coats according to product instructions.
- Light Sanding (between topcoats): Lightly sand with very fine sandpaper (e.g., 320-400 grit) between topcoats. This creates a smoother surface and helps subsequent coats adhere. Wipe off dust thoroughly.
- Final Cure Time: Allow the topcoat to fully cure before heavy use. This can take several days or weeks.
Proper sanding and finishing are crucial for drawer fronts that not only look good but also last a long time.
Attaching Drawer Fronts to Drawer Boxes
Once your drawer fronts are finished and fully cured, the final step is to attach them to your drawer boxes. This process requires accuracy to ensure proper alignment and consistent gaps between all fronts. A misaligned drawer front stands out. I always take my time with this step.
Essential Tools for Attachment
- Drill/Driver: For making pilot holes and driving screws.
- Clamps: Small clamps are helpful for temporarily holding the drawer front in place.
- Shims or Spacers: Small blocks of wood or plastic, or even playing cards, to create consistent gaps.
- Screws: Wood screws long enough to pass through the drawer box front and into the drawer front, without protruding through the front face.
- Combination Square or Ruler: For checking alignment.
- Pencil: For marking pilot hole locations.
Step-by-Step Attachment Process
- Prepare the Drawer Box: Ensure your drawer box is fully assembled and installed in its cabinet opening. You can find information on general drawer construction here: How To Make A Drawer Out Of Wood. The drawer box should slide in and out smoothly.
- Position the Drawer Front:
- Place the finished drawer front against the front of the drawer box.
- Use shims or spacers around the edges of the drawer front to achieve your desired, consistent gaps (e.g., 1/16 inch or 1/8 inch) between adjacent drawer fronts or cabinet frames. This is crucial for a professional look.
- Ensure the drawer front is centered horizontally and vertically on the drawer box. If it is an overlay front, it should cover the desired amount of the opening. If it is an inset front, it should sit flush within the opening.
- Secure Temporarily (Optional but Recommended):
- Once positioned correctly, use a few small clamps to hold the drawer front firmly to the drawer box. Ensure the clamps do not mar the finished surface. You can use protective pads under the clamp jaws.
- Alternatively, some people use double-sided tape or a small brad nail from the inside of the drawer box into the back of the drawer front to hold it while drilling.
- Mark Pilot Holes: From inside the drawer box, mark the locations for your screws. You will typically use two screws near the top corners and two near the bottom corners of the drawer box front.
- Drill Pilot Holes: Remove the drawer front (if you clamped it). Drill pilot holes through the front of the drawer box where you made your marks. Make sure these pilot holes are smaller than your screw diameter.
- Attach the Drawer Front:
- Re-position the drawer front using your shims/spacers.
- From inside the drawer box, align the pilot holes you just drilled with the back of the drawer front.
- Drive your screws through the pilot holes in the drawer box and into the back of the drawer front. Start with a single screw, then check alignment before adding the rest. Make small adjustments as needed.
- Install Hardware: Once the drawer front is securely attached, drill holes for your drawer pulls or knobs. Measure carefully to ensure hardware is centered and consistent across all drawer fronts. Attach the hardware. You can find specific guidance on attaching these elements here: How To Attach A Drawer Front.
Proper attachment makes your new drawer fronts functional and visually appealing. Take your time with alignment, and you will achieve a polished result.
Common Challenges and Troubleshooting in Drawer Front Construction
Even with careful planning, you might encounter issues when building drawer fronts. Knowing how to address common problems can save you time and frustration. I have faced many of these challenges myself. Learning to troubleshoot builds your woodworking skills.
Drawer Fronts Not Square
- Problem: The drawer front looks crooked or does not sit flush.
- Cause: Inaccurate cuts, improper clamping during assembly (for panel styles), or the drawer box itself is not square.
- Solution:
- Check Cuts: Re-measure your drawer front pieces. If you find a piece is off, you might need to re-cut it.
- Re-assemble (if panel style): If the issue is in the frame assembly, you may need to carefully disassemble, clean off old glue, and re-glue, ensuring you check for squareness as you clamp.
- Check Drawer Box: Ensure the drawer box itself is square. If the box is twisted, the drawer front will also appear twisted. You might need to reinforce or adjust the drawer box. Learn about building the drawer boxes themselves here: How To Build A Nightstand With 2 Drawers.
- Adjust During Attachment: Sometimes, minor non-squareness can be hidden by careful shimming during the attachment phase. However, this is a workaround, not a fix for a truly non-square piece.
Inconsistent Gaps Between Drawer Fronts
- Problem: Gaps are wider on one side, or not uniform between drawer fronts.
- Cause: Inaccurate initial measurements, inconsistent cutting, or improper positioning during attachment.
- Solution:
- Review Initial Measurements: Double-check your calculations for overlay or inset, and your gap allowances.
- Adjust Positioning: This is the most common fix. Loosen the attachment screws slightly. Use shims or playing cards to carefully adjust the drawer front’s position. Slide it until the gaps are consistent. Then, re-tighten the screws. It often helps to view the gaps from a slight distance to ensure uniformity.
- Slight Trimming: For very minor issues, a very light sanding or planing of an edge might help, but this is risky on a finished piece.
Screws Stripping or Not Holding
- Problem: Screws do not tighten fully or spin freely.
- Cause: Pilot hole is too large, or the wood is soft/damaged.
- Solution:
- Use Larger Screw: If the pilot hole is too big, try a screw with a slightly larger diameter.
- Wood Glue and Toothpicks/Dowels: Fill the oversized pilot hole with wood glue and insert a few wooden toothpicks or a small dowel. Let the glue dry completely. Then, re-drill a correct-sized pilot hole and insert the screw.
- Relocate Screw: If the wood is damaged, try moving the screw slightly to a fresh spot.
Finish Issues (Blotching, Unevenness)
- Problem: Stain appears uneven, or paint has brush marks.
- Cause: Improper wood preparation (sanding), incorrect application technique, or not using pre-stain conditioner on certain woods.
- Solution:
- Sanding: For blotchiness, you might need to sand back to bare wood and reapply the finish after ensuring thorough and progressive sanding.
- Application Technique: Apply thin, even coats. For paint, use a quality brush or roller. For stain, wipe off excess promptly.
- Pre-stain Conditioner: Always use a pre-stain conditioner on woods known for blotching (e.g., pine, maple, birch) before staining.
Troubleshooting is part of any DIY project. With patience and these tips, you can overcome most challenges when building drawer fronts.
Enhancing Your Drawer Fronts: Hardware and Decorative Details
Beyond the basic construction, hardware and decorative details elevate the look of your drawer fronts. These elements are the final touches that personalize your project. Choosing the right hardware changes the entire aesthetic of your cabinets or furniture. I consider hardware like jewelry for my woodworking projects.
Choosing and Installing Hardware
Hardware includes drawer pulls, knobs, and sometimes cup pulls. They are both functional and decorative.
- Style Selection:
- Modern: Simple, sleek pulls, often in brushed nickel or chrome.
- Traditional: Ornate knobs or pulls, often in brass or oil-rubbed bronze.
- Transitional: A mix of modern and traditional, often with clean lines but a classic finish.
- Farmhouse: Cup pulls or simple black iron hardware.
- Consider the finish of existing fixtures in your home.
- Size and Placement:
- Knobs: Typically placed in the center of the drawer front.
- Pulls: Centered horizontally on the drawer front. The vertical placement depends on the drawer front height. For tall fronts, place them proportionally. For shorter ones, center them vertically.
- Use a hardware template or a ruler to mark hole locations precisely. Accuracy here prevents misdrilled holes.
- Drilling Holes:
- Mark the center point for your hardware carefully.
- Use a drill bit that matches the screw size for your hardware.
- Place a scrap piece of wood behind the drawer front when drilling to prevent tear-out on the back side.
- Drill straight through the drawer front.
- Attaching Hardware: Insert the screws from the back of the drawer front and tighten them into the hardware on the front. Do not overtighten, as this can strip the wood or damage the hardware.
- If your old hardware needs a refresh, you might find tips on cleaning it here: How To Clean Brass Hardware Drawer Pulls.
- drawer construction
- custom drawer fronts
- DIY woodworking
- cabinet fronts
- wooden drawer fronts

Todd Martin
Senior Writer
With over 15 years of experience in home renovation and design, I started HEG to share what I’ve learned with homeowners who want to create spaces that are both beautiful and functional. I’ve always believed in a hands-on approach, and over the years, I’ve picked up practical solutions that actually work. Through HEG, I aim to make home improvement more approachable, sharing real tips that help you create a home you truly love.