· Davia Murnell · Home Improvement · 19 min read
How To Change The Colour Of Kitchen Cabinets
Transform Your Kitchen: Changing Cabinet Color
I know you want a fresh look for your kitchen. Old cabinets can make the whole room feel dated. Changing their color is a big step. This project offers a budget-friendly way to update your home. You can give your kitchen a complete facelift without replacing everything.
This guide will walk you through everything you need to know. We will cover different methods to change the colour of kitchen cabinets. You will learn about preparing surfaces, applying new finishes, and ensuring lasting results. Get ready to create the kitchen you dream of.
Takeaway
- Assess Cabinet Material: Know your cabinet type (wood, laminate, thermofoil) to pick the best method.
- Choose a Method: Decide between painting, staining, cabinet wraps, or refacing based on your goals and budget.
- Prepare Thoroughly: Proper cleaning, sanding, and priming are essential for a durable finish.
- Apply Carefully: Use the right tools and techniques for smooth, even color application.
- Allow Full Curing: Give the new finish enough time to dry and harden before heavy use.
To change the colour of kitchen cabinets, thoroughly clean, sand, and prime surfaces, then apply paint or stain using proper techniques for a durable finish. Alternatively, consider cabinet wraps or refacing for a different aesthetic.
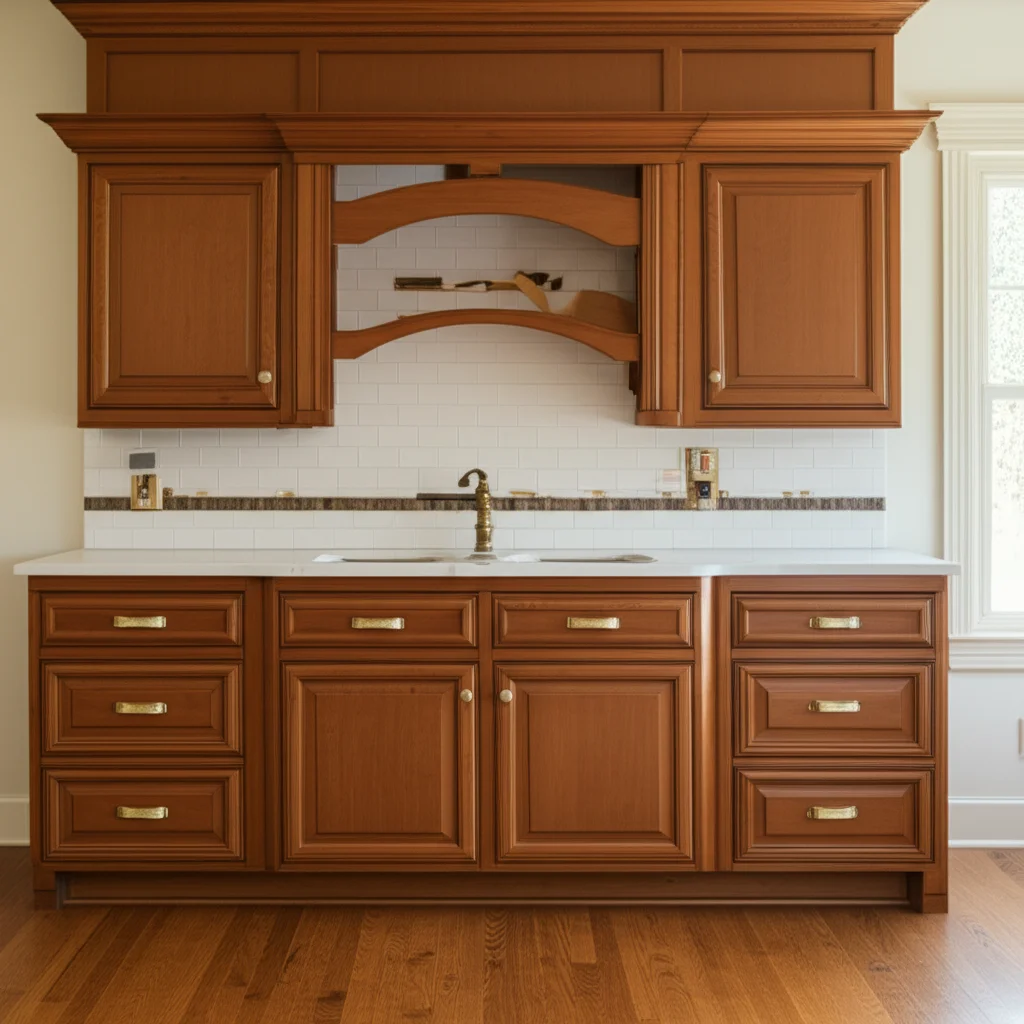
Assessing Your Cabinets: Material and Current Finish
Before you change the colour of kitchen cabinets, you must understand what they are made of. Different materials require different approaches. Knowing your cabinet type helps you choose the right method. This step prevents wasted time and money on unsuitable products.
Your cabinet material affects how a new finish will adhere. It also dictates how much preparation is needed. Take time to inspect your cabinets carefully. This review ensures success for your project.
Identifying Cabinet Material
Wooden cabinets are generally good for painting or staining. Solid wood, like oak or maple, takes paint well. It can also be stained to a darker or different wood tone. Wood grain might show through paint, which some people like.
Laminate or thermofoil cabinets are different. These are often made from particleboard or MDF with a plastic-like coating. You can paint these, but they need specific primers. Staining does not work on these materials. The surface does not absorb stain like wood.
Metal cabinets are less common in homes. They also require special primers for paint adhesion. Be sure about your cabinet material before buying any supplies. This prevents problems later on.
Understanding Existing Finishes
The current finish on your cabinets affects preparation. If cabinets have a clear varnish, sanding is crucial. This creates a surface for the new paint or stain to stick to. Worn areas might need more attention.
Heavily painted cabinets might have brush marks or drips. You might need to sand these areas smooth. This creates a clean base for your new color. Glossy finishes usually need extra sanding or a deglosser. This helps new layers adhere better.
Oil-based finishes can react with water-based paints. Always test a small, hidden area first. This checks for proper adhesion and prevents peeling. Proper assessment saves you from costly redo work.
Choosing Your New Look: Color and Finish Options
Choosing a new color is exciting. The right color can completely change your kitchen’s atmosphere. Think about the overall style of your home. Consider the amount of natural light your kitchen receives. This helps you select a shade that feels right.
The finish, or sheen, also plays a big role. It affects how durable your cabinets are and how they look. Matte, satin, semi-gloss, and high-gloss finishes offer different visual effects. Each has pros and cons for a kitchen environment.
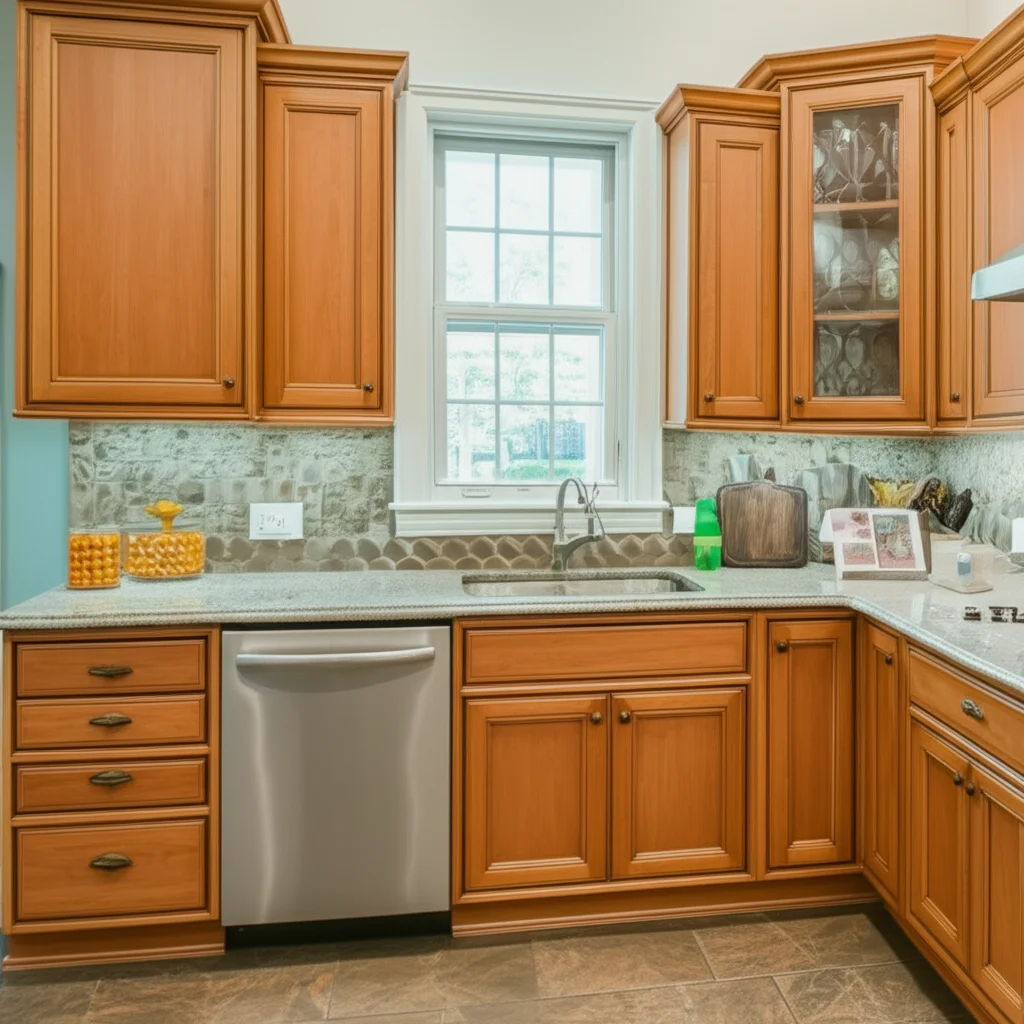
Selecting the Right Color Palette
Light colors, like white or pale gray, make a kitchen feel larger. They reflect more light, making the space brighter. These colors create a clean and airy look. They are popular for modern or Scandinavian designs.
Dark colors, such as navy or charcoal, add drama. They create a sophisticated and cozy feel. Dark cabinets pair well with light countertops or backsplashes. This contrast creates a striking visual.
Consider your existing floor and countertop colors. Pick a cabinet color that complements these elements. Use online tools or samples to test colors in your actual kitchen. Colors look different under various lighting conditions.
Deciding on Sheen and Type of Finish
Satin finishes are a common choice for cabinets. They have a subtle sheen that hides imperfections well. Satin is also easy to clean and offers good durability. It provides a balanced look between matte and glossy.
Semi-gloss finishes are shinier than satin. They are highly durable and very easy to wipe clean. This sheen is excellent for high-traffic areas like kitchens. However, semi-gloss can show imperfections more easily.
High-gloss finishes offer a very reflective, modern look. They are the most durable and easiest to clean. But they show every fingerprint and bump. Matte finishes offer a flat, non-reflective look. They are harder to clean and can absorb stains. Pick a sheen that fits your lifestyle and aesthetic.
Key Methods to Change Cabinet Color
There are several ways to change the colour of kitchen cabinets. Each method has its own benefits and drawbacks. Your choice depends on your budget, time, and desired outcome. Some methods are more DIY-friendly than others.
Consider how much work you want to put in. Think about how long you want the new look to last. We will explore the most popular options in detail. This helps you make an informed decision for your home.
Painting Cabinets for a Fresh Hue
Painting is the most popular way to change cabinet color. It is often the most budget-friendly option too. Paint allows for a vast array of color choices. You can easily match any decor style.
Painting requires significant preparation. This includes thorough cleaning, sanding, and priming. Proper prep ensures the paint adheres well and lasts. A good paint job can make old cabinets look brand new.
Paint also offers flexibility. If you dislike the color later, you can always repaint. This method gives you complete control over the final look. It is a rewarding DIY project.
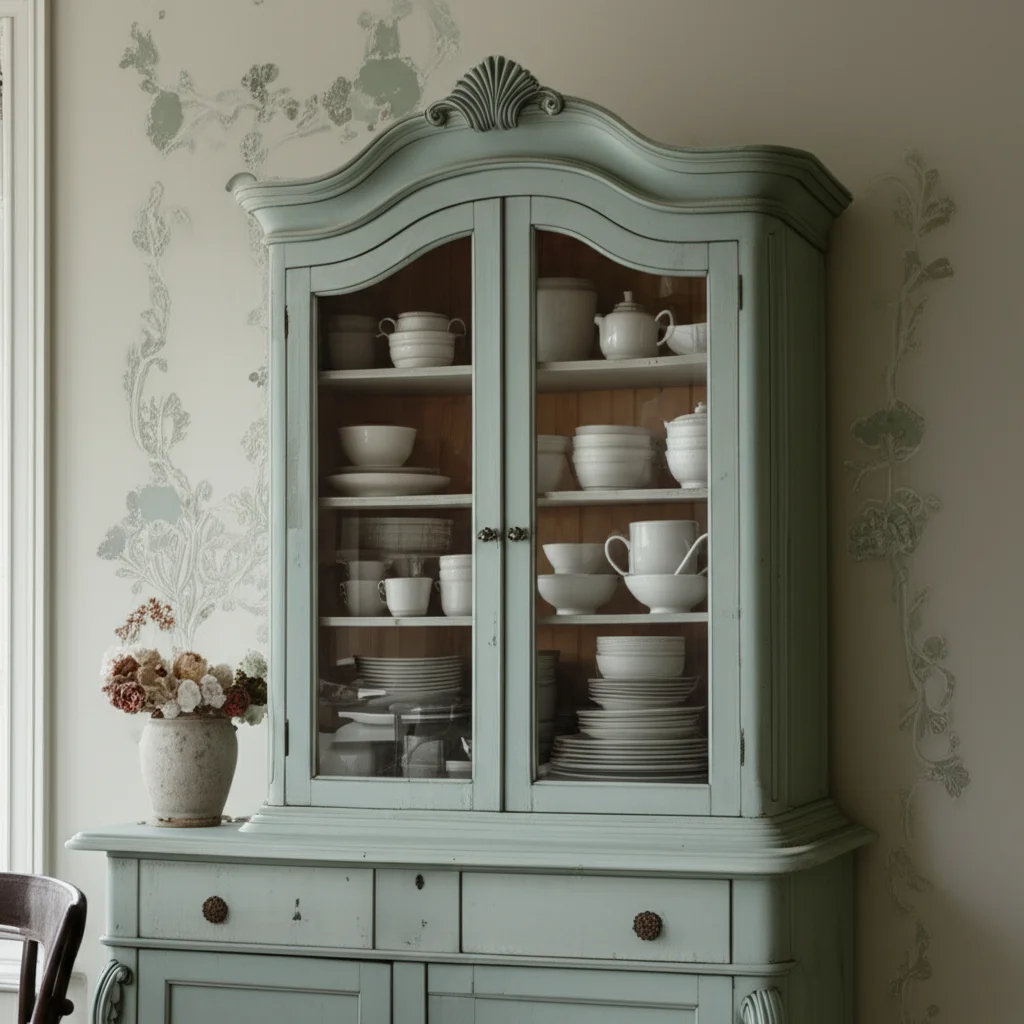
Staining Cabinets for Rich Tones
Staining is ideal if you have solid wood cabinets. It enhances the natural wood grain. Stain adds color without completely hiding the wood’s texture. You can go from a light wood to a deep, rich tone.
Staining requires very clean, bare wood. You might need to strip the old finish completely. This is more intensive than preparing for paint. But the result is a beautiful, natural wood look.
Gel stains offer an easier alternative. They can be applied over existing finishes. This works if the surface is already clean and lightly scuffed. Gel stains are opaque and create a more uniform color.
Exploring Cabinet Wraps
Cabinet wraps are large adhesive sheets. They come in many colors, patterns, and textures. You can find wraps that mimic wood grain, stone, or solid colors. This method is often less messy than painting.
Wraps can be applied directly over existing cabinet surfaces. This includes laminate or thermofoil cabinets. The process involves precise measuring and cutting. Air bubbles can be a challenge to avoid.
Wraps are removable, making them a good option for renters. They offer a temporary change if you are not ready for a permanent solution. This method requires a steady hand for a professional finish.
Considering Cabinet Refacing
Cabinet refacing is a more extensive option. It involves replacing cabinet doors and drawer fronts. New veneer is applied to the existing cabinet boxes. This gives you a completely new look without tearing out the entire kitchen.
Refacing allows you to change the style of your doors. You can choose different profiles and materials. This method is more expensive than painting or staining. But it is less costly than full cabinet replacement.
Refacing is often done by professionals. It offers a high-quality finish and a significant upgrade. If your cabinet boxes are in good condition, refacing is a smart choice. It renews your kitchen quickly.
Essential Preparation: The Foundation for Success
Preparation is the most important step when you change the colour of kitchen cabinets. Do not skip or rush this stage. Poor preparation leads to peeling, chipping, or uneven finishes. Proper prep ensures your new color lasts for years. It creates a smooth and durable surface for paint or stain.
This phase takes the most time and effort. But it is worth every minute. A well-prepared surface makes the actual painting or staining much easier. It guarantees a professional-looking result.
Disassembling and Labeling Cabinet Parts
Start by removing all cabinet doors and drawer fronts. Use a screwdriver to detach hinges and hardware. Take off any existing handles or knobs. Put all hardware in labeled bags. This prevents loss and makes reassembly simple.
Label each door and drawer front. Use painter’s tape and a marker on a hidden spot. Mark which cabinet box it belongs to. For example, “Upper Left 1” or “Drawer Below Sink.” This ensures everything goes back in its original place.
Remove any contents from your cabinets. Clear your countertops. Cover your countertops and floor with drop cloths. This protects surfaces from dust and spills. A clean work area helps you focus.
Thoroughly Cleaning Cabinet Surfaces
Cabinets gather grease and grime over time. You must clean them very well before applying new color. Grease will prevent paint or stain from sticking properly. Use a strong degreaser to remove all residue.
Mix a solution of dish soap and warm water. For stubborn grime, use a TSP (trisodium phosphate) substitute. Wipe down every surface of the cabinet boxes, doors, and drawer fronts. Rinse thoroughly with clean water.
Let all surfaces dry completely before moving on. Any moisture can cause issues with adhesion. For very sticky or greasy cabinets, dedicated cleaning products work best. You can find more tips on cleaning sticky surfaces here: How To Clean Sticky Wood Kitchen Cabinets Before Painting. If you are dealing with a lot of grease, check out How To Clean Grease From Kitchen Cabinets. A general guide on cleaning before painting can be found here: How To Clean Cabinets Before Painting.
Making Repairs and Filling Imperfections
Inspect your cabinets for any damage. Look for dents, scratches, or small holes. Use wood filler to patch these areas. Apply the filler with a putty knife. Smooth it out evenly.
Let the wood filler dry completely. Drying times vary based on the product. Once dry, sand the patched areas smooth. The goal is a flat, seamless surface. This ensures your new finish looks flawless.
Repair any loose joints or hinges. Tighten screws or use wood glue if needed. Address any major structural issues now. This prevents problems after the new color is applied.
Sanding for Proper Adhesion
Sanding creates a “tooth” for the new finish to grip. It roughs up the surface slightly. For painted cabinets, a light scuff sand is usually enough. Use 120-180 grit sandpaper.
If you are staining, you need to strip the old finish completely. Then sand down to bare wood. Start with a coarser grit, like 80 or 100. Progress to finer grits, like 150 or 180. Finish with 220 grit for a smooth stainable surface.
Wipe away all sanding dust. Use a tack cloth or a damp cloth followed by a dry one. Dust left behind will create a bumpy finish. Proper sanding is key to a durable and attractive result.
Applying Primer for Durability
Primer is essential for most cabinet color changes. It creates a barrier between the old and new finish. Primer helps the topcoat adhere better. It also blocks stains or knots from bleeding through.
Choose a primer suitable for your cabinet material. A good quality, bonding primer works well on challenging surfaces. For wood cabinets, use a stain-blocking primer. This prevents wood tannins from discoloring your paint.
Apply primer in thin, even coats. Follow the manufacturer’s drying time recommendations. Sand lightly between coats of primer with 220 grit sandpaper. This smooths out any bumps. Wipe away dust after each sanding.
The Art of Painting Kitchen Cabinets
Painting kitchen cabinets is a rewarding process. It gives you immediate visual impact. The key is applying paint smoothly and evenly. This section guides you through the best techniques. With patience, you can achieve a professional-looking finish.
Choose your paint carefully. High-quality cabinet paint offers better durability. It also provides a smoother finish. Take your time with each coat. Rushing leads to drips and brush marks.
Choosing the Right Paint and Tools
For cabinets, choose a durable paint. Alkyd enamel or a water-based acrylic-alkyd hybrid paint works best. These paints offer good hardness and resistance to everyday wear. They also level out well, reducing brush marks.
Select high-quality brushes and rollers. A good angled brush helps with corners and detailed areas. Use a foam roller or a fine-nap roller for smooth surfaces. These tools help create an even coat.
A paint sprayer offers the smoothest finish. It reduces brush marks completely. If you use a sprayer, practice on scrap wood first. This helps you get comfortable with the technique. If you want to avoid brush marks, this article can help: How To Paint Kitchen Cabinets Without Brush Marks.
Painting Techniques for a Smooth Finish
Apply paint in thin, even coats. This prevents drips and allows the paint to cure properly. Two or three thin coats are better than one thick coat. Always follow the paint manufacturer’s drying times between coats.
When using a brush, paint with the grain of the wood. Use long, even strokes. When using a roller, roll in one direction to ensure even coverage. Overlapping strokes slightly creates a consistent look.
For doors, paint the backs first. Then flip them over and paint the fronts. This prevents smudges on the visible side. Use sawhorses or painter’s pyramids to elevate doors. This allows you to paint edges easily.
Drying and Curing Times
Drying time refers to how long it takes for paint to feel dry to the touch. Curing time is how long it takes for paint to fully harden. Curing can take several days or even weeks. Do not reassemble cabinets too soon.
Allow full drying time between coats. Rushing this step can cause paint to peel. Once all coats are applied, let the cabinets cure. This means leaving them undisturbed. Place doors and drawers in a low-traffic area.
Patience here pays off. A fully cured finish is much more durable. It will resist scratches and chips better. This ensures your new cabinet color lasts for years.
Mastering Cabinet Staining and Gel Staining
Staining offers a classic, rich look for wood cabinets. It brings out the natural beauty of the wood grain. Gel staining provides a similar aesthetic with less intensive prep. Both methods can dramatically change the colour of kitchen cabinets. They offer an alternative to a painted finish.
Choosing between traditional stain and gel stain depends on your cabinet’s current condition. It also depends on how much prep work you are willing to do. Both require careful application for the best results.
Preparing for Staining
Traditional wood stain requires bare wood. You must strip any existing finish completely. This can be done with chemical strippers or extensive sanding. After stripping, sand the wood with progressively finer grits. Finish with 220-grit sandpaper for a smooth surface.
Clean all sanding dust thoroughly with a tack cloth. Any dust left behind will show in the final stained finish. Apply a wood conditioner before staining. This helps the stain absorb evenly. It prevents blotchiness, especially on soft woods.
Gel stain is more forgiving. You can often apply it over an existing finish. The surface must be clean and lightly scuffed with fine-grit sandpaper. This creates a surface for the gel stain to adhere. It works well if you want to change the color of existing oak cabinets without the grain showing too much, similar to what’s described here: How To Paint Oak Cabinets White Without Grain Showing.
Applying Stain Effectively
Apply traditional wood stain with a brush or rag. Work in small sections. Apply liberally, then wipe off excess stain immediately. The longer the stain sits, the darker the color. Experiment on scrap wood first.
Wipe with the wood grain for an even appearance. Overlap your sections slightly. Allow the first coat to dry. Then apply a second coat for a deeper color if desired. Always follow manufacturer instructions for drying times.
Gel stain application is different. Apply it like paint, in thin coats. Use a brush or a foam applicator. Do not wipe it off like traditional stain. Gel stain creates a more opaque color. Apply multiple thin coats until you reach your desired shade.
Topcoats for Protection
After staining, you must apply a protective topcoat. This seals the stain and adds durability. Polyurethane is a common choice. It comes in various sheens, from matte to gloss.
Apply topcoats in thin, even layers. Sand lightly between coats with very fine sandpaper (220-320 grit). This smooths out any dust nibs. Always wipe away sanding dust before the next coat.
At least two to three coats of topcoat are recommended for kitchen cabinets. Kitchens are high-traffic areas. The topcoat protects your beautiful new stain from spills and daily wear. Allow the topcoat to cure fully before reassembling.
Reassembly and Final Touches
You are almost done changing the colour of kitchen cabinets! This final stage brings everything together. Proper reassembly ensures your cabinets look great and function perfectly. Take your time to align doors and drawers. Small adjustments make a big difference in the overall appearance.
Adding new hardware can complete the transformation. It is like putting on jewelry for your cabinets. This step is exciting because you see your hard work come to life. Enjoy your refreshed kitchen.
Reinstalling Hardware
Before reattaching doors and drawers, install the new hardware. If you are reusing old hardware, clean it thoroughly. New knobs and pulls can greatly enhance the updated look. Make sure your new hardware matches the existing drill holes if you are not filling and re-drilling.
For new hardware, measure carefully. Mark drill points precisely for handles or pulls. Use a template if you have many doors. Drill pilot holes to prevent wood splitting. Attach the hardware firmly.
This step is a great opportunity to customize your cabinets. Choose hardware that complements your new cabinet color. It should also match the overall style of your kitchen.
Hanging Doors and Adjusting
Carefully reattach each cabinet door. Use the labels you made earlier. Line up the hinges with the screw holes on the cabinet boxes. Use a drill to secure the screws. Do not overtighten them.
Once doors are hung, check their alignment. Do they close properly? Are there even gaps between doors? Most cabinet hinges allow for adjustment. You can often adjust them up, down, left, and right.
Adjust hinges until all doors are level and have consistent spacing. This attention to detail makes your project look professional. Install drawer fronts back onto the drawer boxes. Ensure they slide smoothly.
Maintaining Your Newly Colored Cabinets
You have invested time and effort to change the colour of kitchen cabinets. Now, keeping them looking good is important. Proper maintenance extends the life of your new finish. It protects your investment. Regular cleaning prevents grime buildup. Gentle care avoids scratches and chips.
Establishing a simple cleaning routine is key. Knowing how to deal with spills quickly helps. This section gives you tips to keep your cabinets beautiful for years.
Cleaning Your Freshly Colored Cabinets
Wait at least 30 days after painting or staining before cleaning vigorously. This allows the finish to fully cure. Use a soft cloth and a mild cleaner for daily wiping. A mixture of dish soap and warm water works well.
Avoid harsh chemicals or abrasive scrubbers. These can damage your new finish. Do not use cleaners that contain bleach or ammonia. They can cause discoloration or breakdown of the paint.
Wipe up spills immediately. Food and liquid can stain or soften the finish if left sitting. Keep your cleaning routine gentle and consistent. This preserves the beauty of your cabinets.
Protecting Against Wear and Tear
Use shelf liners inside your cabinets. This protects the interior surfaces from scratches and spills. Place felt pads on the corners of items that sit on shelves. This prevents them from scratching the cabinet bottom.
Consider adding small bumpers to the inside of cabinet doors. These are tiny adhesive pads. They prevent the doors from hitting the cabinet frame hard when closing. This reduces wear and tear on the finish.
Be mindful when opening and closing doors and drawers. Avoid slamming them. Teach family members to be gentle. Small habits protect your newly finished cabinets.
Frequently Asked Questions
Can I paint over laminate kitchen cabinets?
Yes, you can paint over laminate kitchen cabinets. They require specific preparation. You need to clean them very well. Use a high-quality bonding primer designed for slick surfaces. This helps the paint stick. Follow up with a durable topcoat. Staining is not possible on laminate.
How long does it take to change the color of kitchen cabinets?
The process can take several days to a week or more. Much of this time is for preparation. Drying and curing times between coats of primer, paint, and topcoat add to the duration. For example, painting alone can take 3-5 days of active work and waiting.
Do I need to remove cabinet doors to paint them?
Yes, removing cabinet doors and drawers is highly recommended. It allows for better access to all surfaces. You get a smoother, more even finish this way. Painting them flat reduces drips and runs. It also prevents paint from getting on hinges.
What is the best type of paint for kitchen cabinets?
Durable paints are best for kitchen cabinets. Alkyd enamel paints offer a hard, smooth finish. Water-based acrylic-alkyd hybrid paints are also good choices. They combine the easy cleanup of water-based paints with the durability of oil-based. Pick a paint designed for high-traffic areas.
How do I prepare cabinets before painting or staining?
Preparation is crucial. First, remove all hardware and label doors. Clean cabinets thoroughly with a degreaser. Repair any dents or holes with wood filler. Sand all surfaces to create a smooth, gripping base. Apply a suitable primer before painting.
Can I stain cabinets that are already painted?
No, you cannot stain cabinets that are already painted. Stain needs to absorb into bare wood. Paint creates a barrier on the wood surface. If you want to stain painted cabinets, you must first strip all the paint completely. Then, sand down to bare wood.
Conclusion
Changing the colour of kitchen cabinets offers a powerful way to update your home. It provides a fresh look without the cost of a full renovation. We explored the different methods, from painting to staining and wraps. Each option allows you to transform your kitchen’s aesthetic.
Remember, preparation is the foundation of success. Cleaning, sanding, and priming are crucial steps. They ensure your new finish adheres well and lasts for years. Choosing the right paint or stain also makes a big difference. With careful application and patience, you can achieve results you will love. Take your time, follow these steps, and enjoy your beautifully updated kitchen. Your efforts will result in a space that feels brand new and reflects your style.
- kitchen cabinet makeover
- cabinet painting
- DIY kitchen update
- cabinet staining
- kitchen renovation

Davia Murnell
Room Cleaning Expert
Before joining HEG, I spent over a decade running my own window cleaning business, where I perfected streak-free techniques and learned the ins and outs of specialty glass care. Now, I bring that expertise to a broader mission—helping homeowners maintain sparkling windows and beautiful outdoor spaces. From skylights and sliding doors to patio glass and outdoor furniture, I believe every surface deserves attention and care. I share practical tips and proven methods that make even the toughest cleaning jobs feel manageable. Whether you're battling pollen on the porch or smudges on high windows, I’m here to help you see your home in a whole new light—literally.