· Todd Martin · Kitchen Maintenance · 18 min read
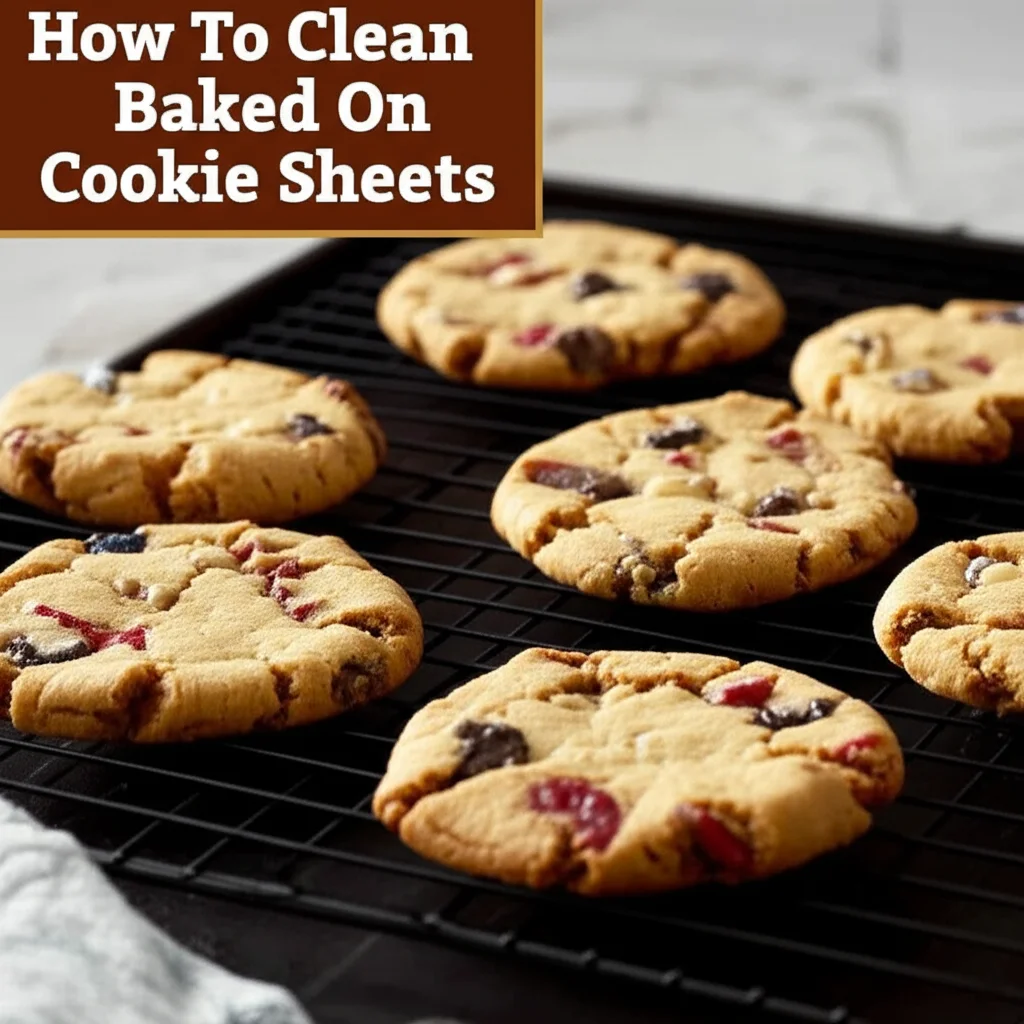
How To Clean Baked On Cookie Sheets
Unlock the Secret to Cleaning Baked On Cookie Sheets
Every home baker knows the joy of fresh cookies. We also know the frustration of a cookie sheet covered in stubborn, baked-on stains. These dark spots are not just ugly; they can affect how your food cooks. Over time, grease and food particles burn onto the surface, creating a sticky, dark layer. This buildup makes your sheets less efficient and less hygienic.
It is a common problem, but there are simple solutions. I know many people struggle with this challenge. Cleaning baked-on cookie sheets does not require harsh chemicals or endless scrubbing. You can bring back the shine using common household items. This guide will show you how to clean these stains effectively. I will cover various methods, from gentle soaks to heavy-duty treatments. You will learn the best ways to restore your cookie sheets. We will also discuss how to keep them clean for a long time. Get ready to make your bakeware look new again!
Takeaway:
- Restore your baked-on cookie sheets using simple, effective household methods.
- Prevent future grime by cleaning promptly and using parchment paper.
- Choose the right cleaning method for your sheet’s material.
To clean baked-on cookie sheets, mix baking soda with a mild abrasive like hydrogen peroxide or dish soap to form a paste. Apply this paste, let it sit for several hours or overnight, then scrub vigorously with a non-scratch pad. For tougher stains, combine baking soda with white vinegar or use a specialized cleaner.
Why Do Cookie Sheets Get Baked-On Grime?
Cookie sheets are kitchen workhorses. They handle high heat, sticky doughs, and greasy foods. This constant use leads to inevitable buildup. Understanding why stains occur helps us prevent them. When fats and sugars heat up, they caramelize and burn onto the surface. This creates a hard, dark layer.
This process happens over many baking sessions. Each time you bake, a small amount of residue might remain. This residue then bakes on further during the next use. Over time, these layers accumulate. They become tough, resistant to normal washing. Even if you wipe down your sheets, some particles remain.
Heat plays a big role. High oven temperatures bake the grease onto the metal. Non-stick coatings can also degrade over time. This makes them more prone to staining. Scratches on the surface create tiny crevices. These crevices trap food particles. Once trapped, these particles become impossible to remove with a simple sponge. I have seen many sheets develop this issue. Knowing the cause helps us choose the best cleaning strategy.
Gentle Methods: Cleaning Baked On Cookie Sheets with Household Items
You do not always need harsh chemicals to clean baked-on cookie sheets. Many common household items work wonders. These methods are safe, economical, and effective for most stains. They use natural abrasive and degreasing properties. I find these simple approaches often surprise people with their power.
Baking Soda and Hydrogen Peroxide Method
This combination creates a powerful paste. Baking soda acts as a mild abrasive. Hydrogen peroxide breaks down grease. This method is excellent for general baked-on stains. It is also gentle on most sheet materials.
Here is how I use this method:
- Gather your supplies: You need baking soda, hydrogen peroxide, a non-abrasive sponge or cloth, and a scrub brush.
- Sprinkle baking soda: Lightly sprinkle a layer of baking soda over the entire stained area of the cookie sheet. Make sure the entire affected surface is covered.
- Add hydrogen peroxide: Pour hydrogen peroxide slowly over the baking soda. You will see it fizz slightly. This reaction helps lift the grime.
- Form a paste: Use your fingers or a spoon to gently spread the mixture. It should form a thick paste. If it is too thin, add more baking soda. If it is too thick, add a little more hydrogen peroxide.
- Let it sit: This is crucial. Allow the paste to sit on the cookie sheet for at least 30 minutes. For tougher stains, I often leave it for a few hours or even overnight. The longer it sits, the more it breaks down the baked-on residue.
- Scrub away: After soaking, grab a non-scratch scrub pad or a soft brush. Gently scrub the paste into the stains. You will notice the grime starting to lift away. For areas with very stubborn residue, I sometimes use a plastic scraper.
- Rinse thoroughly: Rinse the cookie sheet under warm water. Make sure all paste and loosened grime wash away. Repeat if necessary.
- Dry completely: Dry the sheet immediately to prevent water spots or rust.
This method is great for everyday buildup. It often restores a good amount of the sheet’s original appearance. It is a good first step before trying stronger options. For similar cleaning challenges, you might find useful tips on how to clean baking sheets. This can provide broader insights into general baking sheet care.
Baking Soda and Vinegar Soak
This classic cleaning duo is powerful. Vinegar is acidic, and baking soda is alkaline. When combined, they create a fizzing action. This reaction helps loosen stubborn grime. I often turn to this method for tougher, older stains.
Follow these steps:
- Prep your sheet: Sprinkle a generous layer of baking soda over the entire baked-on area of the cookie sheet.
- Pour white vinegar: Slowly pour white vinegar over the baking soda. It will immediately begin to fizz. This is the chemical reaction at work.
- Let it soak: Let the mixture sit for at least 30 minutes. For very heavy buildup, let it soak for several hours. You can even leave it overnight. The bubbles work to lift the gunk.
- Add hot water (optional): For an even deeper soak, you can transfer the sheet to a larger basin or sink. Fill it with hot water, enough to submerge the sheet. Add more baking soda and vinegar to the water. Let it soak for a few hours.
- Scrub and rinse: After soaking, use a non-scratch scrubber or a plastic scraper. Gently scrub the loosened residue. Rinse the sheet thoroughly under warm water.
- Repeat if needed: For very old, thick layers of grime, you might need to repeat this process. Sometimes, it takes a few attempts to fully remove all the baked-on mess.
This method is highly effective for breaking down greasy, burnt-on residues. It uses readily available ingredients. I personally find it very satisfying to watch the grime lift away. These methods are excellent starting points for restoring your bakeware. You can also learn about cleaning other items with similar stubborn grease issues by checking out how to clean baked-on grease from pans. This provides valuable knowledge for all your kitchen cleaning needs.
Tackling Tough Stains: Heavy-Duty Solutions for Baked On Cookie Sheets
Some baked-on stains are incredibly stubborn. They laugh at gentle scrubs. For these challenging spots, you need more powerful solutions. These methods use stronger agents. They break down even the most entrenched grime. I reserve these for truly difficult cases.
Dishwasher Tablet Scrub
Dishwasher tablets are designed to break down tough food residues. They contain powerful enzymes and detergents. This makes them surprisingly effective on baked-on cookie sheets. I have found this method to be a true game-changer for deeply soiled sheets.
Here is how to use a dishwasher tablet:
- Wet the sheet: Lightly wet the stained areas of your cookie sheet. You want the surface to be damp, not soaking wet.
- Grab a tablet: Take one dishwasher tablet. I prefer using a tablet over a gel or powder for this method.
- Start scrubbing: Use the dishwasher tablet itself as a scrubbing block. Rub it directly onto the baked-on stains. Apply a bit of pressure. As you rub, the tablet will slowly dissolve. It will release its cleaning agents.
- Form a paste: As the tablet dissolves, it will create a paste-like residue on the sheet. Continue scrubbing with this paste. You can add a little more water if the paste becomes too dry.
- Focus on tough spots: Pay extra attention to the darkest, most stubborn areas. The abrasiveness of the tablet combined with its cleaning power works wonders.
- Rinse thoroughly: Once the stains are gone, rinse the cookie sheet completely. Make sure no detergent residue remains.
- Dry immediately: Dry the sheet right away to prevent any water spots.
This method is powerful because of the concentrated cleaning agents in the tablet. It works well on many types of metal sheets. I would avoid it on non-stick surfaces, as it can be too abrasive.
Oven Cleaner (Caution)
Oven cleaner is a very strong chemical solution. It is designed to dissolve baked-on grease in ovens. It can also work on cookie sheets. However, this method requires extreme caution. I only recommend this as a last resort. Always use it in a well-ventilated area. Protect your skin and eyes.
Steps for using oven cleaner:
- Work in a well-ventilated area: Go outside or open windows wide.
- Protect yourself: Wear rubber gloves and eye protection. I also recommend old clothes.
- Cover work surface: Lay down old newspapers or a drop cloth. This protects your floor or counter.
- Spray the sheet: Lightly spray the baked-on areas of the cookie sheet with oven cleaner. Follow the product instructions. Do not overspray.
- Let it sit: Allow the cleaner to sit for the time specified on the product label. This is usually 15-30 minutes. Do not leave it on for too long.
- Scrub carefully: Using a non-abrasive pad or plastic scraper, carefully scrub the loosened grime. Be gentle, as the cleaner has done most of the work.
- Rinse thoroughly, repeatedly: This step is critical. Rinse the sheet many, many times under hot water. Ensure all chemical residue is gone. I usually rinse it, then wash with dish soap, then rinse again multiple times.
- Dry completely: Dry the sheet immediately.
Oven cleaner can be harsh on aluminum. It can discolor or pit the metal. Use this method sparingly and with great care. It is very effective but has risks. For insights into cleaning other kitchen surfaces with similar issues, you might find it helpful to read about how to clean old cookie sheets. This can expand your knowledge on restoring neglected bakeware.
Material Matters: Cleaning Different Types of Cookie Sheets
Not all cookie sheets are the same. Their material affects how you should clean them. Using the wrong method can damage your sheet. Knowing your material helps you choose the safest, most effective approach. I always check the material before starting.
Aluminum Cookie Sheets
Aluminum is common because it heats evenly. However, it can react to certain cleaners. Highly alkaline substances like some oven cleaners or even too much baking soda can cause discoloration or pitting. This leaves dark, permanent stains.
- Best approach: For aluminum, stick to the baking soda and hydrogen peroxide method or the baking soda and vinegar soak. These are generally safe.
- Avoid: Do not use oven cleaner unless absolutely necessary and with extreme caution. Avoid abrasive scrubbers like steel wool. These can scratch the soft metal.
- Care tips: Dry aluminum sheets immediately after washing. This prevents water spots and oxidation.
Non-Stick Cookie Sheets
Non-stick coatings make baking easy. But they are delicate. Harsh scrubbing or abrasive cleaners can damage the coating. Once scratched, non-stick properties reduce. Food will start to stick.
- Best approach: Use the gentlest methods first. Baking soda and dish soap paste is ideal. Allow plenty of soak time. A soft cloth or sponge is best for scrubbing.
- Avoid: Never use metal scrubbers, steel wool, or abrasive powders. Avoid dishwasher tablets or oven cleaner. These will ruin the non-stick surface.
- Care tips: Hand wash non-stick sheets. Dishwashers can degrade the coating over time. Use silicone or wooden utensils when baking to prevent scratches.
Stainless Steel Cookie Sheets
Stainless steel is durable and less prone to staining. It can handle more aggressive cleaning methods. It is also less reactive than aluminum. This makes it a robust choice for heavy use.
- Best approach: All methods listed can be used on stainless steel. Baking soda and hydrogen peroxide, baking soda and vinegar, or even the dishwasher tablet scrub are safe.
- Consider: If stains are very tough, a paste of cream of tartar and water can be effective. Rub it on, let it sit, then scrub.
- Care tips: Stainless steel can sometimes develop heat tint (blue or rainbow discoloration). This is harmless. To remove it, rub with a cloth dampened with vinegar. Always dry thoroughly to prevent water spots.
Knowing your sheet’s material prevents accidental damage. It ensures your cleaning efforts are productive. I always recommend identifying the material first.
Essential Tools and Techniques for Effective Scrubbing
Having the right tools makes a huge difference when cleaning baked-on cookie sheets. The technique you use also impacts success. You can make the job easier and more effective. I rely on a few key items.
Recommended Tools
- Non-scratch scrub pad: These are crucial. They provide abrasive power without damaging surfaces. Look for pads made of nylon mesh or similar gentle materials. I never use green scouring pads on anything but the toughest stainless steel.
- Plastic scraper: A plastic dough scraper or a plastic spatula can be incredibly useful. They help lift stubborn, baked-on bits without scratching the metal. I often use the edge of a credit card for small, tough spots.
- Old toothbrush: A toothbrush is perfect for getting into corners and edges. It can scrub small, concentrated areas of grime.
- Microfiber cloths: Great for wiping and polishing after cleaning. They help ensure no residue is left behind.
- Large basin or sink: For soaking methods, you need a space big enough to submerge your sheet.
Scrubbing Techniques
- Soak first: Always give your chosen cleaning solution enough time to work. Soaking breaks down the grime. This makes scrubbing much easier. Do not rush this step.
- Gentle but firm pressure: Apply steady, even pressure when scrubbing. Do not press so hard that you bend the sheet or scratch the surface. Let the cleaning agent and the scrubbing tool do the work.
- Circular motions: For even cleaning, scrub in small circular motions. This helps dislodge grime from all angles.
- Work in sections: If your sheet has large areas of grime, work on one section at a time. This keeps the cleaning solution concentrated where you need it most.
- Scrape, then scrub: For very thick, hard buildup, use a plastic scraper first. Remove as much loose material as possible. Then apply your cleaning paste and scrub. This prevents spreading the grime around.
- Rinse and inspect: After scrubbing, rinse the sheet thoroughly. Inspect it closely. If you see remaining grime, repeat the process. Sometimes, multiple rounds of soaking and scrubbing are needed for really tough cases.
Using the right tools with proper technique saves you time and effort. It also protects your cookie sheets from damage. I have learned that patience is key here.
Preventing Future Baked-On Stains on Your Cookie Sheets
Cleaning baked-on cookie sheets is hard work. The best approach is to prevent the stains from forming. Simple habits can save you a lot of effort later. I always emphasize prevention in my kitchen.
Here are key preventative measures:
- Use parchment paper or silicone mats: This is my number one tip. Lining your cookie sheet with parchment paper or a silicone baking mat creates a barrier. It catches all drips, spills, and grease. Your sheet stays clean underneath. It is also excellent for non-stick baking.
- Clean immediately after use: Do not let food residues sit and bake on. As soon as the sheet cools, wash it. Use hot water and dish soap. The fresher the stain, the easier it is to remove. I often give my sheets a quick wash right after they come out of the oven and cool down.
- Avoid high heat for greasy foods: When baking very greasy items, consider using a lower temperature for a longer time. This can reduce how much grease burns onto the sheet. Or, use a wire rack set inside the sheet to lift food away from pooling grease.
- Do not use cooking sprays (on non-stick): Some cooking sprays contain ingredients that can leave a sticky residue. Over time, this residue bakes onto the non-stick surface. It becomes hard to remove. Use butter, oil, or parchment paper instead.
- Store sheets properly: Store cookie sheets in a dry place. This prevents rust or moisture buildup. I store mine vertically in a cabinet. This allows air to circulate.
- Regular maintenance cleaning: Even with parchment paper, a quick wash after each use is smart. Every few months, give your sheets a deeper clean. Use a baking soda soak to remove any light buildup before it becomes a major problem.
By adopting these habits, you can keep your cookie sheets looking great. You will spend less time scrubbing and more time baking. Prevention is always easier than a cure.
Restoring and Maintaining Your Cookie Sheets’ Shine
After deep cleaning, you want to keep your cookie sheets looking good. Restoring their shine adds to kitchen appeal. Proper maintenance extends their life. I believe well-maintained tools perform better.
Here are tips for restoration and ongoing care:
- Polish after cleaning: For stainless steel or aluminum sheets, a light polish can restore shine. After rinsing and drying, rub the sheet with a microfiber cloth. For stainless steel, you can use a tiny bit of mineral oil or a specialized stainless steel cleaner. For aluminum, simple buffing works.
- Seasoning (for some sheets): Some aluminum or steel sheets can benefit from seasoning. This involves baking a thin layer of oil onto the surface. This creates a natural non-stick layer. It also prevents future sticking and staining.
- How to season: Lightly coat the clean, dry sheet with a very thin layer of vegetable oil. Wipe off any excess. Bake upside down in an oven at 300°F (150°C) for one hour. Let it cool in the oven. Repeat this process a few times for a good layer.
- Note: Do not season non-stick sheets.
- Address new stains quickly: If you see a small new stain forming, deal with it right away. A quick scrub with baking soda and dish soap can prevent it from becoming baked on.
- Avoid stacking wet sheets: Stacking wet sheets can trap moisture. This leads to water spots or even rust on some materials. Always dry sheets completely before storing them.
- Hand wash preference: Even if your sheet is “dishwasher safe,” hand washing is often gentler. Dishwasher detergents can be harsh. They can dull finishes or damage non-stick coatings over time. I always hand wash my good baking sheets.
- Inspect regularly: Take a moment to inspect your sheets before and after use. Look for new stains, scratches, or any damage. Addressing issues early prevents them from worsening.
By following these simple steps, you can keep your cookie sheets in excellent condition. This ensures they perform well for years to come. It also means less time spent scrubbing away baked-on grime. For related information on maintaining kitchen items, you may find our guide on how to clean the bottom of a pan useful. It offers more tips for tackling tough residues on various cooking surfaces.
FAQ Section
How do I remove black stains from cookie sheets?
To remove black baked-on stains, start with a paste of baking soda and hydrogen peroxide. Apply it, let it sit for several hours, then scrub with a non-scratch pad. For very stubborn black spots, a dishwasher tablet dissolved with a little water and scrubbed directly onto the stain can be effective. Rinse thoroughly afterwards.
Can I use steel wool to clean baked-on cookie sheets?
No, you should not use steel wool on most cookie sheets. Steel wool is too abrasive. It will scratch aluminum and non-stick surfaces, permanently damaging them. For stainless steel, it might be acceptable for very tough spots, but a plastic scraper or nylon scrub pad is generally safer and effective enough.
How do you clean cookie sheets without scrubbing?
While some scrubbing is often necessary, you can reduce it by maximizing soak time. Use a baking soda and vinegar soak, or a baking soda and hydrogen peroxide paste. Let these solutions sit on the baked-on grime for several hours or overnight. This allows the chemicals to break down the stains, making them easier to wipe away with minimal scrubbing.
Why do my cookie sheets turn brown or black?
Cookie sheets turn brown or black due to the caramelization of sugars and the burning of fats and food residues. Over time, these residues accumulate and bake onto the surface. This creates a hard, dark layer. High oven temperatures accelerate this process. This buildup is often called “baked-on grime.”
Is it safe to use oven cleaner on cookie sheets?
Using oven cleaner on cookie sheets is generally not recommended as a first choice. It is a very harsh chemical. It can damage aluminum by causing discoloration or pitting. For non-stick sheets, it will destroy the coating. If you must use it, do so as a last resort, in a well-ventilated area, and with strict safety precautions.
How often should I clean my cookie sheets deeply?
The frequency depends on use. For regular bakers, a deep clean every few months is ideal to prevent major buildup. For everyday maintenance, always wash sheets immediately after they cool down. Using parchment paper or silicone mats can significantly reduce the need for frequent deep cleaning.
Conclusion
Cleaning baked-on cookie sheets can seem like a daunting task, but it does not have to be. By understanding why these stains occur and using the right methods, you can restore your bakeware to its former glory. We explored various effective techniques, from gentle household remedies like baking soda and vinegar to more powerful solutions for stubborn grime. Remember to always consider the material of your cookie sheet before choosing a cleaning method. This prevents damage and ensures optimal results.
Beyond cleaning, proactive prevention is key. Using parchment paper, cleaning sheets immediately after use, and proper storage habits will significantly extend the life and appearance of your cookie sheets. I hope these insights empower you to tackle even the toughest baked-on stains with confidence. Say goodbye to dingy, stained bakeware and hello to shiny, ready-to-use cookie sheets. Keep your kitchen tools in top shape and enjoy your baking adventures even more! For more essential home cleaning tips and guides, visit Home Essentials Guide.
- cookie sheet cleaning
- baked-on grease
- kitchen cleaning
- DIY cleaning
- baking sheet care
- home cleaning hacks
- grease removal

Todd Martin
Senior Writer
With over 15 years of experience in home renovation and design, I started HEG to share what I’ve learned with homeowners who want to create spaces that are both beautiful and functional. I’ve always believed in a hands-on approach, and over the years, I’ve picked up practical solutions that actually work. Through HEG, I aim to make home improvement more approachable, sharing real tips that help you create a home you truly love.