· Davia Murnell · Kitchen Maintenance · 20 min read
How To Clean Sticky Wood Kitchen Cabinets Before Painting

Prepare Wood Cabinets: Clean Sticky Surfaces Before Painting
Sticky wood kitchen cabinets pose a real challenge. Over time, cooking fumes, grease, and dust settle on surfaces. This creates a gummy, unpleasant film. If you plan to paint your cabinets, ignoring this stickiness is a mistake. A clean surface ensures paint adheres properly and looks good.
Properly cleaning sticky wood kitchen cabinets before painting is critical for a lasting finish. Paint simply will not stick well to grease or grime. It will chip, peel, or look uneven. This guide provides a detailed approach. We will help you transform your cabinets from grimy to gorgeous. You will learn the best methods and products to achieve a perfectly clean surface.
Takeaway
Preparing sticky wood kitchen cabinets for painting requires thorough cleaning.
- Remove everything: Clear cabinets and remove hardware.
- Choose your cleaner: Use a strong degreaser or TSP alternative.
- Scrub diligently: Work in small sections to remove all grime.
- Rinse thoroughly: Ensure no cleaning residue remains.
- Dry completely: Allow ample time for cabinets to dry before priming.
- Lightly sand: Scuff the surface for optimal paint adhesion.
To clean sticky wood kitchen cabinets before painting, first remove hardware and items. Then, use a strong degreaser or a TSP alternative to scrub away all grease and grime. Rinse surfaces thoroughly with clean water, ensuring no residue remains, and allow the wood to dry completely before applying primer or paint.
Understanding Sticky Wood Cabinet Contaminants
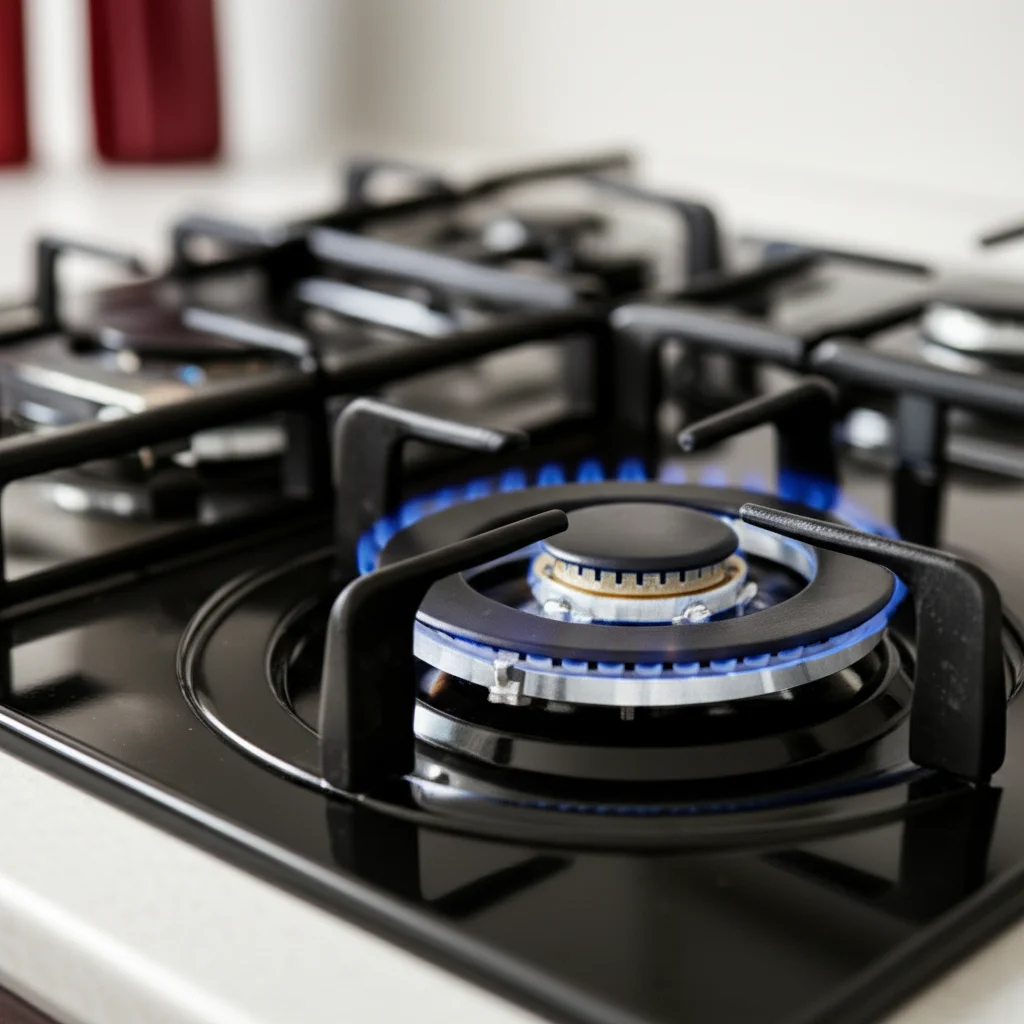
My kitchen cabinets often feel sticky, especially those near the stove. This common problem occurs from a buildup of various substances. Grease from cooking, dust, and evaporated food particles combine to create a tenacious film. This sticky layer is not just unsightly; it is a major obstacle for painting.
When you cook, tiny grease particles become airborne. These particles float through the kitchen. They eventually settle on surfaces like your wood cabinets. Over time, more grease layers build up. Dust from the air then sticks to this greasy film. This creates a thick, sticky residue. This residue can feel gummy and make your cabinets look dirty.
This greasy, sticky buildup directly impacts how paint adheres. Paint needs a clean, porous surface to bond effectively. If you paint over a sticky, greasy cabinet, the paint will not stick. It might bubble, peel, or chip off quickly. The new paint job will look uneven and unprofessional. Skipping the cleaning step guarantees a poor paint outcome. Preparing the surface properly saves you time and effort in the long run.
Different types of wood finishes also react uniquely to grime. Sealed wood might show grease less initially. Unfinished or poorly sealed wood can absorb more grease. This makes it harder to clean. Regardless of the finish, deep cleaning is essential. You must remove all surface contaminants. This creates a proper foundation for your new paint.
You might be surprised by how much grime accumulates. Areas around handles, knobs, and cabinet edges often collect the most stickiness. These high-touch spots need extra attention during cleaning. Focus on these areas to ensure a uniform clean. A truly clean cabinet surface promotes strong paint adhesion. This prepares your cabinets for a beautiful, durable finish. Learn how to clean sticky kitchen cabinets to ensure your surfaces are completely free of stubborn grime and grease before you begin painting. Discover the best methods for how to clean grease from kitchen cabinets to effectively remove common sticky contaminants. Find practical tips on how to clean greasy cabinets for optimal paint adhesion.
Gathering Your Cleaning Arsenal: Essential Tools & Supplies
Before starting any big cleaning project, I always gather all my supplies. Having everything ready saves time and prevents interruptions. For cleaning sticky wood kitchen cabinets before painting, specific tools and products work best. Using the right supplies ensures a thorough clean. This also protects your cabinet surfaces.
You will need several key items. Start with rubber gloves to protect your hands from strong cleaners. Grab a few buckets; one for cleaning solution and one for rinse water. Microfiber cloths are excellent for cleaning and rinsing. They absorb well and leave no lint behind. A stiff-bristled brush or a scrubber sponge helps with stubborn spots. These tools provide the necessary abrasion.
For cleaning agents, I recommend a good degreaser. Heavy-duty kitchen degreasers are formulated to cut through grease. Trisodium Phosphate (TSP) is a very effective cleaner for tough grime. However, it is strong and requires careful handling. TSP alternatives are also available. These products offer similar cleaning power with less harshness. You might also consider a simple mixture of warm water and a few drops of dish soap for lighter grime. However, for sticky cabinets, a stronger solution is usually necessary.
Don’t forget painter’s tape and drop cloths. These protect your floors, countertops, and appliances from cleaning solution splatters. Eye protection is also wise, especially when working with strong chemicals. Prepare plenty of clean water for rinsing. You will need to rinse the cabinets thoroughly to remove all cleaner residue. Having a designated rinsing bucket makes this process easier.
Having a spray bottle can also be useful for applying cleaning solutions. This allows for even distribution and targeted application. Make sure to choose a spray bottle with a strong, even mist. A well-stocked cleaning kit makes the job much smoother. It ensures you can tackle any level of stickiness effectively. Proper preparation with the right tools sets the stage for a successful painting project. For more guidance on preparing surfaces, see our guide on how to clean old kitchen cabinets and how to handle historical grime. Explore DIY solutions for cleaning your kitchen cabinets with wood surfaces to ensure you have the right products on hand.
Step-by-Step Pre-Painting Preparation: Disassembly & Protection
Before cleaning sticky wood kitchen cabinets, proper disassembly and protection are essential. I always start by emptying all contents from the cabinets and drawers. This makes the cabinets lighter and easier to work with. It also prevents any cleaning solutions from getting inside.
Next, remove all doors and drawer fronts. Use a screwdriver to detach the hinges and hardware. It is vital to label everything as you go. I use masking tape and a marker to label each door and drawer with its corresponding cabinet opening. For example, “Upper Left Cabinet Door 1” and “Drawer Front 3.” This makes reassembly much easier later. You will thank yourself for this step.
Carefully remove all cabinet hardware, including hinges, handles, and knobs. Place these items in labeled plastic bags. Keep the screws with their respective hardware. This prevents losing small parts. It also keeps them safe from cleaning agents and paint. You can clean or replace the hardware later.
After removing all removable parts, protect the surrounding areas. Lay down drop cloths or old sheets on the floor beneath the cabinets. Use painter’s tape to mask off any adjacent walls, countertops, or appliances. This prevents accidental splatters of cleaning solution. It also protects these surfaces from paint later on. Proper masking ensures only the cabinets get cleaned and painted.
This stage sets up the entire cleaning and painting process for success. Working with disassembled parts is more efficient. You can clean all surfaces evenly, including edges and hidden spots. Protecting your home ensures a cleaner, safer work environment. This systematic approach saves time and reduces potential headaches. A well-prepared workspace is the foundation for a professional-looking finish. Prepare your cabinets effectively for a fresh coat of paint by learning how to clean cabinets before painting. Ensure your furniture is pristine and ready for paint application by reviewing how to clean furniture before painting.
Effective Cleaning Solutions for Sticky Wood Cabinets
Choosing the right cleaning solution is crucial for tackling sticky wood kitchen cabinets. My approach depends on the severity of the stickiness. For light grime, a simple dish soap solution might suffice. For tough, greasy residue, you need something stronger. This ensures all contaminants are removed before painting.
One common and highly effective cleaner is Trisodium Phosphate (TSP). TSP is a heavy-duty degreaser that cuts through layers of grease and grime. It prepares surfaces for painting exceptionally well. When using TSP, always mix it according to the manufacturer’s instructions. Wear gloves and eye protection. Rinse surfaces thoroughly after using TSP to remove all residue. This prevents paint adhesion issues.
If you prefer a less harsh option, many TSP alternatives exist. These products often use powerful degreasing agents that are safer for home use. Look for cleaners specifically labeled for kitchen degreasing or cabinet preparation. Brands like Krud Kutter or Simple Green are popular choices. They effectively dissolve grease without the intensity of TSP. Always test any cleaner in an inconspicuous area first. This checks for any adverse reactions on your wood finish.
For a DIY approach, a vinegar solution can also work on some sticky residues. Mix equal parts white vinegar and warm water in a spray bottle. Vinegar is a natural degreaser and disinfectant. However, it might not be strong enough for very heavy grease buildup. It also needs thorough rinsing, as its acidic nature could affect wood over time. While it’s eco-friendly, I find it less effective for truly stubborn, caked-on kitchen grime.
Regardless of your choice, the goal is to completely dissolve the sticky layer. Apply the chosen cleaner generously. Let it sit for a few minutes to break down the grease. Then, scrub with a non-abrasive sponge or cloth. Repeat the process if necessary. The surface must feel completely clean, not slick or tacky, before moving on to rinsing. This ensures your cabinets are ready for a perfect paint job. Get a thorough understanding of how to clean sticky kitchen cabinets by examining various cleaning agents. Learn effective methods on how to clean grease from kitchen cabinets to ensure a pristine surface for painting. Understand how to remove stubborn marks with our guide on how to clean sticky residue from various surfaces.
The Deep Clean Process: Tackling Stubborn Sticky Grime
Once you have your cleaning solution, it’s time for the deep clean. This is where you remove all the stubborn sticky grime. I always work in small sections. This prevents the cleaning solution from drying on the cabinet surface. It also allows me to focus on each area thoroughly.
First, spray or wipe your chosen cleaning solution onto a small section of the cabinet. Let the solution sit for a few minutes. This allows it to penetrate and loosen the sticky grime. The dwell time helps dissolve the grease. Do not let the solution dry on the wood. This could leave streaks or damage the finish.
Next, take a clean cloth or a non-abrasive scrubber sponge. Begin scrubbing the section. You might need to apply some elbow grease for heavily soiled areas. For stubborn spots, a stiff-bristled brush can be helpful. Pay extra attention to edges, corners, and areas around where handles were. These spots often accumulate the most grime. You will see the grease and dirt lifting off.
As you scrub, periodically rinse your cloth or sponge in a separate bucket of clean water. This prevents you from spreading dirt back onto the cabinet. You may need to change your cleaning solution and rinse water frequently. The water will become cloudy quickly. Fresh water ensures effective cleaning. Repeat the cleaning process on the same section if the grime persists. The surface should feel smooth and clean, not sticky or tacky.
After scrubbing a section, immediately wipe it down with a clean, damp cloth. This removes any loosened grime and cleaning solution residue. Follow up with a dry cloth to absorb excess moisture. Move to the next section. Continue this process until all cabinet surfaces are clean. This meticulous approach ensures that every inch of your wood cabinets is ready for the next step. It also helps achieve an even paint application later. For thorough removal of deep-set dirt, refer to our comprehensive guide on how to clean grime off kitchen cabinets. Discover the best techniques for how to clean kitchen cabinets without removing finish to preserve your wood while cleaning. Explore the proper methods for how to clean wood cabinets safely and effectively.
Rinsing and Drying: Crucial Steps for Paint Adhesion
After the deep cleaning, thorough rinsing is the next critical step. Many people underestimate its importance. Any cleaning solution residue left on the wood can interfere with paint adhesion. It can cause streaks, peeling, or a dull finish. I always make sure to rinse meticulously.
To rinse, use a clean cloth dampened with plain warm water. Wipe down all surfaces you just cleaned. Do not saturate the cloth; it should be damp, not dripping. The goal is to remove all traces of the cleaning agent and loosened dirt. As you wipe, frequently rinse your cloth in clean water. Change the rinse water often. This prevents you from simply redistributing residue onto the cabinets.
I often do a second or even third pass with a fresh, damp cloth. This ensures no soap film or degreaser residue remains. The surface should feel clean and squeaky. If you feel any slickness or stickiness, repeat the rinsing process. Pay close attention to corners and crevices. Residue can hide there. This step is about creating a truly neutral surface.
Once rinsed, thorough drying is equally important. Wood is porous and absorbs moisture. Painting over damp wood can lead to issues like bubbling, mildew, or poor adhesion. I use clean, dry microfiber cloths to wipe down all surfaces immediately after rinsing. These cloths are excellent at absorbing moisture.
After wiping, allow the cabinets to air dry completely. This might take several hours, or even overnight, depending on humidity levels. I ensure good ventilation in the room. You can open windows or use fans to speed up the drying process. Do not rush this step. The wood must be bone dry before you even think about priming or painting. Check all surfaces, especially inside corners and edges, for any dampness. A properly dry surface is paramount for a professional and durable paint finish. Ensure your cabinet surfaces are perfectly prepped for painting by understanding how to clean cabinets before painting. Discover the essential techniques for how to clean wood after sanding before painting to achieve a flawless finish. Learn the best practices for how to clean furniture before painting to ensure proper adhesion.
Sanding and Final Prep: Ensuring a Smooth Surface
Once your wood cabinets are thoroughly clean and dry, a light sanding is often the next step. This process, known as “scuff sanding,” does not aim to remove the existing finish entirely. Instead, it creates a slightly roughened surface. This texture provides “tooth” for the primer and paint to grip onto. This significantly improves adhesion and durability.
I use a fine-grit sandpaper, typically 180 or 220 grit, for this task. Sanding blocks work well for flat surfaces. For detailed areas and crevices, flexible sanding sponges are useful. Lightly sand all surfaces that will be painted. Use gentle, even pressure. Sand with the grain of the wood. Avoid sanding against the grain. This can leave noticeable scratches.
The goal is to dull the existing finish, not remove it. You should see a fine, dusty powder as you sand. This indicates you are properly scuffing the surface. Pay extra attention to any remaining stubborn bumps or imperfections. Sanding helps smooth these out. This step is crucial for achieving a uniform, professional-looking paint job.
After sanding, you will have a layer of fine dust on your cabinets. This dust must be completely removed. Use a shop vacuum with a brush attachment to vacuum all surfaces. Get into all the corners and crevices. After vacuuming, use a tack cloth to wipe down every surface. A tack cloth is a sticky cloth designed to pick up fine dust particles. It ensures no dust remains.
This final prep ensures a pristine surface. Any dust left behind will mix with the paint. This creates bumps and an uneven finish. The goal is a perfectly smooth, dust-free, and scuffed surface. Your cabinets are now ready for primer. This careful preparation guarantees the best possible foundation for your new paint. Learn crucial steps for how to clean wood after sanding before painting to guarantee optimal paint adhesion. For comprehensive advice on preparing your surfaces, explore our detailed guide on how to clean furniture before painting. Understand the process of properly cleaning cabinets before painting by visiting our guide on how to clean cabinets before painting.
Troubleshooting Common Sticky Cabinet Cleaning Challenges
Sometimes, cleaning sticky wood kitchen cabinets presents unique challenges. Even with the right tools, you might encounter persistent stickiness. Do not get discouraged. Common issues have solutions. Addressing these challenges correctly ensures a successful paint job.
One common problem is heavily caked-on grease. This grease might have been there for years. My usual cleaning solutions might not remove it in one pass. In such cases, I let the degreaser sit longer. You can even reapply the cleaner if it starts to dry. For extreme cases, a second, more concentrated application of TSP or a strong commercial degreaser might be necessary. Be patient and repeat the scrubbing process. You will eventually break down the layers.
Another challenge involves wood swelling or discoloration. This can happen if too much water or a too-strong cleaner is used. Always use damp, not soaking wet, cloths. Avoid leaving cleaning solutions on the wood for extended periods. If minor swelling occurs, allow the wood extra drying time. Gentle sanding can sometimes help smooth out minor raised grain once dry. For severe discoloration, professional wood repair might be needed, or you might proceed, knowing the paint could hide it.
Sometimes, after cleaning, a faint tackiness remains. This often means some cleaning residue is still present. It might also mean the wood has absorbed some cleaner. Repeat the rinsing process. Use a very clean, damp cloth and multiple passes. You want the surface to feel completely dry and smooth. Good ventilation helps evaporate any lingering residue. This ensures a clean surface.
Finally, some “sticky” feelings are not grease. They might be old, degraded finishes. If the topcoat is breaking down, it can feel gummy. Cleaning helps, but painting over a failing finish is risky. In such cases, you might need to sand more aggressively to remove the old topcoat. Or, consider using a bonding primer specifically designed for difficult surfaces. Understanding the root cause helps you choose the right fix. When dealing with persistent issues, learning how to clean old kitchen cabinets can provide advanced solutions. For more intensive grease removal, consult our guide on how to clean greasy cabinets to tackle stubborn build-up. Discover specific techniques for how to clean sticky kitchen cabinets that are particularly resistant to common cleaning methods.
Tips for Maintaining Clean Cabinets After Painting
Congratulations! You have successfully cleaned and painted your sticky wood kitchen cabinets. Now, maintaining their clean, fresh look is important. Regular maintenance prevents the sticky grime from returning. It extends the life of your beautiful new paint job. I always advise homeowners on simple upkeep routines.
First, wipe down your cabinets regularly. Use a soft cloth dampened with warm water and a mild dish soap solution. This prevents grease and dust from building up into a sticky layer. Focus on areas near the stove or high-touch spots. Quick, frequent wipes are much easier than deep cleaning later. This simple habit keeps your cabinets looking new.
Avoid harsh cleaners on painted cabinets. Abrasive cleaners or strong degreasers can damage the paint finish. Stick to mild, non-abrasive solutions for routine cleaning. If you encounter a sticky spot, try the mild soap and water first. For tougher spots, a small amount of an all-purpose kitchen cleaner on a cloth can work. Always test any new cleaner in an inconspicuous area.
Good ventilation in your kitchen also helps. Using your exhaust fan while cooking pulls grease and steam out of the air. This reduces the amount of residue that settles on your cabinets. Regular air circulation minimizes the buildup of airborne particles. A cleaner kitchen environment benefits all surfaces, not just the cabinets.
Finally, consider applying a protective topcoat. Some paints are durable on their own. For high-traffic kitchens, an additional clear topcoat can add an extra layer of protection. This makes the painted surface even more resistant to grease and makes future cleaning easier. Always choose a topcoat compatible with your paint. Following these simple maintenance tips will keep your newly painted wood kitchen cabinets looking fantastic for years to come. Maintain your beautiful wood kitchen cabinets with easy DIY cleaning methods. Preserve your cabinet’s appearance by learning how to clean kitchen cabinets without removing finish. For more comprehensive cleaning tasks, consult our guide on how to clean kitchen cabinets and cupboards.
FAQ Section
Q1: Can I use dish soap to clean sticky wood cabinets before painting?
You can use dish soap for light grime. Mix a few drops with warm water. For very sticky, greasy wood cabinets, dish soap often isn’t strong enough. It may leave a residue that affects paint adhesion. Stronger degreasers like TSP alternatives are usually more effective for pre-painting preparation.
Q2: How long should cabinets dry before painting after cleaning?
Cabinets should dry completely, which typically takes several hours to overnight. I recommend at least 24 hours. The wood must be bone dry to the touch, with no dampness, especially in corners. Proper drying prevents bubbling, peeling, or other paint adhesion issues. Good ventilation helps speed this process.
Q3: Is sanding always necessary after cleaning sticky cabinets?
Light sanding, or “scuff sanding,” is highly recommended even after thorough cleaning. It helps create a slightly rough surface, or “tooth.” This gives the primer and paint something to grip onto. This step significantly improves paint adhesion and durability, leading to a much more professional finish.
Q4: What if my cabinets are still sticky after cleaning them?
If cabinets remain sticky, it means the grease was not fully removed, or cleaner residue is present. Repeat the deep cleaning process with a stronger solution, like TSP. Ensure you scrub thoroughly and rinse multiple times with clean water. Allow extra drying time. The surface must feel smooth and non-tacky.
Q5: What’s the best degreaser for wood cabinets before painting?
For optimal results, Trisodium Phosphate (TSP) is highly effective at cutting through heavy grease. If you prefer a less harsh option, commercial TSP alternatives or heavy-duty kitchen degreasers like Krud Kutter are excellent choices. Always test any product on an inconspicuous area first.
Q6: Do I need to remove hardware from cabinets before cleaning them?
Yes, always remove all hardware like hinges, handles, and knobs before cleaning. This allows for thorough cleaning of all cabinet surfaces, including hidden spots. Removing hardware also prevents damage to the hardware from cleaning solutions and ensures a cleaner, more uniform paint job.
Conclusion
Cleaning sticky wood kitchen cabinets before painting is more than just a chore. It is a fundamental step. It ensures your hard work results in a beautiful, long-lasting finish. Skipping this crucial preparation leads to paint failures. Grease and grime prevent proper paint adhesion. This causes peeling, chipping, and an overall poor appearance.
By following the steps outlined, you can achieve a perfectly clean surface. Gather your essential tools, from gloves to powerful degreasers. Methodically disassemble and protect your workspace. Apply effective cleaning solutions to dissolve stubborn grime. Remember to rinse thoroughly and allow ample drying time. A light sanding and final dust removal then prepare your cabinets for primer.
This detailed preparation might seem like a lot of effort. However, it is an investment in your kitchen’s future. A properly cleaned and prepped surface guarantees excellent paint adhesion. You will enjoy a professional-looking paint job for many years. Start your project with confidence. Your newly transformed wood kitchen cabinets will be a source of pride. Get ready to enjoy a fresh, clean look in your kitchen!
- Kitchen Cabinets
- Wood Cleaning
- Cabinet Painting
- Sticky Cabinets
- Grease Removal

Davia Murnell
Room Cleaning Expert
Before joining HEG, I spent over a decade running my own window cleaning business, where I perfected streak-free techniques and learned the ins and outs of specialty glass care. Now, I bring that expertise to a broader mission—helping homeowners maintain sparkling windows and beautiful outdoor spaces. From skylights and sliding doors to patio glass and outdoor furniture, I believe every surface deserves attention and care. I share practical tips and proven methods that make even the toughest cleaning jobs feel manageable. Whether you're battling pollen on the porch or smudges on high windows, I’m here to help you see your home in a whole new light—literally.