· Todd Martin · Kitchen Maintenance · 19 min read
How To Clean Drip Pans On Stove
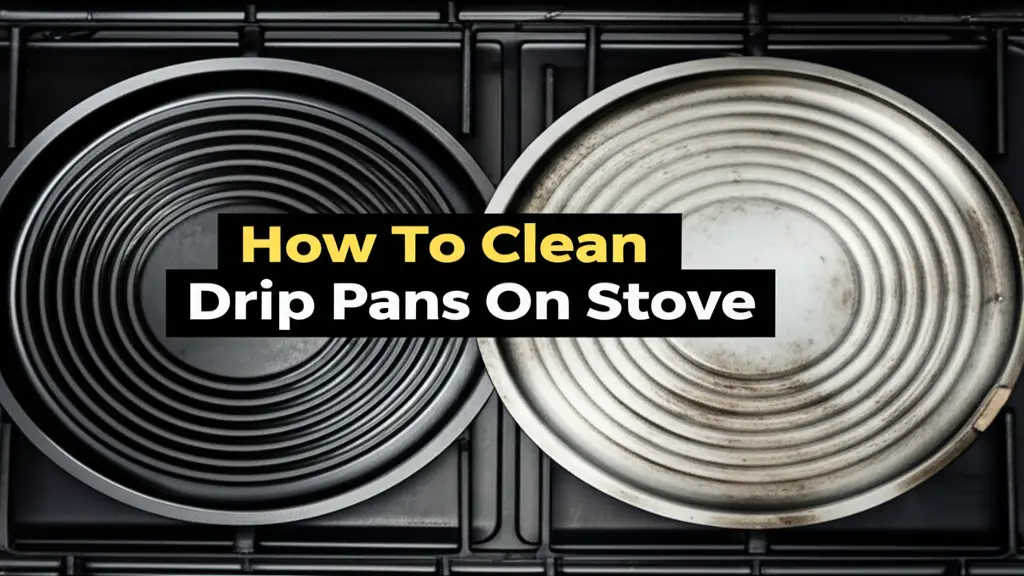
Restore Your Stove’s Shine: How to Clean Drip Pans Effectively
A clean kitchen brings joy. You use your stove every day. Food spills and grease collect on the drip pans. These pans sit under the burners. Over time, they look dirty. This buildup of grime affects how your kitchen looks. It can also lead to smoke and odors when you cook.
Cleaning these stove drip pans is important for a tidy home. It also helps your stove work well. Many people find cleaning drip pans a challenge. Baked-on food seems impossible to remove. This guide helps you tackle even the toughest stains. We will cover different types of pans. We will share various cleaning methods. You will learn how to keep your drip pans spotless.
Takeaway
- Remove and Soak: Take out drip pans and soak them in hot, soapy water.
- Use Natural Cleaners: Baking soda and vinegar make a powerful cleaning paste.
- Scrub Thoroughly: Use a non-abrasive scrubber to remove grime.
- Consider Ammonia for Tough Stains: Use this method with extreme caution in a well-ventilated area.
- Prevent Future Buildup: Clean spills quickly and use liners to reduce work.
To clean drip pans on your stove, first remove them. Soak them in hot, soapy water to loosen grime. For baked-on messes, make a paste with baking soda and vinegar. Apply this paste and let it sit. Scrub with a non-abrasive sponge or brush. Rinse the pans well and dry them completely before putting them back.
Understanding Your Stove Drip Pans: Types and Materials
Before you start cleaning, know what type of drip pans you have. Drip pans come in different materials. Each material needs a specific cleaning approach. Knowing the material helps you choose the right method. This choice prevents damage to your pans. It also ensures the best cleaning results.
Most drip pans are metal. They are often made of chrome, porcelain, or sometimes cast iron. Chrome pans are common on electric coil stoves. They have a shiny, reflective surface. Porcelain pans are usually black or white. They have a smooth, enamel coating. Some specialty stoves may have different pan types. Understanding these differences is key.
For example, harsh scrubbers can scratch chrome. They can chip porcelain. You want to clean these pans without causing damage. I always check the material first. This step saves time and effort later. It also protects your kitchen investments. This way, your drip pans last longer.
Chrome Drip Pans
Chrome drip pans are popular. They are shiny and reflect heat. This reflection helps with cooking efficiency. Over time, spills burn onto the chrome surface. These burnt-on stains are hard to remove. Abrasive cleaners can scratch chrome easily. Scratches make the pans look dull. They can also make future cleaning harder.
When cleaning chrome, be gentle. Use soft sponges or cloths. Mild cleaning agents work best for regular upkeep. For tough stains, you need a method that breaks down grease. This method should not damage the surface. Soaking is often the first step for chrome pans. It softens the baked-on food. This makes scrubbing much easier.
Remember that chrome can rust if left wet. Always dry chrome drip pans completely. This prevents rust spots from forming. Proper drying maintains their shiny appearance. You can find more tips on cleaning various metal pans here: How To Clean Metal Pans.
Porcelain Drip Pans
Porcelain drip pans are durable. They have a non-porous enamel coating. This coating resists stains more than chrome. However, spills can still bake onto them. This forms stubborn spots. Porcelain can chip if you drop it. It can also scratch if you use harsh scrubbers. The material is strong but needs care.
Cleaning porcelain pans requires a soft touch. Avoid steel wool or abrasive powders. These can damage the smooth finish. Once chipped, porcelain pans are harder to clean. Food can get stuck in the chips. A gentle yet effective cleaning method is best. Baking soda often works well on porcelain. It lifts stains without scratching.
You can also use a nylon brush for scrubbing. This helps remove stuck-on food. Always ensure the cleaning agent is safe for enamel. Many general kitchen cleaners are safe. They help maintain the pan’s smooth surface. Regular cleaning keeps porcelain pans looking new.
Cast Iron Drip Pans
Cast iron drip pans are less common. Some heavy-duty or professional stoves use them. Cast iron retains heat well. These pans are very durable. However, they can rust if not cared for properly. They also need seasoning, much like cast iron cookware. Seasoning prevents rust and creates a non-stick surface.
Cleaning cast iron drip pans is different. Avoid harsh soaps that strip seasoning. Water can cause rust. Instead, use a stiff brush or scraper. You might only need hot water for most messes. For tough buildup, a gentle scrub with coarse salt can work. Re-season the pans after deep cleaning.
To re-season, apply a thin layer of cooking oil. Bake the pans upside down in a hot oven. This process creates a protective layer. It keeps the cast iron in good condition. You can learn more about general pan cleaning here: How To Clean Pots And Pans. This type of care keeps cast iron pans performing well.
Gathering Your Cleaning Arsenal: What You Need
Effective cleaning starts with the right tools. You do not need fancy chemicals. Many common household items work wonders. Having these items ready saves time. It makes the cleaning process smoother. I always collect my supplies before starting. This preparation prevents interruptions.
The basic tools are simple. You will need a sturdy scrubbing brush. A non-abrasive sponge is also important. These help lift grime without scratching surfaces. For tough spots, an old toothbrush is handy. It gets into small crevices. I also recommend rubber gloves. They protect your hands from hot water and cleaning solutions.
Your main cleaning agents will be natural. Baking soda is a powerful abrasive. Vinegar is a gentle acid. Dish soap helps break down grease. Hot water is essential for soaking. These items form the core of most effective drip pan cleaning methods. Using these common items makes cleaning easy and affordable.
Essential Cleaning Supplies
Here is a list of supplies you will need:
- Hot Water: Soaking items in hot water loosens grime. It helps dissolve grease.
- Dish Soap: Any grease-cutting dish soap works well. It breaks down oily residues.
- Baking Soda: This is a mild abrasive. It helps scrub away stuck-on food.
- White Vinegar: Vinegar is acidic. It reacts with baking soda to create fizz. This fizz helps lift stubborn stains.
- Non-Abrasive Scrubber or Sponge: Avoid steel wool on most pans. A nylon brush or a regular sponge is better.
- Old Toothbrush: Useful for tight spots and edges.
- Rubber Gloves: Protect your hands from hot water and chemicals.
- Large Basin or Sink: You need a place to soak the pans.
- Paper Towels or Clean Cloths: For wiping and drying.
Step-by-Step Guide to Cleaning Drip Pans
Cleaning stove drip pans is straightforward. The key is to follow a process. This ensures thorough cleaning. It removes all built-up grime. I follow these steps every time I clean my drip pans. This method works for most types of pans. It gets them sparkling clean.
Start by preparing your workspace. Remove everything from the stove top. Make sure you have good lighting. Gather all your cleaning supplies nearby. This setup makes the process efficient. You will feel good about your clean stove. A clean stove makes your whole kitchen feel cleaner.
Remember to be patient. Some stains need time to loosen. Do not rush the soaking process. This is often the most important step. Taking your time leads to better results. Your drip pans will look much better after this.
Removing Drip Pans and Initial Scrape
First, ensure your stove is cool. Never clean hot parts. Carefully remove the drip pans from under the burners. If you have electric coil burners, lift the coil first. The drip pan will then be accessible. Gas stove grates usually lift off. Then you can remove the pan.
Once the pans are out, scrape off loose food bits. Use a plastic scraper or an old credit card. Avoid metal tools. Metal can scratch the pan surface. This initial scrape helps remove the largest pieces. It makes the next steps easier. I always do this part over a trash can. This keeps crumbs out of the sink.
You will be surprised how much loose debris comes off. This step saves you from clogging your sink. It also means less scrubbing later on. This quick pre-clean makes a difference. You can also quickly wipe the burner coils with a damp cloth if they are cool. For more details on cleaning burner parts, see this guide: How To Clean Burner Pans.
Soaking for Success
Soaking is the secret weapon against baked-on grime. Fill a sink or a large basin with very hot water. Add a generous amount of dish soap. Place the drip pans into the soapy water. Make sure they are fully submerged. Let them soak for at least an hour. For very tough messes, soak them overnight.
The hot water and soap work together. They loosen the grease and burnt-on food. This makes scrubbing much easier later. I often put my pans in hot water right after dinner. They soak while I clean the rest of the kitchen. By morning, they are ready for the next step.
You will see the water turn cloudy. This means the grease is lifting off the pans. This step is crucial. Do not skip it. It saves you from hard scrubbing. It also reduces the need for harsh chemicals. Soaking is truly a game-changer.
Scrubbing Away Grime
After soaking, drain the dirty water. Take one drip pan out at a time. Now, it is time to scrub. Most of the loosened grime should come off easily. Use your non-abrasive scrubber or sponge. Work in circular motions. Focus on areas with remaining stains.
For stubborn spots, sprinkle some baking soda directly onto the pan. Add a few drops of water to make a paste. Scrub with the baking soda paste. This paste adds a gentle abrasive action. It helps lift resistant marks. The baking soda is safe for most pan surfaces. It does not scratch them like harsh powders.
An old toothbrush is perfect for edges and corners. These areas often collect grime. Pay attention to the lip of the pan. This part can be hard to reach. Continue scrubbing until the pan looks clean. You will see the original surface reappear.
Rinsing and Drying
Once you finish scrubbing, rinse the drip pans thoroughly. Use clean, warm water. Make sure all soap residue is gone. Any leftover soap can leave streaks. It can also attract dust later. Rinse both sides of each pan. Check for any remaining grime. If you see any, go back and scrub that spot again.
After rinsing, dry the pans completely. Use a clean paper towel or a soft cloth. Do not let them air dry. Water spots can form. Chrome pans can rust if left wet. Ensuring they are dry prevents damage. It also makes them ready for immediate use.
You can also place them in a warm oven for a few minutes. Make sure the oven is off but still warm. This helps evaporate all moisture. A completely dry pan is a happy pan. Once dry, place the drip pans back on your stove. Your stove will look much cleaner.
Tackling Tough Stains: Baked-On Grease and Burnt Food
Some stains are extra stubborn. Baked-on grease and burnt food seem impossible to remove. Regular soap and water might not be enough. These tough messes need stronger methods. Do not despair. There are specific tricks for them.
These methods involve more powerful cleaning agents. They still use common household items. The key is allowing the cleaner enough time. This lets it break down the hardened gunk. Patience is your best friend here. With the right approach, even the worst stains will surrender.
I have faced many tough drip pan stains. I always find a way to get them clean. These methods have saved me from replacing pans. They are effective and safe when used correctly. You can defeat those stubborn stains. For more information on general grease cleaning, check out this article: How To Clean Grease Off Pans.
The Baking Soda and Vinegar Power Duo
This combination is famous for a reason. It creates a powerful cleaning action. First, make a thick paste with baking soda and a little water. Spread this paste generously over the tough stains on your drip pan. Cover the entire stained area.
Next, pour white vinegar over the baking soda paste. You will see a fizzing reaction. This bubbling action helps lift the grime. It is the chemical reaction working to loosen the burnt food. Let the mixture sit for at least 30 minutes. For very stubborn stains, let it sit for a few hours. I sometimes leave it overnight.
After waiting, scrub the pan with a non-abrasive brush. The stains should come off more easily. The baking soda provides the abrasive power. The vinegar helps break down the grease. Rinse well afterward. This method is safe and effective for most pan types. You can also explore specific methods for baked-on grease here: How To Clean Baked-On Grease From Pans.
Ammonia Bag Method (Use with Caution)
The ammonia bag method is for extreme cases. It is very effective but requires strict safety. Always use this method in a well-ventilated area. Never mix ammonia with bleach. Mixing them creates dangerous fumes. I prefer to do this outside or near an open window.
Place the dirty drip pan in a large, sealable plastic bag. A sturdy garbage bag works. Add about 1/4 cup of ammonia to the bag. Do not let the ammonia touch the pan directly if possible. Just let the fumes do the work. Seal the bag tightly. Let it sit overnight, or for several hours.
The ammonia fumes soften the baked-on grease. After waiting, open the bag carefully. Do this outdoors or over a sink. Remove the pan. The grime should wipe right off. You might need a light scrub. Rinse the pan very thoroughly with soapy water. Wash your hands well afterward. This method is powerful for burnt residues, similar to how one might clean difficult burnt marks from other cooking surfaces: How To Clean Burnt Grease From Bottom Of Frying Pans.
Special Considerations for Different Stove Types
Not all stoves are the same. Electric stoves use coils. Gas stoves use grates and burners. Each type of stove has slightly different drip pan setups. These differences affect how you remove and clean the pans. Knowing your stove type helps you clean correctly.
The cleaning principles remain similar. Soaking and scrubbing are always key. However, accessing the drip pans differs. Also, the surrounding components need care. You want to clean the drip pans without damaging the rest of the stove. I adjust my approach based on the stove type. This ensures a complete cleaning job.
For example, electric coil removal is different from lifting gas grates. You need to handle each type carefully. This section provides tips for both common stove types. This way, your cleaning is efficient.
Electric Stove Drip Pans
Electric stoves often have removable coils. The drip pans sit underneath these coils. These pans are usually chrome or porcelain. To access them, first ensure the stove is unplugged or the circuit breaker is off. This is important for safety. Never touch electrical parts with wet hands.
Gently lift each burner coil. They usually pull straight up. Some may have a small clip holding them. Once the coil is out, the drip pan lifts right out. These pans often collect grease drips and burnt-on food. The heat from the coil bakes these spills on.
Clean these pans using the soaking and baking soda/vinegar methods. You can also wipe the burner coils themselves. Use a damp cloth for this. Do not submerge coils in water. They are electrical components. This careful approach cleans both the pans and the coils. You can learn more about cleaning coils here: How To Clean Stove Coils.
Gas Stove Drip Pans
Gas stoves typically have grates over the burners. Beneath the grates are the burners and often a drip pan or tray. Some gas stoves have individual burner trays. Others have a single, large drip tray for the entire cooktop. These pans are often porcelain-coated.
To clean, first remove the grates. These lift off easily. Then, remove the burner caps and burner heads. These are the parts that create the flame. Place them aside. Now you can access the drip pans. Lift them out carefully. Be aware of any igniters or gas lines. Do not pull on them.
Clean these pans with the methods described. Pay attention to the holes and crevices around the burner area. Grease can build up there. You can wipe down the area around the burner openings. Make sure it is dry before reassembling. You can find more specific tips for cleaning gas stove components here: How To Clean Burners On Gas Stove.
Preventing Future Buildup: Keeping Your Drip Pans Cleaner Longer
Cleaning drip pans can be hard work. The best way to reduce that work is prevention. Regular care keeps them cleaner for longer. This means less deep cleaning later. It also means your stove always looks good. I believe prevention is easier than cure.
Simple habits make a big difference. Wiping spills quickly is very effective. Using protective liners can also save you effort. These small steps add up. They prevent grease and food from baking onto the pans. This section gives you practical tips for maintenance.
You will spend less time scrubbing. Your kitchen will stay tidier. These easy measures help you maintain a sparkling stove. This keeps your home looking its best.
Wipe Spills Immediately
The quickest way to prevent baked-on stains is to clean spills fast. When food boils over, wipe it up right away. Do this while the stove is still warm but not hot. A warm surface makes grease easier to remove. Use a damp cloth or paper towel.
Letting spills cool and bake on makes them much harder. They harden and bond to the pan surface. Fresh spills are just liquid. They wipe away with minimal effort. This simple habit saves you hours of scrubbing later. I always keep a damp cloth ready when I cook. It makes cleanup instant.
This small action prevents major work. It keeps your drip pans much cleaner. It also stops odors from burnt food. This immediate action is the best defense against grime. For overall greasy stove cleaning, check out: How To Clean Greasy Stove.
Use Drip Pan Liners
Drip pan liners are a game-changer. They are disposable aluminum foil covers. These liners fit over your drip pans. They catch all spills and drips. When they get dirty, you simply remove them. Then, you replace them with new ones. This keeps your actual drip pans pristine.
Liners are inexpensive. They come in sizes for both electric and gas stoves. Using them saves so much cleaning time. Your original drip pans stay clean underneath. You only need to clean them occasionally. This is my favorite trick for busy cooks.
Make sure the liners fit snugly. This prevents spills from going underneath. Check them regularly. Replace them as needed. This simple addition makes stove maintenance very easy. It is a smart way to protect your pans.
Regular Light Cleaning
Even with liners, do a light clean regularly. A quick wipe down every week helps. Remove the liners if you use them. Wipe the actual drip pans with a soapy cloth. This removes any minor splashes. It prevents small spills from becoming big problems.
This routine cleaning takes only a few minutes. It keeps your stove consistently clean. It also extends the life of your drip pans. Consistent light cleaning prevents buildup. It ensures your stove always looks its best. This is much better than waiting for heavy grime.
I dedicate a few minutes once a week. I wipe down the entire stovetop. This includes a quick look at the drip pans. This prevents a daunting deep clean later. Regular cleaning saves you time and effort in the long run.
Common Mistakes to Avoid When Cleaning Drip Pans
Cleaning drip pans seems simple. However, some common mistakes can damage them. They can also make the cleaning process harder. Avoiding these pitfalls ensures better results. It also protects your stove components. I have learned these lessons over time.
Knowing what not to do is as important as knowing what to do. Using the wrong tools or chemicals can harm your pans. It can even create safety hazards. This section highlights common errors. It helps you prevent them.
Learning from these mistakes saves you trouble. You will clean your drip pans more effectively. You will also keep them in good condition. Follow these tips for a safe and successful cleaning experience.
Using Abrasive Scrubbers
A common mistake is using harsh abrasive scrubbers. Steel wool, coarse scouring pads, or very rough sponges can scratch surfaces. Chrome drip pans are especially vulnerable. Once scratched, these pans lose their shine. They also become harder to clean. Food and grease stick more easily to rough surfaces.
Porcelain pans can chip with aggressive scrubbing. Even some “heavy-duty” scrubbers can be too much. Always opt for non-abrasive options. A nylon brush, a soft sponge, or a microfiber cloth is best. For tough spots, rely on the power of soaking. Let the cleaning solutions do the work.
Patience is key. Do not try to force off baked-on grime with brute force. Allow the cleaners to break down the bond. This gentler approach preserves your pans. It keeps them looking good longer.
Forgetting to Dry Pans Completely
Leaving drip pans wet is another common mistake. Especially for chrome or cast iron pans, moisture leads to rust. Rust spots are unsightly. They can also damage the pan’s surface. Even porcelain pans can develop water spots. These spots make the pans look dirty.
After rinsing, dry each pan thoroughly. Use a clean towel or paper towels. You can also place them in a slightly warm, turned-off oven. This ensures all moisture evaporates. Do not put them back on the stove until they are bone dry.
This step is quick but vital. It prevents rust and water stains. It maintains the pan’s appearance and longevity. I always make sure my pans are completely dry. This simple act prevents future problems.
Mixing Cleaning Chemicals
Never mix different cleaning chemicals. For example, never mix ammonia with bleach. This combination creates highly toxic fumes. These fumes are dangerous to breathe. They can cause serious respiratory problems. Always read product labels for warnings.
Stick to the recommended cleaning agents. Baking soda, vinegar, and dish soap are usually safe together. If you choose a commercial cleaner, use it alone. Do not combine it with other products. Ensure good ventilation when using any strong cleaner.
Safety comes first in cleaning. Understand the chemicals you are using. Follow instructions carefully. Protect yourself and your home. My rule is: if in doubt, stick to natural remedies or use one cleaner at a time.
- stove cleaning
- drip pan cleaning
- grease removal
- kitchen tips

Todd Martin
Senior Writer
With over 15 years of experience in home renovation and design, I started HEG to share what I’ve learned with homeowners who want to create spaces that are both beautiful and functional. I’ve always believed in a hands-on approach, and over the years, I’ve picked up practical solutions that actually work. Through HEG, I aim to make home improvement more approachable, sharing real tips that help you create a home you truly love.