· Todd Martin · Culinary Skills · 19 min read
How To Clean Red Snapper
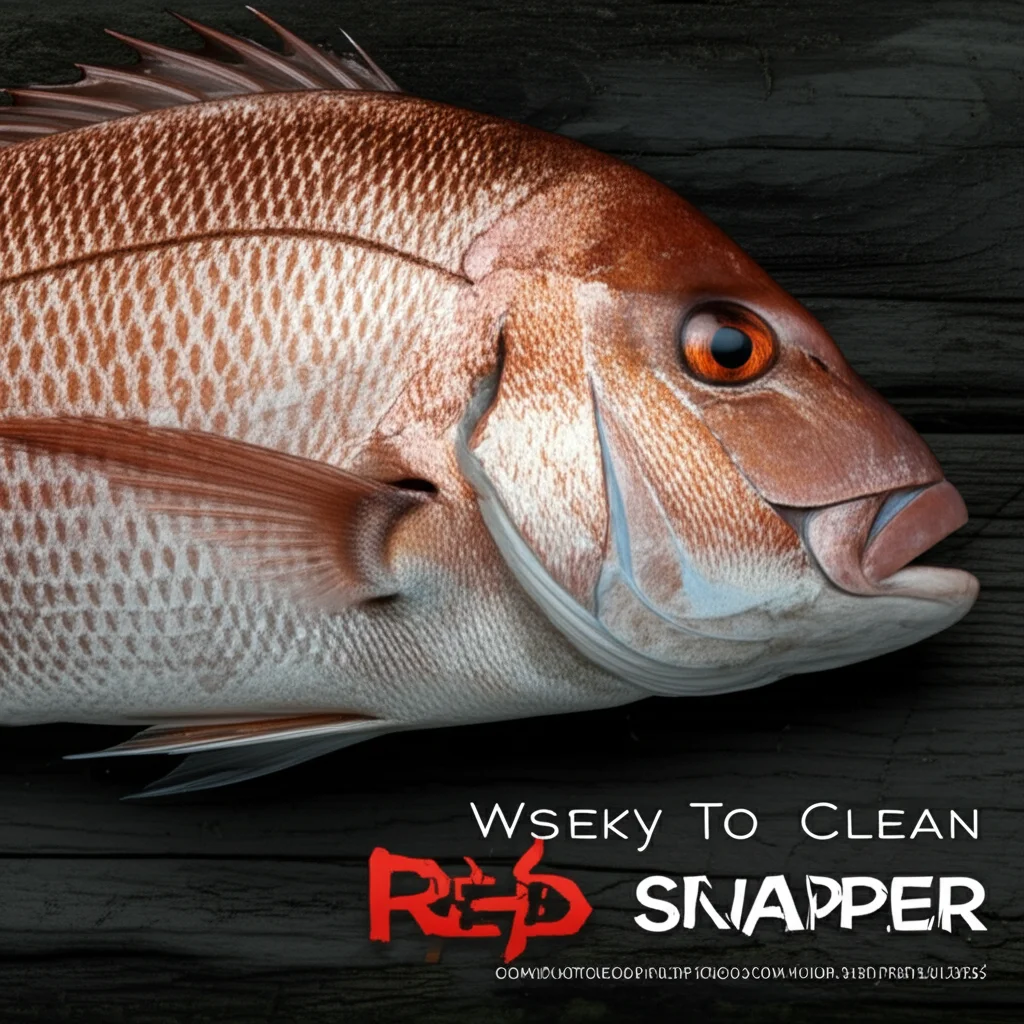
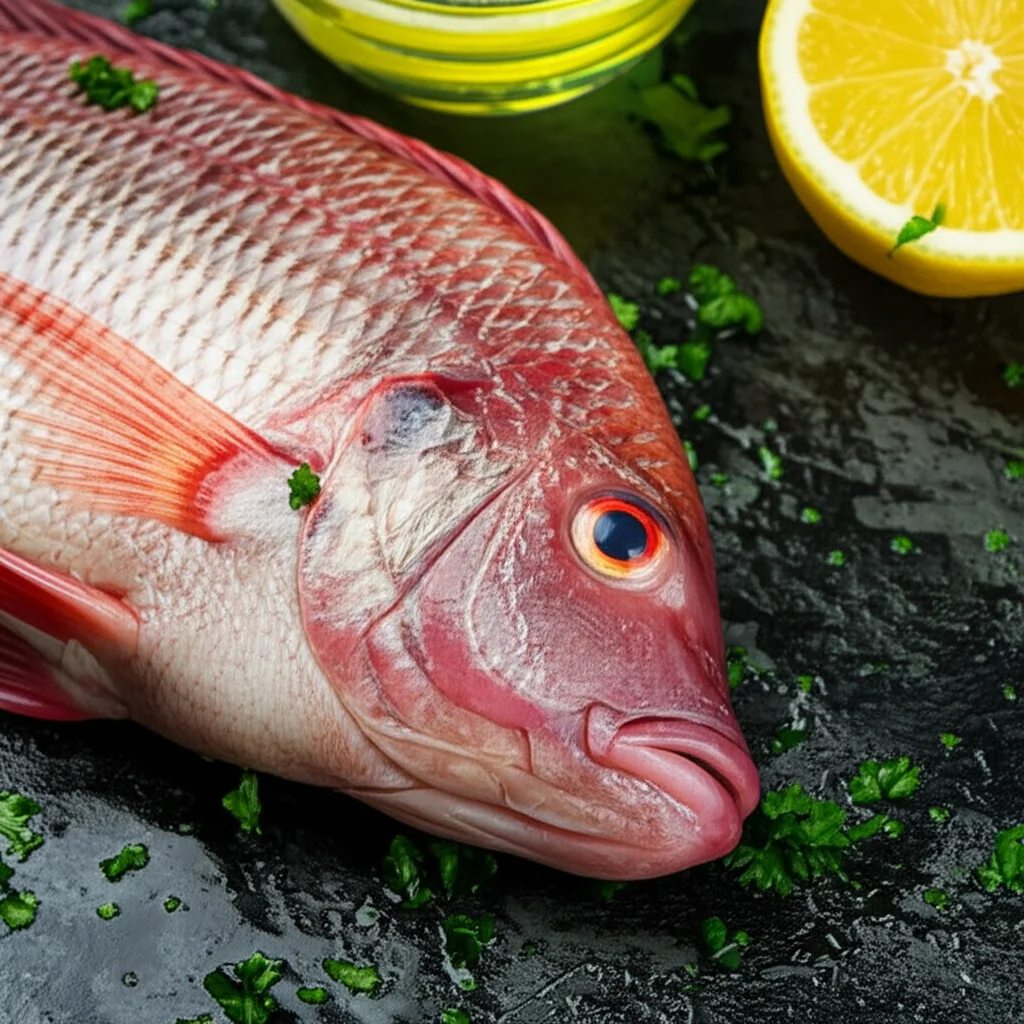
Mastering the Art: How to Clean Red Snapper
Ever wondered how to turn a beautiful whole red snapper into a culinary masterpiece right in your own kitchen? Cleaning fresh fish might seem daunting at first. However, mastering the process of how to clean red snapper yourself ensures the freshest taste and a truly rewarding cooking experience. This guide will take you step-by-step through everything you need to prepare your snapper, from descaling to expert filleting.
We will explore the essential tools, proper setup, and meticulous techniques for descaling, gutting, and gilling. You will learn the precision required for filleting and the best practices for storing your perfectly cleaned catch. Get ready to elevate your seafood game and enjoy the unparalleled flavor of home-prepared red snapper.
Takeaway
- Gather essential tools like a sharp knife, scaler, and cutting board before starting.
- Clean your workspace and fish thoroughly to maintain hygiene.
- Master descaling, gutting, and gilling for whole fish preparation.
- Practice filleting to yield clean, boneless portions.
- Store cleaned snapper correctly to preserve freshness.
Clear and Concise Answer
To clean red snapper, first, rinse it thoroughly. Then, remove scales with a scaler, working against the grain. Next, carefully cut open the belly from vent to gills and remove all internal organs and gills. Finally, rinse the fish inside and out before filleting or cooking whole.
Why Clean Your Own Red Snapper? Enjoy Superior Freshness
Cleaning your own red snapper offers significant benefits. The most important benefit is unmatched freshness. When you clean a fish immediately after catching it or buying it whole, you lock in its peak flavor. This prevents deterioration that can occur during transport or storage if not handled properly.
I believe this step is crucial for anyone serious about seafood. A professionally cleaned fish often comes at a higher price. Taking the time to do it yourself saves money over time. It also gives you complete control over the quality of your meal.
When I clean my own fish, I feel more connected to the food. This hands-on approach adds a layer of satisfaction to the cooking process. You gain a deeper understanding of the fish’s anatomy. This skill becomes very useful for all kinds of fish.
Cleaning your own red snapper ensures no parts are wasted. You can save bones and heads for making flavorful fish stock. This reduces waste and adds depth to your culinary creations. It is a sustainable practice.
Finally, ensuring proper hygiene is easier when you do the cleaning. You control the cleanliness of your tools and surfaces. This minimizes any risk of cross-contamination. I always make sure my stainless steel surfaces are clean before I start.
Essential Tools and Gear for Cleaning Red Snapper
Having the right tools makes the process of cleaning red snapper much easier. Proper equipment also makes the task safer and more efficient. You do not need a lot of specialized gear, but certain items are indispensable. Invest in good quality tools for the best results.
First, a sharp filleting knife is paramount. This knife should have a thin, flexible blade. It allows for precise cuts and easy maneuvering around bones. A dull knife makes cleaning difficult and unsafe. I always sharpen my knife before starting.
Next, you will need a fish scaler. These tools have serrated edges or teeth designed to quickly remove scales. You can find simple handheld models or more elaborate electric ones. If you do not have a dedicated scaler, the back of a spoon or a dull knife can work in a pinch.
A sturdy cutting board is also essential. Choose one that is large enough to comfortably hold the entire fish. Plastic or composite boards are ideal because they are easy to clean. Wooden boards can absorb odors and are harder to sanitize.
You will also need a pair of kitchen shears. These are useful for trimming fins and sometimes for gutting. Heavy-duty shears make quick work of tougher parts. I keep a dedicated pair just for fish.
Finally, have plenty of paper towels or clean cloths ready. These help manage mess and provide a good grip on the slippery fish. Access to a running water source is also crucial for rinsing. A clean sink is always my starting point for any food prep.
Preparing Your Workspace for Snapper Cleaning
Before you even touch the fish, setting up a clean and efficient workspace is crucial. Proper preparation minimizes mess and ensures food safety. A well-organized area makes the cleaning process smooth and stress-free. I always dedicate a specific part of my kitchen counter for this task.
Start by clearing your counter space. Remove any unnecessary items that might get in the way. You want a wide, unobstructed area to work. This provides ample room for the fish and your tools.
Next, sanitize your cutting board and surrounding surfaces. Use hot, soapy water or a food-safe disinfectant. This prevents the spread of bacteria. After cleaning, rinse thoroughly and dry the surfaces completely. For general kitchen hygiene, I often refer to guides like how to clean your sink to ensure everything is spotless.
Place your cutting board on a non-slip mat or a damp towel. This prevents it from sliding around while you work. A stable surface is vital for safety, especially when using sharp knives. You do not want any unexpected movements.
Arrange your tools within easy reach. Your filleting knife, scaler, shears, and a bowl for discard should be organized. Having everything at hand means you will not need to search for items mid-process. This saves time and keeps your focus on the fish.
Finally, ensure you have a designated waste receptacle nearby. A large bowl or a plastic bag works well for collecting scales, guts, and fins. This helps keep your main workspace clean throughout the process. Proper disposal is key to preventing odors.
The Step-by-Step Guide to Descaling Red Snapper
Descaling is often the first step in cleaning red snapper. It is a messy but necessary task. Removing scales ensures a smooth texture when cooked and prevents tough bits in your meal. I always brace myself for a little splatter!
1. Prepare for the Mess:
- Lay down old newspapers or a large plastic bag on your work surface. This will catch the scales.
- Consider descaling the fish in a large sink or a bucket of water. This dramatically reduces scale spray.
- You can also do it outdoors with a hose if available. This is my preferred method if the weather permits.
2. Grip the Fish Firmly:
- Hold the fish by the tail with your non-dominant hand. A firm grip prevents the fish from slipping.
- You can use a cloth or paper towel for a better hold. Red snapper can be quite slippery.
3. Start Descaling:
- Take your fish scaler, or the back of a spoon, or a dull knife.
- Scrape firmly against the direction of the scales, from tail to head. Use short, vigorous strokes.
- Apply consistent pressure to lift and remove the scales. They will fly off, so be prepared.
4. Check for Missed Spots:
- Pay close attention to areas like the belly, near the fins, and around the head. Scales can hide in these spots.
- Run your fingers over the fish to feel for any remaining rough patches. Repeat the scraping until the skin feels smooth.
- Be gentle around the delicate fins to avoid tearing the skin.
5. Rinse Thoroughly:
- Once descaled, rinse the fish under cold running water. This washes away loose scales and slime.
- Rinse both sides of the fish. Ensure all traces of scales are gone.
- A good rinse prepares the fish for the next steps.
Remember, the goal is to get all the scales off. Patience and thoroughness are key here. I always take my time to ensure no scales are left behind.
Mastering the Art of Gutting and Gilling Red Snapper
Once descaled, the next crucial steps are gutting and gilling the red snapper. This removes internal organs and gills, which can impart an undesirable flavor if left in. It also ensures the fish is clean and ready for cooking. I find this part satisfying as the fish transforms from whole to ready-to-cook.
Gutting the Red Snapper
1. Locate the Vent:
- Place the fish on your cutting board. The vent is a small opening near the tail, on the underside of the fish.
- This is where you will begin your cut for gutting. It is a precise starting point.
2. Make the Incision:
- Insert the tip of your sharp filleting knife into the vent. Point the blade shallowly towards the head.
- Carefully cut along the belly towards the head. Stop when you reach the pectoral fins.
- Do not cut too deep, as you might puncture the internal organs. This can make the cleaning messier.
3. Remove Internal Organs:
- Open the belly cavity wide. Reach inside and pull out all the internal organs.
- Start from the back and work your way forward. Ensure everything comes out.
- Look for a dark bloodline along the backbone. Scrape this out with your thumb or a spoon. This bloodline can give a strong flavor if not removed.
4. Rinse the Cavity:
- Rinse the emptied belly cavity thoroughly under cold running water. Use your fingers to scrub away any remaining bits or blood.
- Ensure the cavity is clean and free of debris. This is important for flavor and freshness.
Gilling the Red Snapper
1. Access the Gills:
- Open the gill plate on one side of the fish. You will see the bright red, feathery gill arches.
- The gills are typically attached at the top and bottom. They are crucial to remove.
2. Cut the Gills:
- Using your kitchen shears, cut through the membranes that attach the gills to the fish.
- Make a cut at the top and bottom of each gill arch. This severs their connection to the head.
- Be careful not to cut yourself on the sharp gill rakers. They can be quite poky.
3. Remove the Gills:
- Once the attachments are cut, pull the entire gill assembly out. It should come out in one piece.
- Repeat the process for the gills on the other side of the fish.
- Ensure no gill remnants are left behind. Gills can quickly spoil and affect the taste.
4. Final Rinse:
- Give the entire fish, especially the head and body cavity, a final thorough rinse under cold water.
- This washes away any remaining blood, slime, or small pieces of organs. The fish should now be completely clean inside and out, ready for filleting or cooking whole.
This meticulous approach ensures your red snapper is perfectly prepared. I always feel a sense of accomplishment after these steps.
Filleting Your Red Snapper: From Whole Fish to Perfect Fillets
Filleting is arguably the most rewarding step in cleaning red snapper. It transforms the whole fish into boneless, skin-on or skin-off portions perfect for cooking. This process requires a steady hand and a sharp knife, but with practice, it becomes second nature. I love seeing the clean fillets emerge.
Making the Initial Cuts
1. Dorsal Cut:
- Place the cleaned, whole red snapper on your cutting board, belly facing away from you.
- Make a deep cut behind the pectoral fin, angled towards the head, cutting down to the backbone. Do not cut through the backbone.
- Turn the knife and run it along the top of the backbone, from the head cut all the way to the tail. Keep the blade flat against the bones.
2. Rib Cage Separation:
- Once you’ve cut along the backbone, you will encounter the rib cage.
- Carefully slide your knife over the top of the ribs, separating the fillet from the rib bones. Angle the blade slightly upward as you go.
- Use your free hand to lift the fillet gently as you cut. This helps expose the bones.
3. Completing the First Fillet:
- Continue cutting down towards the belly of the fish, following the contour of the bones.
- Once the fillet is mostly separated, cut through the skin at the tail end. Lift the fillet away.
- You should now have one boneless fillet with the skin still on.
Repeating for the Second Fillet
1. Flip the Fish:
- Turn the fish over to expose the second side.
- Repeat the entire process, starting with a cut behind the pectoral fin and along the backbone.
- Work carefully to separate the second fillet from the spine and ribs.
2. Remove the Second Fillet:
- Once fully separated, lift off the second fillet. You now have two complete fillets.
- The remaining fish carcass, including the head and bones, can be used for stock.
Skinning the Fillets (Optional)
1. Prepare for Skinning:
- Place a fillet skin-side down on the cutting board.
- Make a small incision at the tail end of the fillet, just between the skin and the flesh.
2. Remove the Skin:
- Grip the skin firmly with one hand. Angle your knife slightly down, almost parallel to the board.
- Slide the knife forward, wiggling it gently, while pulling the skin taut. This separates the flesh from the skin.
- Work slowly and steadily to avoid losing too much flesh.
Pin-Boning (Optional but Recommended)
1. Feel for Pin Bones:
- Run your fingers along the center line of each fillet. You will feel small, needle-like bones.
- These are called pin bones. They are remnants from the rib cage area.
2. Remove Pin Bones:
- Use a pair of clean needle-nose pliers or special fish tweezers.
- Grasp each pin bone firmly and pull it out in the direction it came from. This minimizes tearing of the flesh.
- Go over the entire fillet carefully until all pin bones are removed. This ensures a boneless eating experience.
Proper Storage and Handling of Cleaned Red Snapper
After meticulously cleaning your red snapper, proper storage is vital. Correct handling preserves its freshness, flavor, and texture. It also ensures food safety. I always plan my storage method right after filleting.
Immediate Use
If you plan to cook the cleaned snapper within 24 hours, simple refrigeration is sufficient.
- Rinse and Pat Dry: First, gently rinse the fillets or whole fish under cold water. Pat them thoroughly dry with paper towels. Excess moisture can make fish spoil faster.
- Wrap Tightly: Wrap the fish tightly in plastic wrap or aluminum foil. Ensure there are no air pockets.
- Place on Ice: Put the wrapped fish on a bed of ice in a shallow pan. Place this in the coldest part of your refrigerator. The ice helps maintain a consistently low temperature. This keeps the fish fresh.
Freezing for Longer Storage
For longer storage, freezing is the best option. Properly frozen fish can last for several months without significant loss of quality.
- Individual Portions: If you have fillets, consider freezing them individually. Wrap each fillet tightly in plastic wrap. Then, place them in a freezer-safe bag or container. This prevents freezer burn.
- Vacuum Seal: For the best results, use a vacuum sealer. This removes all air, which is the primary cause of freezer burn. Vacuum-sealed fish can last up to 6 months.
- Ice Glaze (for whole fish or fillets): This method adds an extra layer of protection.
- Place the cleaned fish or fillets on a baking sheet and freeze for 30 minutes.
- Dip the semi-frozen fish into ice water. A thin layer of ice will form.
- Return to the freezer for 10-15 minutes.
- Repeat this dipping and freezing process 2-3 times. This creates a protective ice glaze.
- Then, wrap in plastic wrap and place in a freezer bag. This minimizes exposure to air.
Thawing Frozen Snapper
Thawing fish correctly is as important as freezing it.
- Refrigerator Thawing: The safest way to thaw frozen fish is slowly in the refrigerator. Transfer the frozen fish from the freezer to the fridge the night before you plan to cook it. This method maintains texture.
- Cold Water Thawing: For faster thawing, place the vacuum-sealed or tightly wrapped fish in a bowl of cold water. Change the water every 30 minutes. Do not use hot water, as it can cook the fish unevenly.
- Cook from Frozen: Some recipes allow cooking fish directly from frozen. This works well for baking or broiling thicker fillets. Adjust cooking times accordingly.
Always handle fresh and cleaned fish with clean hands and tools. Regularly clean your kitchen surfaces to prevent any contamination. Following these storage and handling tips ensures your hard work cleaning red snapper pays off with a delicious, safe meal.
Common Mistakes to Avoid When Cleaning Red Snapper
Cleaning red snapper can be a straightforward process. However, some common mistakes can make it harder or compromise the quality of your fish. Knowing what to avoid will help you achieve perfect results every time. I’ve certainly learned from my own errors!
1. Using a Dull Knife
This is perhaps the most common and dangerous mistake. A dull knife requires more force, increasing the risk of slips and injury. It also tears the flesh instead of making clean cuts, leading to ragged fillets. Always ensure your filleting knife is razor-sharp before you begin. A sharp knife glides through the fish with ease.
2. Not Preparing Your Workspace
Neglecting to prepare your cleaning area can lead to a messy, unhygienic, and frustrating experience. Scales will fly, and fish slime can get everywhere. Always cover your surfaces and have a designated waste bin. A clean and organized workspace makes the job much more efficient and enjoyable.
3. Cutting Too Deep During Gutting
When opening the belly, cutting too deep can puncture the stomach or intestines. This releases digestive contents, which can contaminate the flesh and create an unpleasant odor. Use a shallow, precise cut, just deep enough to open the cavity without piercing organs.
4. Leaving Gills or Bloodline
Forgetting to remove the gills or the dark bloodline along the backbone is a common oversight. Gills spoil quickly and can impart a bitter, fishy taste. The bloodline also contributes to a strong, metallic flavor. Always thoroughly clean out the gill arches and scrape away the bloodline. This ensures a clean-tasting fillet.
5. Rushing the Descaling Process
Descaling can be tedious, but rushing it means you will leave scales on the fish. Cooked scales are unpleasant to eat. Take your time, working against the grain, and check all areas, including near the fins and head. A thorough rinse afterward will confirm all scales are gone.
6. Not Rinsing Thoroughly
After each major step (descaling, gutting, gilling), a thorough rinse under cold running water is essential. This washes away loose scales, blood, and any bits of internal organs. Insufficient rinsing can leave residual odors or contaminants on the fish.
7. Improper Storage
Failing to store your cleaned snapper properly will lead to rapid spoilage. Exposure to air, warm temperatures, or prolonged contact with water degrades the fish quickly. Always pat dry, wrap tightly, and store on ice in the coldest part of the refrigerator, or freeze properly if not using immediately. A water filter can ensure the water you use for rinsing is clean.
By being mindful of these common pitfalls, you can clean your red snapper efficiently and safely, ensuring the best possible quality for your culinary endeavors. I always double-check these points before I consider the fish fully cleaned.
Frequently Asked Questions About Cleaning Red Snapper
Q1: Why is it important to clean red snapper immediately after catching it?
A1: Cleaning red snapper promptly after catching is vital for freshness. Fish enzymes and bacteria begin to break down the flesh quickly after death, especially in warm conditions. Immediate cleaning removes the internal organs and blood, which are primary sources of spoilage. This practice helps preserve the delicate flavor and firm texture of the fish.
Q2: Can I freeze red snapper whole before cleaning?
A2: While you technically can freeze red snapper whole, it is not recommended for optimal quality. Freezing a whole, uncleaned fish can lock in bacteria and enzymes from the guts, which may compromise flavor and texture when thawed. For best results, always clean (descale, gut, gill) the snapper before freezing, or ideally, fillet it.
Q3: What if I don’t have a dedicated fish scaler?
A3: If you do not have a dedicated fish scaler, several common kitchen items can serve as effective substitutes. The back of a sturdy butter knife, a dull knife, or even the edge of a spoon can be used to scrape off scales. Remember to work against the grain of the scales and do it in a sink or under running water to minimize mess.
Q4: How do I remove the “fishy” smell from my hands and cutting board after cleaning?
A4: To remove the “fishy” smell from your hands, rub them with lemon juice, vinegar, or baking soda, then rinse. For your cutting board, especially if it’s plastic, scrub it with a paste of baking soda and a little water, let it sit, then rinse thoroughly. For a more intensive clean, especially after dealing with strong odors, consider methods for cleaning stains on plastic.
Q5: Is cleaning red snapper a difficult process for beginners?
A5: Cleaning red snapper can seem challenging for beginners, but it is a very achievable skill. The process involves several distinct steps: descaling, gutting, gilling, and optionally filleting. With a sharp knife, the right tools, and a little patience, anyone can learn. Practice makes perfect, and each attempt will build your confidence and skill.
Q6: Can I leave the skin on the red snapper fillets when cooking?
A6: Yes, you can absolutely leave the skin on red snapper fillets when cooking. Many chefs prefer this for its crispy texture and flavor, especially when pan-searing or grilling. The skin also helps the fillet hold together during cooking. Ensure the skin is thoroughly descaled if you choose to leave it on.
Elevate Your Culinary Skills: Cleaning Red Snapper with Confidence
Learning how to clean red snapper yourself is a fantastic step in your culinary journey. You gain control over the freshness and quality of your seafood. This skill not only saves you money but also connects you more deeply with your food. We covered everything from setting up your workspace to the precise art of filleting.
Remember, a sharp knife, proper hygiene, and patience are your best friends throughout this process. By following these steps—descaling, gutting, gilling, and filleting—you ensure your red snapper is perfectly prepared for any dish. You now have the knowledge to transform a whole fish into delicious, boneless portions.
Do not be intimidated; practice makes perfect. With each fish you clean, your confidence and skill will grow. I encourage you to try it. Embrace the satisfaction of serving your family and friends fresh, expertly cleaned red snapper. So, grab your tools, prepare your space, and get ready to enjoy the best seafood experience right from your own kitchen.
- fish cleaning
- red snapper preparation
- filleting fish
- seafood handling
- kitchen skills

Todd Martin
Senior Writer
With over 15 years of experience in home renovation and design, I started HEG to share what I’ve learned with homeowners who want to create spaces that are both beautiful and functional. I’ve always believed in a hands-on approach, and over the years, I’ve picked up practical solutions that actually work. Through HEG, I aim to make home improvement more approachable, sharing real tips that help you create a home you truly love.