· Todd Martin · Home Repair · 16 min read
How To Fix Gap Between Cabinet Doors
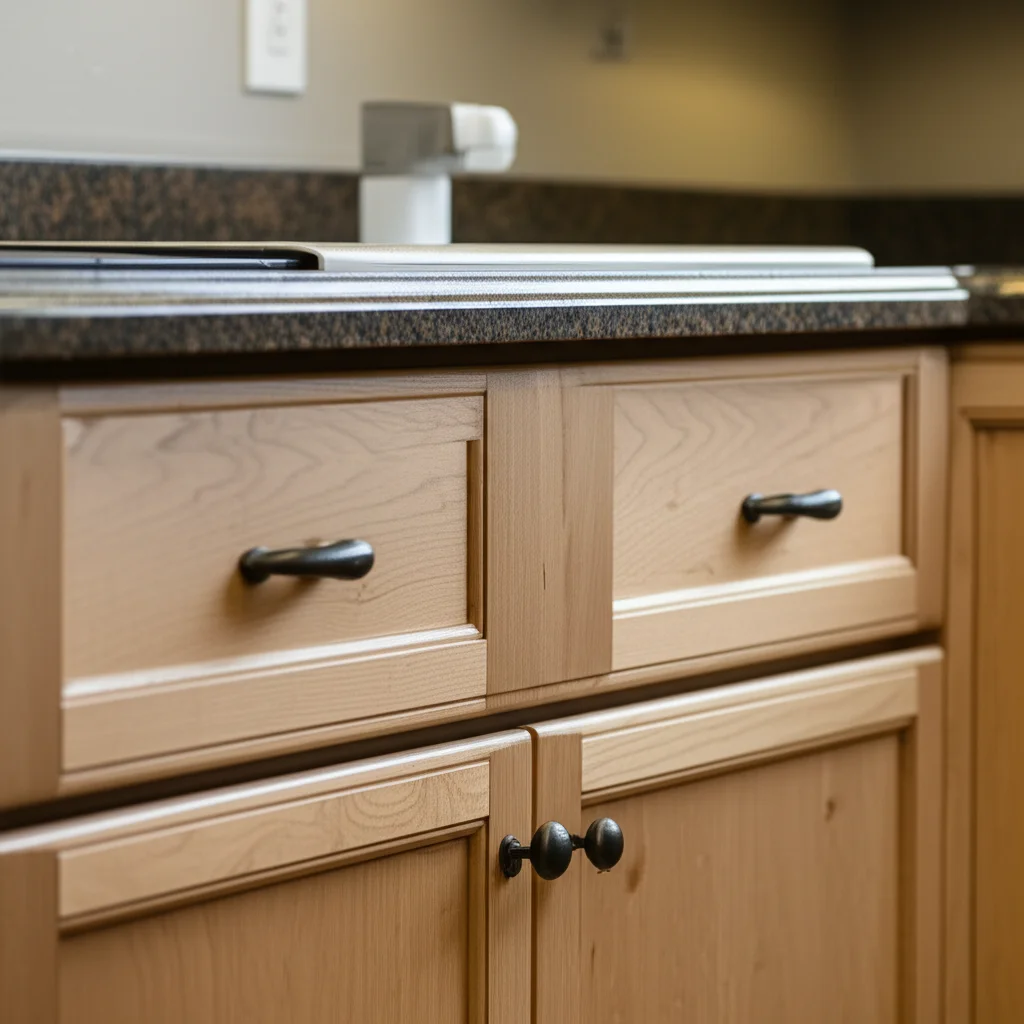
Fix Gaps Between Cabinet Doors: Your Complete DIY Guide
Do you notice annoying gaps between your cabinet doors? These gaps make your kitchen or bathroom look untidy. They can also let dust and debris into your cabinets. I understand how frustrating this can be. A small gap can ruin the look of your entire space.
Many homeowners face this problem. The good news is that you can fix gap between cabinet doors yourself. You do not need special tools or skills. This guide will walk you through each step. We will cover common reasons for gaps. We will also explain how to solve them. You will learn about adjusting hinges. You will also learn how to repair damaged parts. By the end, your cabinet doors will close perfectly. Your cabinets will look great again.
Takeaway
- Check cabinet hinges first. They are the most common cause of gaps.
- Adjust screws on European-style hinges for horizontal, vertical, and depth alignment.
- Repair stripped screw holes using wood glue and toothpicks.
- Address warped doors by shimming or, in severe cases, replacing them.
- Ensure the cabinet box is square for proper door alignment.
- Perform regular checks to prevent future gap issues.
To fix gap between cabinet doors, you usually need to adjust the hinges. Modern hinges have screws for side-to-side, up-and-down, and in-and-out adjustments. If hinges are loose or damaged, tightening screws or repairing stripped holes often solves the problem. Sometimes, a warped door or an out-of-square cabinet box also needs attention.
Understanding Cabinet Door Gaps: Common Causes
Gaps between cabinet doors are a frequent issue. Many things can cause these gaps. Knowing the reason helps you fix the problem correctly. I often see people rush to adjust hinges without checking other factors. This can lead to more frustration. Take a moment to understand why your doors do not align.
One main reason is loose or worn hinges. Cabinet doors get a lot of use. Over time, screws can loosen. Hinges can also bend or break. This makes the door sag. A sagging door creates a gap at the top or bottom. It can also cause doors to rub against each other.
Another common cause is the cabinet structure itself. Sometimes, the cabinet box is not square. This happens if the cabinet was installed incorrectly. It can also happen if the house settles. If the box is out of square, doors will never hang straight. This creates uneven gaps. Learning how cabinets are built can help you diagnose this issue. For instance, understanding the basic structure of a pantry cabinet with doors can provide insight into potential frame issues.
Wood changes with humidity. This can cause doors to warp. A warped door bows or twists. You will see a gap on one side. The door may also stick when you try to close it. This is more common in areas with high humidity. Old doors are also more prone to warping.
Finally, stripped screw holes are a big problem. The screws that hold hinges can pull out from the wood. This happens when doors are opened forcefully or when screws are overtightened. When a screw hole is stripped, the hinge loses its grip. The door will become loose and unstable. This directly leads to alignment problems and gaps.
Gathering Your Tools: Essential Items for Gap Repair
Before you start, gather all necessary tools. Having the right tools makes the job easier. It also ensures you complete the repair safely. You do not need many specialized items. Most of these tools are common in any home.
First, you will need a good set of screwdrivers. A Phillips head screwdriver is essential. Most cabinet hinges use Phillips head screws. A flathead screwdriver might also be useful for prying or fine adjustments. Make sure your screwdrivers have comfortable grips. This helps prevent hand fatigue.
Next, consider a power drill. A drill is not always necessary, but it can be helpful. You might need it to drill new pilot holes. This is especially true if you are repairing stripped screw holes. Use a drill with caution. Set it to a low torque setting. This prevents stripping screws or damaging wood.
You will also need wood shims or small wedges. These are thin pieces of wood. They help level the cabinet frame. You can also use them to adjust doors slightly. Look for shims at a hardware store. Small wooden craft sticks can also work in a pinch.
Wood glue and toothpicks are vital for stripped screw holes. These materials fill the hole. They give the screw something new to grip. You might also want some small wood plugs or dowels. These offer a stronger repair for larger stripped holes. Keep a clean cloth nearby for excess glue.
A level and a measuring tape are also useful. A level helps you check if your cabinet box is plumb and square. A measuring tape helps you measure door dimensions. These tools help identify structural issues. They ensure your final adjustments are precise. Having all these items ready saves you time and effort during the repair process.
Adjusting Cabinet Hinges: The Primary Fix
Adjusting hinges is the most common way to fix gaps between cabinet doors. Many modern cabinet hinges, often called European or concealed hinges, have three adjustment screws. These screws allow for precise control over door alignment. If you want to understand more about different hinge types, you can look into resources like how to hang cabinet doors with exposed hinges to see a contrast in mechanisms. I always start with hinge adjustments because they often solve the problem quickly.
Let us look at how these adjustments work. Each hinge has a set of screws. One screw adjusts the door horizontally. This moves the door side-to-side. If your doors are too close or too far apart, this is the screw to turn. Turning it clockwise often pulls the door closer to the cabinet frame. Turning it counter-clockwise moves it away.
Another screw adjusts the door vertically. This moves the door up and down. If one door is higher or lower than the other, use this screw. You might need to adjust both the top and bottom hinges. Make small turns. Then, check the door alignment. This ensures you do not over-adjust.
The third screw adjusts the door’s depth. This moves the door in and out from the cabinet frame. It controls how tightly the door closes against the cabinet. If your door does not close flush, this screw can help. It also affects the gap between the door and the cabinet face. Adjust this screw to ensure the door sits perfectly flat.
Start with the horizontal adjustment. This is usually the most needed fix. Make small turns with your screwdriver. Turn the screw a quarter turn. Then, close the door and check the gap. Repeat this until the gap is even. Then, move to the vertical adjustment. Finally, use the depth adjustment if the door does not sit flush. Take your time. Adjusting hinges requires patience and precision. You will see an improvement with each small change.
Dealing with Warped Cabinet Doors and Frame Issues
Sometimes, adjusting hinges is not enough. The problem might be a warped door or an out-of-square cabinet frame. These issues require different solutions. I have seen many cases where warped doors were the main culprit behind stubborn gaps. It is important to identify these problems accurately.
First, check for a warped door. Close the door and look at it from different angles. Does it bow outwards or inwards? Does one corner stick out more than the others? Laying a straightedge across the door face can also help. If you find a warp, you have a few options. For a minor warp, sometimes adding a small shim behind the hinge or adjusting the depth screw can help pull the door flatter. Door straighteners, metal bars installed on the back of the door, can also correct minor warps over time. However, severe warps often mean the door needs replacement. You could consider making shaker cabinet doors from old flat fronts as a DIY replacement option.
Next, check the cabinet frame. An out-of-square frame can make perfectly good doors look crooked. Use a level to check the cabinet’s top, bottom, and sides. Also, measure the diagonals. If the diagonal measurements are not equal, the cabinet is out of square. For wall cabinets, this might mean shimming behind the cabinet where it mounts to the wall. This pulls the frame back into square. For base cabinets, check the leveling feet or shims underneath.
If the frame is slightly out of square, you can use wood shims. Place them behind the hinge side of the cabinet frame. This pushes the frame just enough to make the door hang straighter. You might need to loosen cabinet mounting screws first. Then, insert the shims. Retighten the screws. This takes careful work. This step ensures your doors hang correctly from a stable base. Remember, a square frame is crucial for proper door alignment.
Repairing Stripped Screw Holes in Cabinetry
Stripped screw holes are a very common problem in cabinet repair. When a screw spins freely and does not tighten, the hole is stripped. This means the wood fibers around the screw are damaged. A loose hinge cannot hold the door in place. This will always create a gap. I have fixed countless stripped holes. It is a straightforward repair that makes a big difference.
The simplest method uses wood glue and toothpicks. First, remove the screw and the hinge. Apply wood glue into the stripped hole. Take several wooden toothpicks and push them into the hole. Push in as many as you can fit. Break off the ends of the toothpicks flush with the wood surface. Let the glue dry completely. This usually takes a few hours. Once dry, the toothpicks and glue create a solid, new surface inside the old hole. You can then reinsert the screw. It will now have something firm to grip. This technique is effective for most small stripped holes. For more details on this, you can refer to how to fix stripped screw hole in wood cabinet.
For larger or severely damaged holes, you might need a dowel or wood plug. Remove the hinge. Use a drill bit that matches the size of a wooden dowel. Drill out the stripped hole to a clean, round shape. Apply wood glue to the dowel. Insert the dowel into the drilled hole. Tap it gently with a hammer until it is flush. Allow the glue to dry. Once dry, you can cut the dowel flush with a flush-cut saw. Then, drill a new pilot hole directly into the center of the dowel. Reattach the hinge with a new screw. This method creates a very strong repair.
Another option is to use a larger screw. If the existing screws are small, you can try using a slightly wider screw. Be careful with this method. It might split the wood if the new screw is too large. Always pre-drill a small pilot hole. This helps guide the screw and prevents splitting. However, the toothpick or dowel method is usually a more reliable long-term solution for stripped holes. These fixes restore the hinge’s ability to hold the door firmly.
When DIY Isn’t Enough: Advanced Solutions & Pros
Most cabinet door gap issues are fixable with basic DIY methods. However, some problems need more advanced solutions. There are times when professional help is the best choice. Recognizing these situations saves you time and prevents further damage. I always advise homeowners to know their limits.
One advanced solution involves replacing old or worn hinges. If your hinges are bent, rusted, or simply too old, adjustment might not work. New hinges provide a fresh start. They ensure proper function and alignment. Replacing hinges is a fairly straightforward process. You unscrew the old ones. Then, you screw in the new ones. Make sure the new hinges match the old ones in size and type. This avoids drilling new holes. Consider upgrading to soft-close hinges. They prevent slamming. This extends the life of your cabinet doors.
If a cabinet door is severely warped, replacement is often the only real fix. Minor warps can sometimes be corrected. But a door that is twisted or bowed beyond repair will always have gaps. You can buy new doors. You can also have custom doors made. This choice depends on your budget and the style of your cabinets. Replacing doors can also be an opportunity to update your kitchen’s look.
Structural damage to the cabinet box itself is a more complex problem. If the cabinet frame is badly damaged, rotten, or falling apart, a simple door adjustment will not help. This might require disassembling and rebuilding parts of the cabinet. Or it might mean replacing the entire cabinet unit. These are significant projects. They often need carpentry skills.
If you have tried all the DIY steps and still have issues, it is time to call a professional. A skilled carpenter or cabinet maker can diagnose complex problems. They have specialized tools. They also have experience fixing major structural issues. They can re-square cabinets. They can install custom door solutions. Professional help ensures the job gets done right. This saves you stress and future repair costs.
Preventing Future Gaps: Cabinet Door Maintenance
Fixing cabinet door gaps is great. But preventing them in the first place is even better. Regular maintenance keeps your cabinet doors looking good. It also ensures they function correctly for years. I always recommend a simple routine to homeowners. It helps avoid many common problems.
First, regularly check your hinges. At least once or twice a year, open your cabinet doors. Look closely at the hinges. Are any screws loose? If so, tighten them gently. Do not overtighten. This can strip the screw holes. Are the hinges bent or corroded? If they look damaged, consider replacing them before they cause major issues. This simple check takes only a few minutes. It can save you from bigger repairs later.
Next, control the humidity in your home. Wood is sensitive to moisture. High humidity can cause doors to swell and warp. Low humidity can cause them to shrink and crack. Use a dehumidifier in humid months. Use a humidifier in dry months. Keep your home’s temperature stable. This helps keep the wood stable. It prevents your cabinet doors from moving. Consistent humidity levels are crucial for wood furniture and cabinetry longevity.
Proper cleaning and care also help. Avoid using harsh chemicals on your cabinet doors. These can damage the finish. Use a soft cloth and a mild cleaner. Clean your cabinet doors regularly. This removes dirt and grime. It also gives you a chance to inspect them. For general cabinet cleaning tips, you can refer to how to clean cabinet or for cleaning the doors specifically, how to clean cupboard doors.
Finally, be gentle with your cabinet doors. Avoid slamming them shut. Do not lean on them. Do not hang heavy items on them. These actions put stress on hinges and door frames. This leads to loosening and damage over time. Teach children to close doors carefully. By following these simple maintenance tips, you can greatly reduce the chances of future gaps appearing between your cabinet doors.
FAQ Section
Q: Why do my cabinet doors keep developing gaps even after I fix them? A: Gaps often return due to underlying issues. Check for constant humidity changes in your home, which warp wood. Also, confirm your cabinet box is square and stable. Loose mounting screws for the entire cabinet can cause repeated alignment problems. Sometimes, worn-out hinges simply cannot hold the door properly anymore and need replacement.
Q: What is the easiest way to tell if my cabinet door is warped? A: Close the door and stand back to view it from different angles. Look for any bowing, twisting, or unevenness. A simple test is to hold a long, straight ruler or level against the face of the door. If light shows through significantly in the middle or at the edges, your door is likely warped.
Q: Can I fix a cabinet door that is rubbing against another door or the frame? A: Yes, rubbing is a sign of misalignment. Adjust the hinge screws, usually the horizontal adjustment, to move the door away from the rubbing point. If the door itself is warped, you may need to shim the hinge or, in severe cases, consider replacing the door entirely to prevent further rubbing and damage.
Q: How often should I perform maintenance on my cabinet doors? A: A good schedule is to perform a quick check twice a year, perhaps when you do spring and fall cleaning. Look for loose screws, inspect hinges for damage, and check door alignment. This proactive approach helps catch small issues before they become major problems that require extensive repair work.
Q: Is it better to replace old hinges or try to fix them? A: If hinges are simply loose, tightening screws often works. If screws are stripped, a simple repair can fix it. However, if hinges are bent, rusted, or show significant wear and tear, replacing them is usually the best option. New hinges provide stability and smooth operation, preventing future alignment issues.
Q: What if my cabinet doors are still gapped after trying all adjustments? A: If adjustments do not work, the issue might be a severely warped door or an out-of-square cabinet box. It could also be significant structural damage. In such cases, replacing the door or having a professional carpenter re-square the cabinet frame might be necessary. Do not hesitate to seek expert help for complex problems.
Conclusion
Seeing gaps between cabinet doors can be annoying. It affects how your kitchen or bathroom looks. However, fixing these gaps is often a simple task. I hope this guide gives you the confidence to tackle this common home repair. You learned about common causes. You also now know how to adjust hinges. You can repair stripped screw holes. You can even address warped doors.
Remember, patience is key. Make small adjustments. Then, check your progress. Most of the time, adjusting a few screws on your hinges will solve the problem. Regular checks and basic maintenance prevent future gaps. This keeps your cabinet doors looking good. It also ensures they function well for a long time. Take pride in knowing you can improve your home with your own hands. Do not let those gaps bother you anymore. Your cabinets will thank you. For more helpful tips and DIY guides, explore the rest of our website.
- cabinet repair
- door alignment
- DIY cabinet fix
- hinge adjustment
- kitchen cabinets
- home improvement

Todd Martin
Senior Writer
With over 15 years of experience in home renovation and design, I started HEG to share what I’ve learned with homeowners who want to create spaces that are both beautiful and functional. I’ve always believed in a hands-on approach, and over the years, I’ve picked up practical solutions that actually work. Through HEG, I aim to make home improvement more approachable, sharing real tips that help you create a home you truly love.