· Kianna Connelly · Home Repair · 19 min read
How To Fix Shelf That Fell Out Of Wall
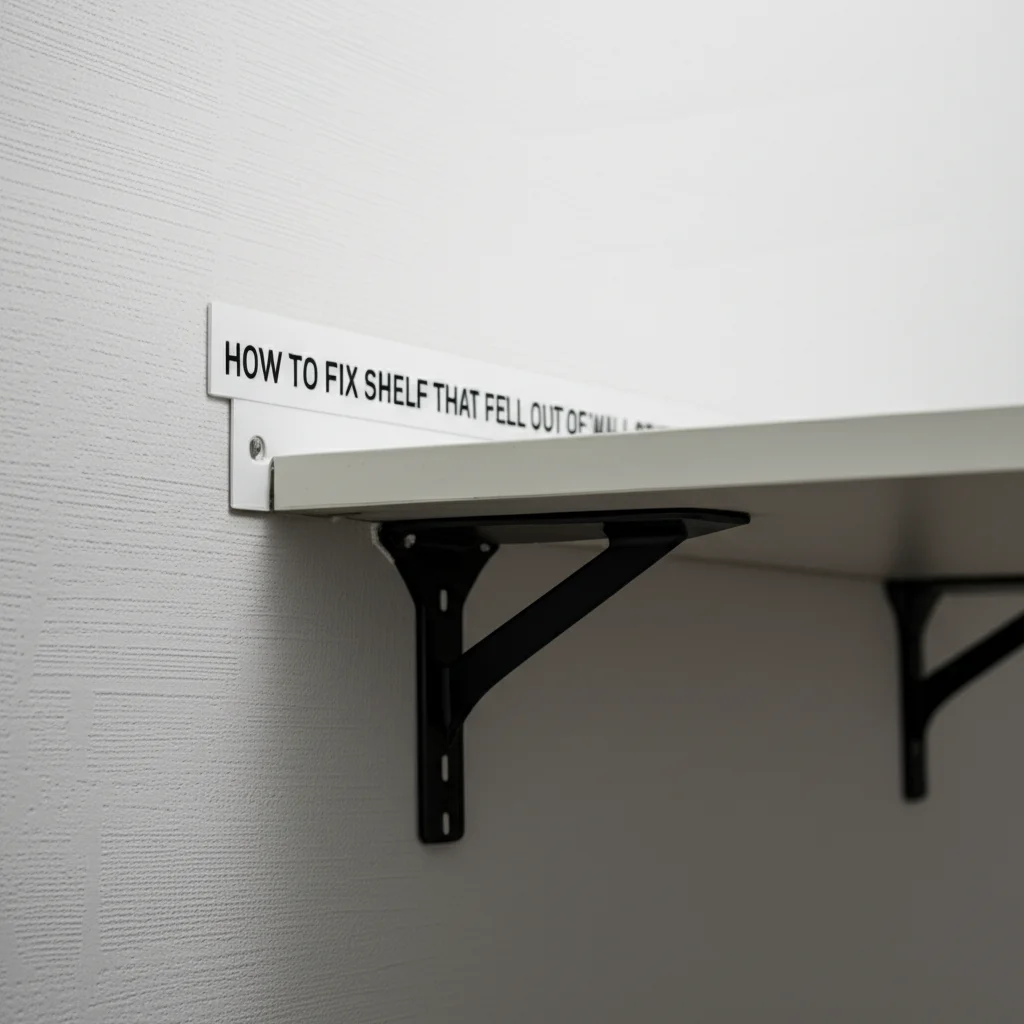
Fix a Shelf That Fell Out of the Wall
A shelf suddenly detaching from the wall can feel like a mini disaster. Books, decor, or even kitchen items might scatter everywhere. You probably feel frustrated and maybe a little overwhelmed by the mess and the damaged wall. Fixing a shelf that fell out of the wall is a common home repair task. I know the feeling of looking at a gaping hole where a functional shelf once stood. This guide gives you clear steps to repair the damage and reinstall your shelf more securely. We will cover assessing the wall, repairing the drywall, selecting the right hardware, and installing the shelf to last.
Takeaway
- Assess Damage: Inspect the wall and shelf for damage immediately.
- Repair Wall: Patch holes and smooth the surface before reinstalling.
- Choose Anchors: Select anchors appropriate for your wall type and shelf weight.
- Locate Studs: Mount shelves into studs whenever possible for maximum strength.
- Reinstall Securely: Follow proper installation techniques to prevent future falls.
When a shelf falls out of the wall, you need to first assess the damage to both the wall and the shelf. Next, you must repair any holes in the drywall. Then, choose stronger mounting hardware, like toggle bolts or molly bolts, based on the wall type and shelf weight. Finally, reinstall the shelf, ensuring it connects directly to wall studs if possible.
Why Your Shelf Fell Out: Understanding the Cause
When a shelf collapses, it is often due to poor installation or overload. The first step in fixing a shelf that fell out of the wall is understanding why it happened. This helps you prevent future incidents. You can avoid repeat problems by identifying the root cause.
Many shelves fall because of incorrect anchors. Standard plastic anchors work for light items but fail under heavy loads. If your shelf held many books, the anchors might not have been strong enough. Another common reason is improper stud location. Shelves perform best when mounted directly into wall studs. Studs provide a solid wood base for screws. Drywall alone cannot support heavy weights without special anchors.
Sometimes, the weight on the shelf exceeds its capacity. You might have added more items over time, slowly stressing the anchors. Over time, even correctly installed shelves can fail if they consistently hold too much weight. Poor quality installation hardware also contributes to shelf failures. Generic screws or cheap anchors might strip or break easily. Checking the hardware’s quality before installation is important. This prevents future problems.
Additionally, the wall material plays a big role. Drywall is weaker than plaster or concrete. Each wall material requires specific anchors for secure attachment. Using the wrong anchor for the wall type guarantees failure. Always match your hardware to your wall.
- Common Reasons for Shelf Failure:
- Overloading: Too much weight on the shelf.
- Incorrect Anchors: Using anchors too weak for the weight or wall type.
- No Stud Connection: Not mounting into wall studs when possible.
- Poor Installation: Loose screws, incorrect drilling, or hasty work.
- Wall Material: Incompatible hardware for drywall, plaster, or concrete.
- Moisture Damage: Water weakening the wall material around the anchors.
Understanding these reasons helps you choose the correct repair method. You can address the specific problem that led to the shelf falling. This ensures your newly fixed shelf stays put.
Assessing Wall and Shelf Damage
Before you can fix a shelf that fell out of the wall, you must carefully assess all damage. This step is crucial for planning your repair effectively. You need to know exactly what needs fixing on both the wall and the shelf. Start by examining the wall where the shelf detached. Look for large holes, cracks, or crumbled drywall. Small screw holes are easy to patch, but large chunks missing require more substantial repair.
Check the edges of the damaged area. Are they clean or jagged? Jagged edges mean more plaster or drywall needs removal before patching. You should also check for any signs of moisture damage, such as water stains or soft, crumbling material. Water damage indicates a bigger underlying issue that needs addressing first. If you spot any dirt or residue around the damage, a quick clean might be beneficial for future repair work. You can learn more about general wall cleaning by reviewing guides on how to wash a wall.
Next, inspect the shelf itself. Check the shelf brackets and the shelf board. Are the brackets bent or warped? Are the screw holes on the shelf board stripped or enlarged? If the shelf board is severely cracked or split, you might need a new shelf. Sometimes, only the hardware is damaged, and the shelf itself is fine. Look for any screws still stuck in the shelf or brackets. Remove these carefully.
Evaluate the type of existing anchors. Were they plastic, self-drilling, or toggle bolts? This helps you understand what failed. If they were simple plastic anchors, they were likely inadequate for the load. Take pictures of the damage if you need to remember specifics or consult with someone. This visual record helps you track your repair progress too.
- Wall Damage Checklist:
- Size and depth of holes.
- Cracks in drywall or plaster.
- Loose or crumbling wall material.
- Signs of moisture or mold.
- Shelf Damage Checklist:
- Bent or broken brackets.
- Stripped screw holes on the shelf.
- Cracks or splits in the shelf board.
- Condition of existing hardware (screws, anchors).
A thorough assessment ensures you gather the correct materials for the repair. It also helps you choose the best method for reattaching the shelf. This careful evaluation prevents surprises during the repair process.
Gathering Your Tools and Materials
Having the right tools and materials is essential to fix a shelf that fell out of the wall. This preparation makes the repair job smooth and efficient. You do not want to stop mid-task because you lack a crucial item. Start by collecting basic hand tools. You will need a tape measure, a pencil, and a level. A stud finder is also very important. It helps you locate the strong wooden framing members behind your wall. Using these studs provides the most secure mounting points.
For wall repair, gather drywall patching compound or spackle. You will also need a putty knife for applying the compound. Sandpaper, usually 120-grit, is necessary for smoothing the patched area. A small piece of drywall mesh tape or a drywall patch kit can help for larger holes. You might also need a utility knife to trim jagged edges. Having a clean rag or sponge for wiping away dust is also useful.
When it comes to reinstallation, new anchors are key. Do not reuse the old ones if they failed. The type of anchor depends on your wall material and the weight your shelf will hold. For drywall, consider heavy-duty toggle bolts, molly bolts, or self-drilling anchors rated for higher loads. If you plan to secure items like a heavy metal bed frame to a wall, the principles of how to secure a metal loft bed to the wall offer valuable insights into robust wall fastening. For concrete or brick, you will need masonry anchors and a hammer drill. New screws compatible with your chosen anchors are also necessary. Match the screw length and diameter to the anchor specifications.
Finally, consider safety gear. Safety glasses protect your eyes from dust and debris. Gloves can prevent cuts and splinters. A dust mask is good when sanding drywall compound. Having a drill with various drill bits will make pilot holes and secure screws easier. Make sure your drill bits match the size needed for your anchors and screws.
- Essential Tools:
- Stud finder
- Tape measure
- Pencil
- Level
- Drill with various bits
- Screwdriver (Phillips and flathead)
- Putty knife
- Utility knife
- Sandpaper (120-grit)
- Necessary Materials:
- Drywall patching compound or spackle
- Drywall mesh tape or patch kit (for larger holes)
- New, appropriate wall anchors (toggle bolts, molly bolts, etc.)
- New screws (compatible with anchors)
- Painter’s tape
- Primer and paint (matching wall color)
- Safety Gear:
- Safety glasses
- Gloves
- Dust mask
Gathering everything before you start saves time and frustration. It allows you to focus on the repair work itself.
Repairing the Wall Damage
Once you have assessed the damage and gathered your tools, it is time to repair the wall. This is a critical step to fix a shelf that fell out of the wall. You need a smooth, stable surface before you can rehang anything. Start by preparing the damaged area. Use a utility knife to carefully cut away any loose or crumbling drywall around the holes. You want clean edges for a better patch. Remove any lingering bits of old anchors or screws. A clean surface ensures better adhesion for the patching material.
For small holes, under half an inch in diameter, you can often just fill them directly with spackle or lightweight patching compound. Apply the compound with a putty knife, pressing it firmly into the hole. Overfill slightly, then smooth it flush with the wall surface. Let it dry completely. For larger holes, use a self-adhesive drywall patch. These patches have a mesh backing that reinforces the area. Place the patch over the hole, ensuring it covers the entire damaged section. Then, apply a thin layer of patching compound over the mesh, feathering the edges. You can get more tips on handling gaps in walls, especially if they are larger, by checking out resources like how to fill large gap between cabinet and wall.
For holes larger than 4-6 inches, you might need to cut out a square section of drywall and insert a new piece. Cut the damaged area into a neat square. Cut a new piece of drywall to fit this opening. Secure small wood furring strips inside the wall to provide backing for the new drywall piece. Screw the new drywall piece into these strips. Then, apply joint compound and drywall tape over the seams.
Once the first layer of compound is dry, apply a second, thin coat if needed. Smooth it out again. This step helps achieve a perfectly flat surface. Wait for it to dry. Next, lightly sand the patched area using 120-grit sandpaper until it is smooth and flush with the surrounding wall. Wipe away all dust with a damp cloth. You want no bumps or ridges.
Finally, prime the patched area. This seals the repair and helps the new paint match the existing wall color. Once the primer is dry, paint the patched area to match your wall. You might need two coats of paint. Allow each coat to dry fully. A properly repaired wall looks seamless and provides a strong foundation for your shelf.
- Steps for Wall Repair:
- Clean and prepare the damaged area.
- For small holes, fill with spackle.
- For medium holes, use a self-adhesive drywall patch.
- For large holes, cut out and replace drywall section.
- Apply patching compound in thin layers.
- Sand the patched area smooth after drying.
- Prime and paint to match the wall.
Taking your time with the wall repair ensures a professional-looking finish. It also prepares the wall for a much stronger shelf installation.
Choosing the Right Anchors and Mounting Hardware
Selecting the correct anchors and mounting hardware is the most critical step to fix a shelf that fell out of the wall and prevent future problems. The right hardware ensures your shelf stays securely in place, even under load. You must consider the wall material and the weight of items you plan to put on the shelf. Do not reuse old, failed anchors. Always invest in new, high-quality hardware.
For drywall, the most common interior wall material, standard plastic anchors are often insufficient for shelves. They are fine for light pictures but not for functional shelving. Instead, look for heavy-duty options. Toggle bolts are excellent for heavy loads. They work by creating a wide, strong brace behind the drywall. Molly bolts (also called expansion anchors) are another good choice. They expand within the wall cavity, providing a secure grip. Self-drilling drywall anchors are quicker to install but generally hold less weight than toggle or molly bolts. For maximum strength, always try to anchor into wall studs. A stud finder helps locate these wooden supports behind the drywall.
If your wall is plaster over lath, traditional anchors can be tricky. Plaster can crumble. For plaster walls, toggle bolts are usually the best option as they bridge the lath. Specialized plaster anchors also exist. For concrete or brick walls, you need masonry anchors. These require drilling into the masonry with a hammer drill and masonry bit. Then, you insert the anchor and screw. Masonry screws can also directly penetrate concrete if properly drilled.
Beyond the anchors, consider the shelf brackets themselves. Ensure they are strong enough for the intended load. Look for sturdy metal brackets. Also, use screws that are compatible with your chosen anchors and long enough to fully engage them. Too-short screws will not provide a secure hold. Match the screw type (e.g., Phillips, flathead) to your screwdriver.
- Anchor Types for Different Walls:
- Drywall (Light Loads): Self-drilling anchors (e.g., E-Z Ancor).
- Drywall (Medium to Heavy Loads): Toggle bolts, Molly bolts.
- Plaster: Toggle bolts, specialized plaster anchors.
- Concrete/Brick: Masonry anchors, lead anchors, concrete screws.
- Key Considerations:
- Wall Material: Drywall, plaster, concrete, wood studs.
- Shelf Weight: The combined weight of the shelf and its contents.
- Stud Location: Always prioritize mounting into studs if available.
- Bracket Strength: Use sturdy brackets appropriate for the load.
- Screw Compatibility: Ensure screws match anchors in size and type.
Choosing the right hardware upfront prevents future shelf failures. It provides the stability and support your shelf needs. This makes your repair job last for years.
Reinstalling Your Shelf Securely
Now that your wall is repaired and you have the correct hardware, it is time to reinstall your shelf. This step needs precision to ensure the shelf is level and secure. Proper reinstallation is key to fix a shelf that fell out of the wall for good. First, decide on the exact placement of your shelf. If you are reusing the old location, avoid the patched areas directly. Move the shelf up or down slightly, or shift it horizontally, to find fresh, strong wall material.
Use your stud finder to locate wall studs if possible. Mark their positions with a pencil. Mounting at least one side of the shelf into a stud provides superior strength. If you cannot hit a stud, mark the exact spots for your new, heavy-duty anchors. Hold the shelf bracket against the wall. Use a level to ensure it is perfectly straight. Mark the screw holes through the bracket with a pencil. Double-check your marks for accuracy. When hanging items on your wall, understanding how to prevent damage is helpful. For example, knowing how to hang a rug on the wall without damaging it can provide valuable techniques for careful installation.
Next, drill pilot holes at your marked locations. The drill bit size must match the specifications of your chosen anchors. Do not drill too wide, or the anchor will not grip. Insert your chosen anchors into the pilot holes according to the manufacturer’s instructions. For toggle bolts, push them through the hole until the wings pop open behind the drywall. For molly bolts, tap them in flush, then tighten the screw to expand them. For masonry anchors, you will drill, insert, and then drive your screw.
Once the anchors are in place, align the shelf brackets with the anchor points. Insert the appropriate screws through the bracket holes and into the anchors. Tighten them firmly but do not overtighten, especially with drywall anchors, as this can strip them. The bracket should feel solid and not wobble. Repeat this process for all brackets. If you are mounting a floating shelf, ensure its hidden bracket is securely attached to the studs or heavy-duty anchors before sliding the shelf onto it.
After the brackets are installed, place the shelf board on top of them. If the shelf has pre-drilled holes for screws to secure it to the brackets, drive those screws in. Use your level one final time to confirm the shelf is perfectly straight before loading it. Taking these steps ensures your shelf is reinstalled securely and safely.
- Steps for Secure Reinstallation:
- Determine new shelf placement (avoid old damage).
- Locate and mark wall studs or anchor points.
- Hold bracket, use level, and mark screw holes.
- Drill pilot holes to match anchor size.
- Install chosen anchors firmly according to instructions.
- Attach shelf brackets to anchors with screws.
- Secure shelf board to brackets.
- Verify levelness and stability.
This methodical approach to reinstallation provides confidence. Your shelf will now hold its intended weight.
Preventing Future Shelf Falls
After successfully repairing and reinstalling your shelf, the final step is to learn how to prevent future shelf falls. This ensures your hard work lasts and keeps your home organized. The goal is to avoid the frustration of another collapsed shelf. One of the primary reasons shelves fall is overloading. Always be mindful of the weight limit for your shelf and its mounting hardware. If you frequently put heavy items on shelves, consider using a different storage solution. For example, a cabinet with internal support or a floor-standing unit.
When installing any new shelf, always use a stud finder. Mounting directly into wall studs provides the strongest possible support. If studs are not available, invest in high-quality, heavy-duty drywall anchors specifically rated for the weight you anticipate. Do not cut corners with cheap hardware. Quality hardware is an investment in your home’s functionality. For instance, if you are looking to hang something heavy and decorative like a large textile, understanding principles from articles like how to hang a Persian rug on the wall can offer insights into secure hanging methods for substantial items.
Distribute weight evenly across the shelf. Do not pile all heavy items on one end or in the center. Spreading the load helps prevent stress points that can lead to failure. If you have adjustable shelves, ensure the support pins or clips are fully inserted into the shelf holes. Check them periodically. Also, avoid placing items that are too large or awkwardly shaped on shelves. They can create leverage that pulls the shelf down.
Consider the environment where your shelf is located. High humidity or temperature fluctuations can sometimes weaken wall materials over time. In bathrooms or other damp areas, choose moisture-resistant shelving and hardware. Periodically inspect your shelves. Check for any wobbling, loose screws, or signs of stress on the wall. Tighten screws as needed. Early detection of issues can prevent a complete collapse.
Finally, think about the type of shelf itself. Floating shelves, which have no visible brackets, often rely entirely on strong internal anchors. They might have lower weight capacities than shelves with visible, robust brackets. Choose the right shelf style for your needs and weight requirements. By following these preventive measures, you can enjoy your securely mounted shelves for a long time.
- Key Prevention Strategies:
- Respect Weight Limits: Do not overload shelves.
- Use Studs: Always mount into wall studs when possible.
- Choose Quality Hardware: Invest in heavy-duty anchors for non-stud installations.
- Even Weight Distribution: Spread items evenly across the shelf.
- Regular Inspections: Check for wobbles or loose fasteners.
- Consider Shelf Type: Match shelf style to its intended use and weight.
- Environmental Factors: Account for humidity or temperature if relevant.
These practices ensure your shelves remain safe and functional. They provide peace of mind in your home.
FAQ Section
What is the best type of anchor for a heavy shelf in drywall?
For heavy shelves in drywall, the best anchors are toggle bolts or molly bolts. Toggle bolts deploy wings behind the drywall, creating a large, secure grip. Molly bolts expand within the wall cavity, offering strong support. Both are significantly stronger than standard plastic anchors for substantial weight. Always check their weight ratings.
How do I patch a large hole in drywall where a shelf fell out?
To patch a large hole, cut around the damage to create a neat square opening. Cut a new piece of drywall to fit this opening. Secure wood furring strips inside the wall to provide backing for the new drywall piece. Screw the new drywall into these strips, then apply joint compound and drywall tape over the seams.
Can I just use longer screws when fixing a shelf that fell?
No, using longer screws alone is often not enough if the original anchors failed. Longer screws still need a strong anchor point. If the wall material is damaged, they will not grip. You must repair the wall and use new, appropriate anchors designed for the wall type and shelf weight for a secure fix.
How can I find wall studs to hang a shelf?
You can find wall studs using a stud finder, a handheld electronic device that detects changes in wall density. Move it slowly across the wall. It will beep or light up when it detects a stud. Mark the edges of the stud with a pencil. This allows you to drill into the center for maximum strength.
What should I do if my shelf keeps falling even after repair?
If your shelf keeps falling, the issue might be fundamental to its design or your wall’s integrity. Ensure you are using the strongest possible anchors for your wall type, ideally mounting into studs. Re-evaluate the shelf’s weight capacity and consider a different type of shelf or storage solution. Sometimes, a professional assessment is needed.
How much weight can a typical drywall anchor hold?
The weight capacity of a drywall anchor varies widely by type. Basic plastic anchors hold 10-20 pounds. Self-drilling anchors might hold 30-50 pounds. Heavy-duty molly bolts and toggle bolts can support 50-100+ pounds each, depending on their size and design. Always check the manufacturer’s specific weight rating.
Conclusion
Seeing a shelf detach from your wall can be alarming. However, learning how to fix a shelf that fell out of the wall is a valuable skill. It is a common home repair that you can definitely tackle yourself. By carefully assessing the damage, choosing the right tools, and applying proper repair techniques, you can restore functionality and stability to your living space. Remember, the key to a lasting fix lies in understanding why the shelf failed. It also involves selecting the correct, strong hardware for your specific wall material and intended load.
We covered steps from diagnosing the cause to meticulously repairing the wall and securely reinstalling your shelf. We also discussed essential preventive measures to ensure your shelves remain steadfast for years to come. Do not let a fallen shelf intimidate you. With the right approach, you can transform a frustrating problem into a rewarding DIY success. Take action today, gather your supplies, and make your shelves stronger than before. Your organized home awaits.
- shelf repair
- wall damage
- drywall repair
- shelf installation
- home improvement

Kianna Connelly
Cleaning Expert
With a background in hospitality management and a passion for professional organizing, I’ve dedicated my career to helping people create cleaner, calmer living spaces. At HEG, I design efficient, eco-friendly cleaning systems that not only save time but also deliver spotless, lasting results. I believe that a well-organized home brings peace of mind—and I’ve had the privilege of transforming thousands of homes with practical strategies that truly work. Whether it’s streamlining routines or tackling the toughest messes, I’m here to make clean living simple and sustainable.