· Todd Martin · Home Improvement · 18 min read
How To Build Boxes Above Kitchen Cabinets
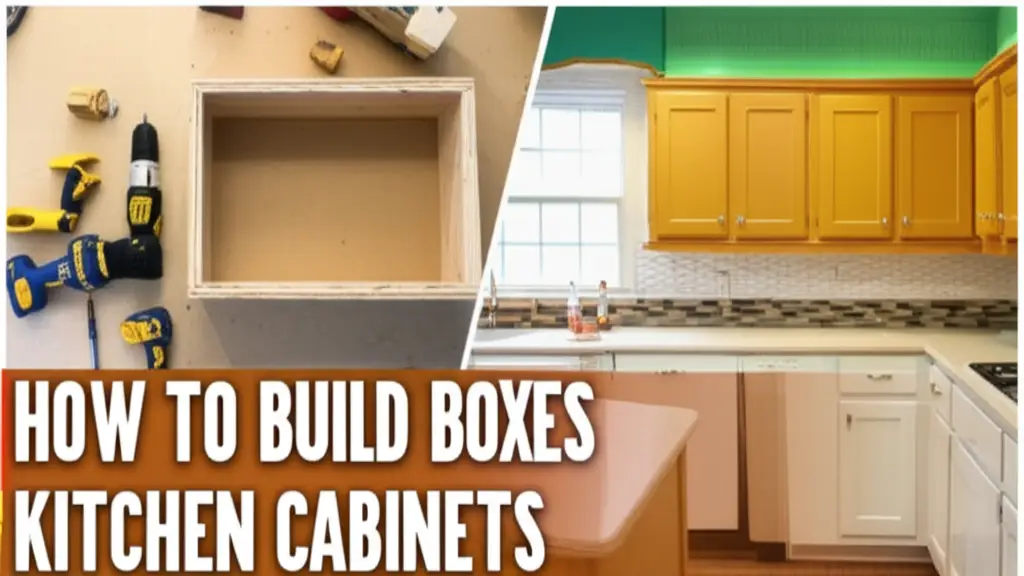
Extend Your Kitchen: Build Boxes Above Cabinets
Do you look at that empty space above your kitchen cabinets and see wasted potential? Many homeowners do. That unused area can become valuable storage or a beautiful design feature. I understand the desire to make every part of your home work harder for you.
Learning how to build boxes above kitchen cabinets changes your kitchen. This project helps you create more storage. It also gives your kitchen a custom, finished look. Imagine a place for seldom-used appliances or seasonal decor. This guide shows you each step. We cover planning, building, and finishing your new cabinet extensions. Get ready to transform your kitchen.
Takeaway:
- Plan Carefully: Measure precisely and design with your kitchen’s style in mind.
- Gather Tools: Have all necessary tools and materials ready before starting.
- Build Strong Boxes: Construct sturdy frames using appropriate wood and joinery.
- Secure Safely: Attach the new boxes firmly to existing cabinets and wall studs.
- Finish Flawlessly: Match finishes or create a new cohesive look for your kitchen.
Building boxes above kitchen cabinets gives you extra storage and improves kitchen aesthetics. You design and construct custom units to fit the space. Then you securely attach them to existing cabinetry and wall studs. Finally, you finish the boxes to match or complement your current kitchen decor.
Understanding the Benefits of Adding Cabinet Boxes
Adding boxes above your kitchen cabinets offers many practical advantages. This project maximizes vertical space. It creates new storage areas for items you do not use daily. Think about large serving platters or holiday dishes. These boxes keep clutter off your countertops.
This addition also improves your kitchen’s visual appeal. It gives your existing cabinets a taller, more custom appearance. This helps bridge the gap between your cabinets and the ceiling. The kitchen looks more complete. This small change can make a big difference in how your kitchen feels and functions.
Maximizing Kitchen Storage Solutions
Every kitchen benefits from more storage. When you build boxes above kitchen cabinets, you unlock hidden space. This space is perfect for less frequently used items. You can store seasonal decorations or extra kitchen gadgets. This frees up prime cabinet and drawer space below.
This strategy helps organize your kitchen. You assign a place for everything. This reduces clutter and makes your kitchen more functional. An organized kitchen makes cooking and daily tasks easier. It helps you keep track of your belongings.
Enhancing Kitchen Aesthetics and Value
Adding cabinet boxes provides a custom look. It makes standard cabinets appear built-in and high-end. This can significantly update an older kitchen. It avoids the awkward dust-collecting gap above cabinets. This visual improvement can increase your home’s appeal.
A more appealing kitchen can add value to your home. Potential buyers often look for good storage and a finished look. This DIY project is a cost-effective way to achieve both. It shows attention to detail and good use of space. You can also explore how to add height to kitchen cabinets for similar benefits.
Essential Planning and Design Steps
Careful planning is crucial when you decide to build boxes above kitchen cabinets. Proper preparation ensures a smooth process. It also guarantees a successful outcome. You need to consider measurements, materials, and overall design. Think about how these new boxes will integrate with your existing kitchen.
Measure the space accurately. Decide on the function of your new boxes. Will they be open shelves, or will they have doors? Think about the style. Will they match your current cabinets or offer a contrasting look? These early decisions save time and effort later on.
Measuring and Assessing Your Space
Accurate measurements are the foundation of this project. You will need a tape measure and a level. First, measure the width of each existing cabinet section. This determines the width of your new boxes. Then, measure the height from the top of your current cabinets to the ceiling. This gives you the maximum possible height for your boxes.
Also, check for levelness. Your ceiling might not be perfectly flat. This can affect how your boxes fit. Account for any crown molding or trim you might want to add later. Write down all measurements clearly. Double-check them to avoid errors.
Choosing Materials and Finish
Selecting the right materials is important. Plywood is a common choice for cabinet boxes. It is strong and stable. You can use 3/4-inch plywood for the box structure. For the face frames, use solid wood. This gives a better look and provides strong attachment points for doors.
Consider the finish. Do you want to match your existing cabinets exactly? This might involve painting or staining. Or perhaps you want a contrasting color. If matching, obtain samples. Test them in your kitchen lighting. If you plan to paint kitchen cabinets without sanding, ensure your new boxes are prepped for that method.
Designing for Function and Style
Your design should balance function and aesthetics. Decide what you will store in these boxes. This determines if you need solid doors, glass inserts, or open shelving. Open shelves display decorative items. Closed boxes hide clutter. Consider the overall kitchen style.
The style should complement your current kitchen. You might add crown molding to the top of the new boxes. This creates a finished, built-in look. You can also match the hardware to your existing cabinet pulls. This attention to detail makes the additions look seamless. You can also use design principles from building a kitchen island with stock cabinets to ensure cohesion.
Gathering Your Tools and Materials
Before you start building, collect all necessary tools and materials. Having everything ready saves time and prevents interruptions. This project requires woodworking tools and safety gear. A well-stocked workspace makes the job easier and safer.
Double-check your shopping list. Ensure you have the correct types and quantities of wood. Buy enough screws, glue, and fasteners. Do not forget sandpaper and finishing supplies. Preparation is key to a successful DIY project.
Essential Tools for Cabinet Construction
You will need several power tools and hand tools. A circular saw or table saw is vital for cutting plywood accurately. A miter saw helps with precise angle cuts for face frames and trim. A drill is necessary for pre-drilling and driving screws.
Other useful tools include a stud finder, level, tape measure, and clamps. Clamps hold pieces together while glue dries. Safety glasses and hearing protection are a must. Always prioritize your safety when using power tools.
Required Materials List
Here is a general list of materials you will need:
- Plywood: 3/4-inch plywood for the box carcasses (sides, top, bottom).
- Solid Wood: For face frames and any decorative trim.
- Wood Glue: Strong adhesive for joints.
- Screws: Wood screws (1 1/4-inch and 2 1/2-inch) for assembly and mounting.
- Finishing Nails: For attaching face frames and trim.
- Sandpaper: Various grits for smoothing wood surfaces.
- Paint or Stain: To match or contrast your existing cabinets.
- Primer: If painting.
- Wood Filler/Putty: For filling gaps and screw holes.
- Cabinet Hardware: Hinges, pulls, and knobs for doors (if applicable).
- Crown Molding or Trim: For a finished look.
Think about how to build face frames for cabinets as a separate but related skill. You will apply similar techniques here.
Step-by-Step Box Construction
Once your planning is complete and materials are gathered, you can begin building. Constructing the boxes carefully ensures they are strong and stable. Precision in cutting and assembly is important. This phase is where your design comes to life.
Take your time with each step. Work in a well-lit and organized area. This helps prevent mistakes and keeps you safe. Remember, quality construction leads to a lasting addition to your kitchen.
Cutting Plywood for Carcasses
Start by cutting the plywood pieces for your box carcasses. Use your precise measurements. You will need two sides, a top, and a bottom for each box. The back of the box can be a thin piece of plywood or hardboard for stability. For an open-concept box, you may not need a back.
Use a circular saw with a straight edge guide or a table saw for accurate, straight cuts. Make sure all cuts are square. This ensures your boxes fit together snugly. Label each piece as you cut it. This prevents confusion during assembly.
Assembling the Box Frames
Assemble the cut plywood pieces to form the box frames. Use wood glue and screws for strong joints. Apply glue to the edges that will join together. Then, clamp the pieces in place. Pre-drill pilot holes before driving screws to prevent splitting the wood.
A pocket hole jig can create strong, concealed joints. This method pulls the pieces together tightly. Ensure your boxes are square before the glue dries. Use a large framing square to check corners. Strong joints ensure your boxes can hold weight.
Building and Attaching Face Frames
Face frames give your cabinet boxes a finished look. They also provide solid points for attaching doors. Build these frames from solid wood. You will need vertical stiles and horizontal rails. Join them using pocket screws or mortise and tenon joints for strength.
Once assembled, attach the face frame to the front of each plywood box. Use wood glue and finishing nails. Ensure the frame is flush with the box edges. Clamp it in place while the glue dries. This creates a clean, professional appearance.
Installation Process for Above-Cabinet Boxes
Installing the new boxes requires accuracy and safety. These boxes need secure attachment to your existing cabinets and wall studs. A solid installation prevents issues later on. It also ensures the new storage is safe to use.
Work with a helper if possible. Lifting and holding cabinet boxes can be challenging alone. Use your level frequently during installation. This ensures your new boxes are straight and plumb.
Preparing the Existing Cabinets
Before you lift the new boxes, prepare the tops of your existing kitchen cabinets. Clean the surface thoroughly. Ensure it is free of dust and grease. You might want to add a thin layer of wood adhesive for extra grip between the old and new cabinets.
If your existing cabinets have crown molding that extends above the top, you might need to adjust or remove it. The goal is a flat, stable surface for the new boxes to rest on. Check the top of your existing cabinets for levelness. Use shims if needed to create a flat base for the new boxes.
Lifting and Securing the Boxes
This step often requires two people. Carefully lift each new box into position on top of the existing cabinet section. Ensure it aligns perfectly with the cabinet below. Once in place, use clamps to temporarily hold the new box to the cabinet below.
Now, secure the boxes to the wall. Use a stud finder to locate wall studs above your existing cabinets. Drive long wood screws (2 1/2-inch or 3-inch) through the back of the new cabinet boxes and into the wall studs. Also, screw through the top of your existing cabinets up into the bottom of the new boxes. This creates a very stable connection. You are essentially extending your existing cabinets upwards. This method is similar to how you might assemble wall cabinets for a living room.
Joining Multiple Boxes Together
If you are installing several boxes side-by-side, you will need to join them. Use cabinet screws to connect the adjacent face frames. Pre-drill pilot holes to prevent splitting. Ensure the faces are perfectly flush before driving the screws. Use clamps to hold them tightly together while you fasten them.
This creates a continuous, seamless look. It also adds structural rigidity to the entire run of new boxes. Once all boxes are installed and joined, give them a gentle push. They should feel very stable.
Finishing Touches and Customization
Finishing your new cabinet boxes is where your project truly comes to life. This step transforms raw wood into a beautiful, integrated part of your kitchen. The goal is to make the new additions look like they were always there. Or, you can choose a contrasting finish for a bold statement.
This process includes sanding, painting or staining, and adding hardware. Pay attention to detail here. A good finish protects the wood and enhances its appearance.
Sanding and Prepping for Finish
Sanding is a critical step for a smooth, professional finish. Start with a medium-grit sandpaper (e.g., 120-grit) to smooth out any imperfections or rough spots. Then, move to a finer grit (e.g., 180 or 220-grit) for a silky-smooth surface. Sand with the grain of the wood.
After sanding, thoroughly clean the boxes. Remove all dust with a tack cloth or vacuum. This ensures the paint or stain adheres properly. Any dust left behind will create a bumpy finish. Proper preparation makes a big difference in the final look.
Painting or Staining Your New Boxes
Now, it is time to apply your chosen finish. If painting, start with a good quality primer. This helps the paint adhere and provides a uniform base. Apply several thin coats of paint, allowing each coat to dry thoroughly between applications. Lightly sand between coats for a smoother finish.
If staining, apply the stain according to the manufacturer’s instructions. Wipe off excess stain to prevent blotchiness. Follow with several coats of a protective topcoat, such as polyurethane or lacquer. This protects the wood and gives a durable finish. Consider how you would approach cleaning cabinets before painting if you are refreshing your existing cabinetry at the same time.
Adding Doors, Hardware, and Trim
If your design includes doors, install them now. Use hinges that match your existing cabinet hinges. Ensure the doors hang straight and close properly. Then, attach your chosen hardware – knobs or pulls. These small details unify the look.
Finally, add any decorative trim or crown molding. This is crucial for a built-in look. Cut the molding to size, using mitered corners for clean joints. Attach it with finishing nails and wood glue. Fill any nail holes with wood putty and touch up the paint or stain. This creates a polished, integrated appearance.
Lighting and Decorative Considerations
Beyond storage, the space above your cabinets offers design opportunities. You can use lighting to highlight these new boxes. Decorative items can also add personality. Thinking about these elements early enhances the overall effect.
This step allows you to infuse your personal style. It makes the space not just functional but beautiful. Good lighting can transform the ambiance of your kitchen.
Incorporating Under-Cabinet Lighting
Consider adding lighting to the bottom of your new boxes. This is often called under-cabinet lighting, even though it is technically above your main counter space. LED strip lights are a popular choice. They are energy-efficient and easy to install. This lighting can illuminate your countertops below.
It adds practical task lighting for cooking. It also creates a warm, inviting glow in your kitchen. This type of lighting is highly functional and adds a modern touch.
Decorative Elements and Styling
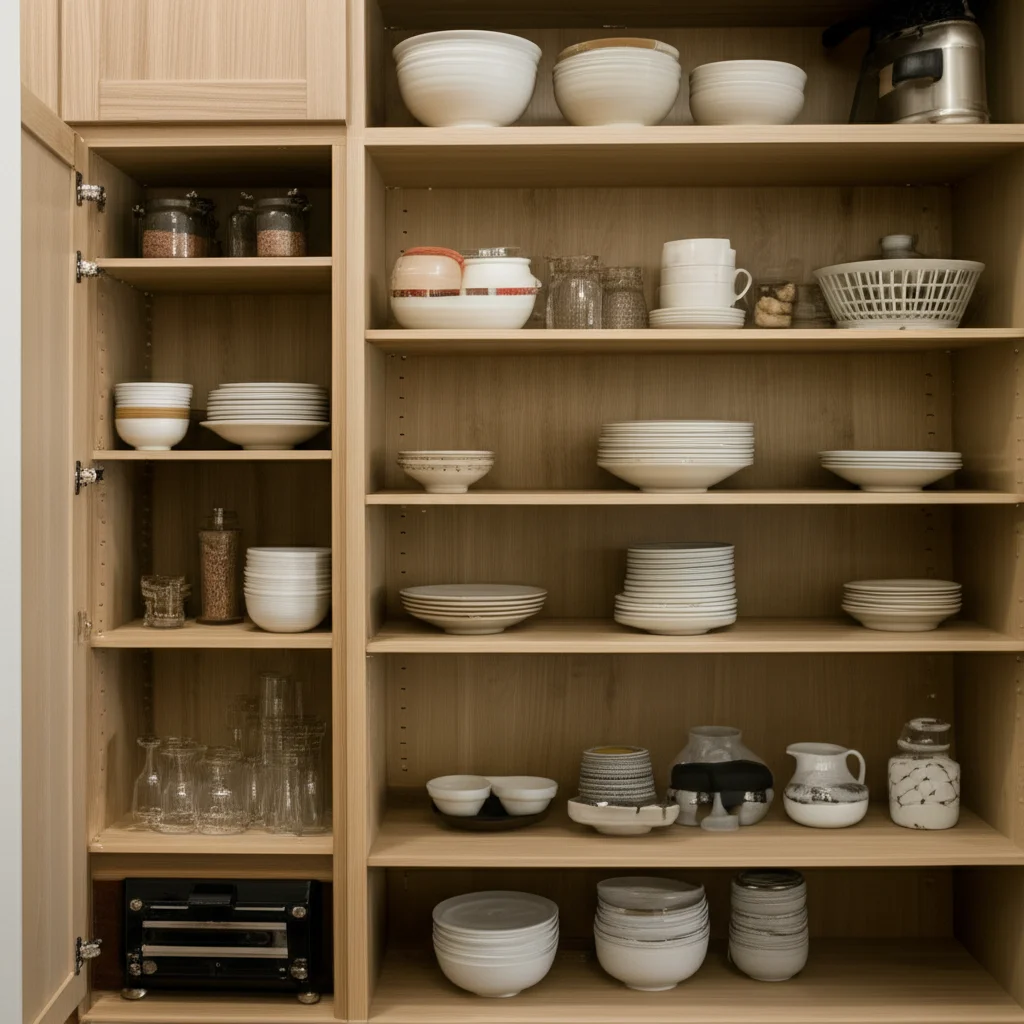
If your boxes have open shelving or glass doors, you can use them for display. Arrange cookbooks, small plants, or decorative pottery. Choose items that complement your kitchen’s style. Do not overcrowd the shelves. A few well-placed items look better than many cluttered ones.
Consider the height. Taller items might be better suited for the center. Shorter items can fill gaps. This space allows you to express your creativity. For more ideas on styling, think about how you might decorate a shelf in the kitchen.
Maintenance and Care for Your New Boxes
Maintaining your new cabinet boxes ensures their longevity and appearance. Proper care keeps them looking fresh. Regular cleaning prevents grime buildup. This is especially true in a kitchen environment.
Simple maintenance routines help preserve your investment. Treat these new boxes like the rest of your kitchen cabinetry. They will continue to serve you well for years.
Regular Cleaning Practices
Clean your new cabinet boxes regularly. Use a soft, damp cloth to wipe down surfaces. For painted surfaces, a mild soap and water solution works well. For stained or wood finishes, use a wood-safe cleaner. Avoid harsh abrasive cleaners. They can damage the finish.
Pay attention to areas near the stove. Grease and cooking fumes can accumulate here. Wipe spills immediately. This prevents staining and buildup. For general cabinet care, concepts from how to clean kitchen cabinets without removing finish are applicable.
Addressing Wear and Tear
Over time, your cabinet boxes might show signs of wear. Scratches or chips can occur. Address these promptly. Use wood filler or touch-up paint to repair small imperfections. For more significant damage, you might need to sand and re-finish the affected area.
Check hinges and hardware periodically. Tighten loose screws. Lubricate hinges if they squeak. Good maintenance prevents small problems from becoming big ones. This ensures your boxes remain functional and attractive.
Common Challenges and Solutions
Even with careful planning, DIY projects can present challenges. Building boxes above kitchen cabinets is no exception. Knowing common issues helps you prepare. It allows you to find solutions quickly.
Do not get discouraged by minor setbacks. Most problems have straightforward fixes. Patience and problem-solving skills are key.
Dealing with Uneven Ceilings or Walls
Kitchens often have imperfections. Ceilings might not be perfectly level. Walls might not be perfectly plumb. This can make fitting new boxes difficult. Use shims to address these issues. Shims are thin pieces of wood that fill gaps. Place them between the top of your existing cabinets and the new boxes.
You can also place shims between the back of the new box and the wall. This ensures the boxes are level and plumb. Once secure, trim any excess shim material. Then, cover gaps with caulk or trim molding. This creates a flush, finished appearance.
Matching Existing Cabinet Finish
Achieving an exact match to existing cabinet finishes can be hard. Colors can fade over time. Manufacturers’ stains vary. Get paint or stain samples. Test them on scrap wood. Compare them under different lighting conditions in your kitchen. This helps you find the closest match.
If an exact match is impossible, consider a complementary finish. A slightly lighter or darker shade can work. Or, paint all cabinets for a uniform new look. This is a chance to refresh your entire kitchen’s aesthetic.
Ensuring Structural Integrity
The most important challenge is ensuring the new boxes are structurally sound. They must support the weight of their contents. They must also be securely attached to your home. Use strong joinery methods like pocket screws or wood glue and screws. Do not rely on just nails.
Always secure boxes to wall studs. This provides essential support. If studs are not available where needed, use heavy-duty wall anchors. These anchors expand to grip the drywall firmly. This ensures your boxes are safe and stable for daily use.
FAQ Section
Can I build boxes above kitchen cabinets without professional help?
Yes, you can build boxes above kitchen cabinets yourself. This project requires basic woodworking skills. You also need common tools. Careful planning and precise measurements are very important. Following detailed instructions helps you succeed.
What kind of wood is best for building these boxes?
Plywood is often the best choice for cabinet box carcasses. It is stable and strong. Use furniture-grade 3/4-inch plywood. For face frames, solid wood like poplar or maple works well. These materials ensure your boxes are durable.
How do I ensure my new boxes match my existing cabinets?
To match existing cabinets, you can paint or stain the new boxes to blend in. Get paint or stain samples from your current cabinets. Test them on scrap wood. Pay attention to sheens and colors. You can also add matching hardware or trim for a cohesive look.
How do I secure the boxes safely to the wall?
Secure the boxes by screwing them into wall studs. Use a stud finder to locate studs. Drive long screws through the back of the new boxes and into the studs. Also, screw from the top of your existing cabinets into the bottom of the new boxes. This provides double security.
Can I add doors to the new boxes later on?
Yes, you can add doors to your new boxes later. Design your boxes with face frames from the start. This gives you a solid surface for attaching hinges. You can then measure and order doors at any time. This offers flexibility in your project timeline.
How much weight can these new boxes hold?
The weight capacity depends on construction and installation. Properly built boxes from 3/4-inch plywood, joined with screws and glue, are strong. When secured into wall studs and existing cabinets, they hold significant weight. Always use proper fasteners and structural support.
Conclusion
Building boxes above kitchen cabinets is a rewarding home improvement project. It transforms an overlooked space into valuable storage and a striking design element. We explored everything from careful planning and precise construction to seamless installation and beautiful finishing. This guide empowers you to tackle this DIY challenge with confidence.
You can add significant storage capacity to your kitchen. You can also give your home a custom, built-in appearance. This project extends the life and style of your kitchen space. Start planning your custom cabinet boxes today. Enjoy the satisfaction of creating something functional and beautiful with your own hands.
- kitchen storage
- DIY cabinets
- cabinet extensions
- kitchen renovation
- home organization

Todd Martin
Senior Writer
With over 15 years of experience in home renovation and design, I started HEG to share what I’ve learned with homeowners who want to create spaces that are both beautiful and functional. I’ve always believed in a hands-on approach, and over the years, I’ve picked up practical solutions that actually work. Through HEG, I aim to make home improvement more approachable, sharing real tips that help you create a home you truly love.