· Davia Murnell · Home Improvement · 20 min read
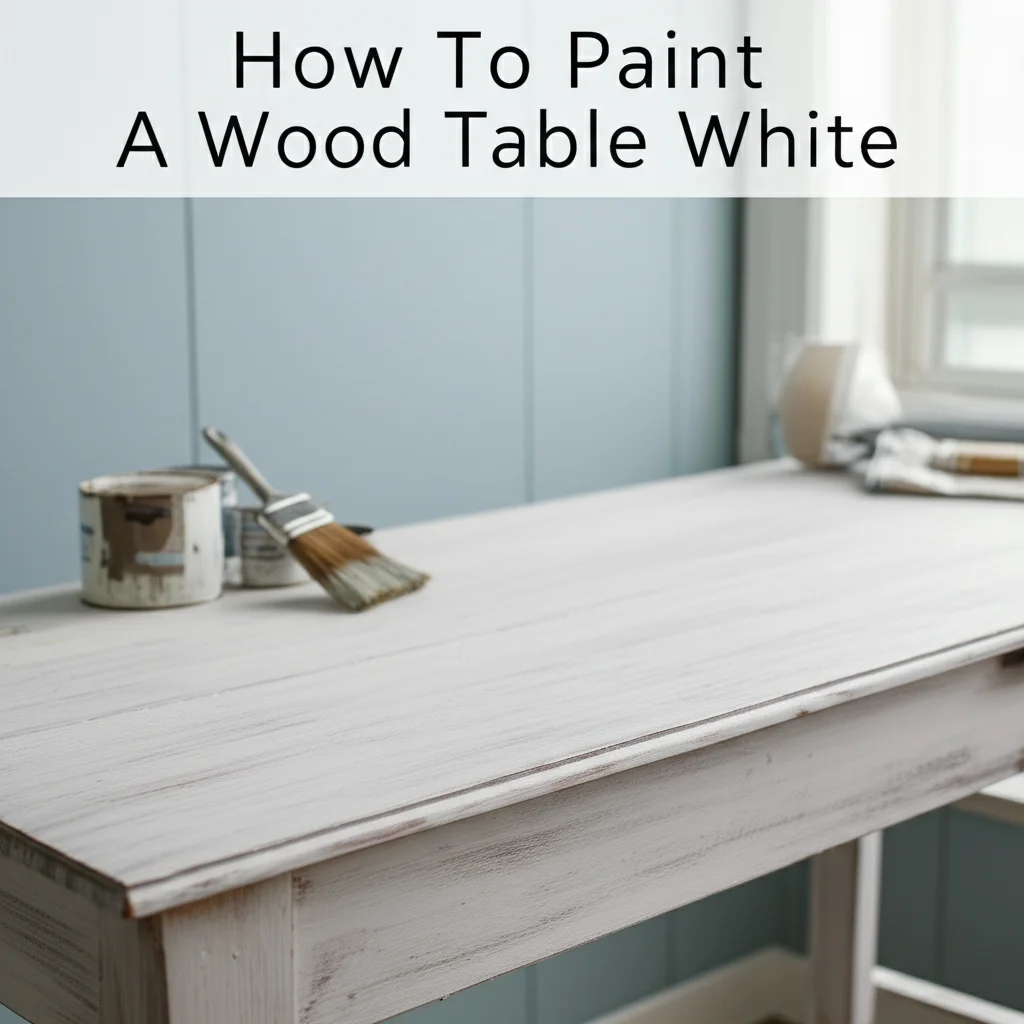
How To Paint A Dining Room Table Without Sanding
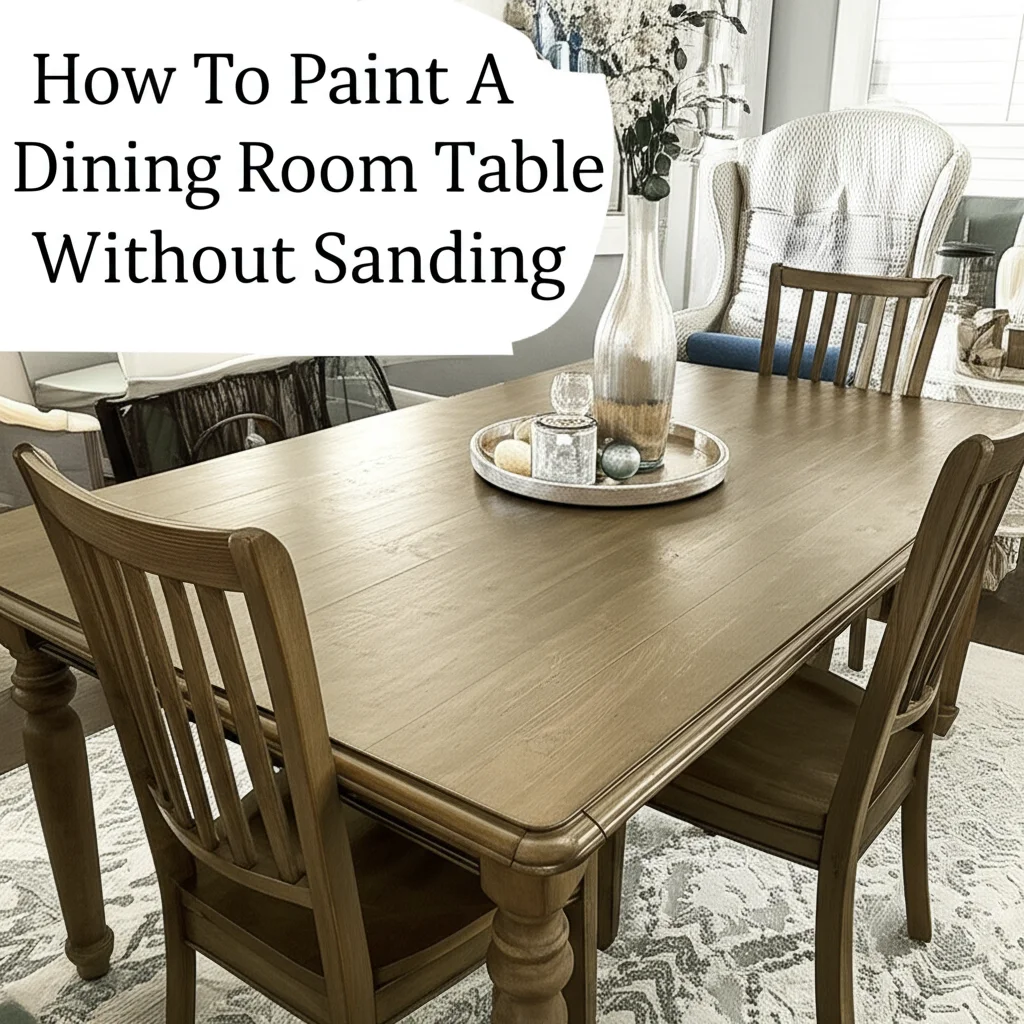
Refresh Your Dining Table: How To Paint Without Sanding
Do you look at your old dining room table and imagine a fresh new look? Maybe you want to update its style. The idea of sanding often stops people from starting this project. Sanding creates a big mess. It takes a lot of time. Many people think it is a necessary step for painting furniture.
However, modern paints and primers change this idea. You can indeed achieve a durable, beautiful finish on your dining table without sanding. This article shows you how. We will cover the best materials, proper preparation, and step-by-step instructions. Get ready to transform your dining space easily.
Takeaway
- Skip the Sanding: Use specific paints and primers to avoid messy prep.
- Clean Thoroughly: A spotless surface is critical for paint adhesion.
- Choose Wisely: Select paints like chalk paint or mineral paint, or use a strong bonding primer.
- Apply Thin Coats: Build up color with multiple thin layers for a smooth finish.
- Seal for Durability: Always protect your painted surface with a suitable topcoat.
How to paint a dining room table without sanding?
You can paint a dining room table without sanding by using specialized paints like chalk paint, mineral paint, or an all-in-one paint with built-in primer. Alternatively, apply a high-quality adhesion primer first, then follow with your desired paint. Thorough cleaning and degreasing of the table surface are essential before any paint application to ensure proper adhesion and a lasting finish.
Why Skip the Sanding? Benefits of No-Prep Painting
Sanding prepares a surface for paint. It creates a rough texture. This texture helps new paint stick better. However, sanding also comes with downsides. It creates dust everywhere. This dust gets into your lungs. It makes a big cleanup job. Many people avoid furniture painting because of this messy step.
Choosing to paint without sanding offers several advantages. You save time and effort. You avoid the dusty mess. New paint technologies make this possible. These paints bond directly to many surfaces. This includes laminate, metal, and previously finished wood.
Time and Effort Savings
Sanding a dining room table takes hours. It requires specific tools. You need a sander, sandpaper, and often a mask. Skipping this step means your project finishes faster. You can start painting almost right away. This makes a weekend project much more manageable. You spend more time painting and less time preparing.
Less Mess, Cleaner Air
Dust from sanding gets everywhere. It settles on floors, furniture, and walls. Cleaning up this dust is a big job. It also pollutes the air you breathe. Fine wood dust can be a health hazard. Painting without sanding avoids these problems. Your workspace stays cleaner. The air remains free of dust particles. This creates a much more pleasant DIY experience.
Preserving Original Finish (if desired under new paint)
Sometimes, a table has a beautiful wood grain. You might want to preserve it under the paint. Sanding removes the original finish completely. If you ever change your mind, the original finish is gone. Painting without sanding leaves the existing finish intact. The new paint covers it, but the original layer remains underneath. This offers more flexibility for future changes.
Specific Paint Technologies
Modern paint science offers solutions for no-sand projects. Certain paints have excellent adhesion properties. Chalk paint, for example, is famous for sticking to almost any surface. Mineral paints and all-in-one furniture paints also offer this benefit. These paints are designed to bond without roughing up the surface. Using the right product makes the process easy. Always check the paint label for “no-sand” or “minimal prep” instructions.
Essential Supplies for No-Sand Table Painting
Before you start painting, gather all your supplies. Having everything ready makes the process smooth. Using the right tools and materials is crucial for a no-sanding project. The quality of your supplies affects your final result. Do not cut corners here. Investing in good products ensures a durable finish.
Cleaning Agents
A clean surface is the most important step for no-sanding projects. Dirt, grease, and grime stop paint from sticking. You need strong cleaners to degrease your table.
- Dish Soap and Water: For basic dirt and dust, a simple mix of warm water and dish soap works. Use a clean cloth.
- TSP (Trisodium Phosphate) Substitute: For greasy or very dirty surfaces, use a TSP substitute. These cleaners are powerful degreasers. They remove stubborn residues. Always follow package directions and wear gloves.
- Degreaser: Specialized kitchen degreasers also work well. Make sure they leave no residue.
- Rubbing Alcohol or Denatured Alcohol: After cleaning with soap or TSP, wipe the surface with alcohol. This removes any lingering cleaner residue. It ensures the surface is truly clean and dry. This step helps paint stick better. You should learn how to clean a wood table properly before painting.
Paint Types
Choosing the correct paint is critical for a no-sand project. Some paints naturally adhere better than others.
- Chalk Paint: This is a very popular choice for no-sanding projects. It adheres well to many surfaces. It gives a matte, chalky finish. It is easy to distress for a vintage look. You might find it useful to know how to paint a coffee table to look vintage, as similar techniques apply.
- Mineral Paint: This paint is durable and self-leveling. It often has a built-in topcoat. It provides excellent adhesion without sanding. Mineral paint offers a smooth, satin finish.
- All-in-One Furniture Paints: Many brands offer paints with primer and topcoat in one. These are designed for minimal prep. Read labels carefully to ensure “no-sanding” claims.
- Adhesion Primer: If you want to use regular latex or acrylic paint, you need a strong adhesion primer. This primer creates a bonding layer. It allows your chosen paint to stick without sanding. Look for primers specifically labeled for “difficult surfaces” or “bonding.”
Brushes and Rollers
Good quality tools improve your finish. Cheap brushes leave streaks. They shed bristles.
- Synthetic Brushes: Use high-quality synthetic brushes for water-based paints. They give a smooth finish. Angled brushes help with corners and details.
- Foam Rollers: For large flat surfaces, foam rollers give a very smooth finish. They reduce brush strokes. Choose dense foam rollers designed for smooth surfaces.
- Small Artist Brushes: Use these for tight spots or decorative details.
Protective Gear and Drop Cloths
Protect yourself and your workspace. Even without sanding, painting can be messy.
- Drop Cloths: Lay down drop cloths or old sheets. Cover the floor and any nearby furniture. This protects against drips and spills.
- Painter’s Tape: Use good quality painter’s tape. Tape off any areas you do not want to paint. This includes table legs if you only paint the top. Ensure the tape has clean edges.
- Gloves: Wear disposable gloves. This protects your hands from paint and cleaners.
- Ventilation Mask: If using strong cleaners or oil-based paints, wear a mask. Ensure good ventilation in your work area. Open windows and doors.
Topcoats and Sealers
A painted dining table needs protection. It sees heavy daily use. A topcoat protects the paint from scratches, spills, and wear.
- Polyurethane (Water-based): A very durable option. Water-based polyurethanes do not yellow over time. They clean up with water. They offer good protection against wear.
- Polycrylic: Similar to polyurethane but less prone to yellowing. It is very durable for furniture.
- Wax (for Chalk Paint): Wax provides a soft, matte finish for chalk paint. It offers some protection. It may need reapplication over time. It is not as durable as polycrylic for a high-traffic dining table.
- Varnish: Some paints recommend a specific varnish as a topcoat. Always check the paint manufacturer’s recommendation.
Having all these supplies ready makes your painting project much easier. It also helps ensure a beautiful and lasting finish.
Preparing Your Dining Table for a Sand-Free Makeover
Even without sanding, preparation is crucial. A clean, smooth surface ensures good paint adhesion. Skipping proper prep means your paint will likely chip or peel. Take your time with these steps. They lay the foundation for a successful paint job. This is not the time to rush.
Deep Cleaning is Key
This is the most important step for no-sanding painting. Your dining table collects food residue, oils from hands, and general grime. Paint will not stick to a dirty surface.
- Initial Wipe Down: Start by wiping the entire table with a damp cloth. Remove loose dust and crumbs.
- Degreasing: Mix a strong degreaser (like TSP substitute) with warm water. Follow the product’s instructions for dilution. Dip a clean cloth into the solution. Wipe down every part of the table. Pay special attention to areas with heavy use. These include the tabletop and edges. The goal is to remove all grease and dirt.
- Rinse Thoroughly: After degreasing, wipe the table again with a cloth dampened with clean water. This removes any cleaner residue. Residue can also prevent paint adhesion. Rinse your cloth often. Repeat this rinsing step until no suds or cleaner remains.
- Final Wipe with Alcohol: For the best adhesion, give the table a final wipe. Use rubbing alcohol or denatured alcohol. This step removes any remaining oils or invisible film. Let the table dry completely. Ensure no damp spots remain before moving on. A properly cleaned table will feel slightly tacky to the touch, which indicates a good surface for paint adhesion. For more general cleaning advice, see how to clean your dining table.
Repairing Imperfections
A no-sanding approach covers existing surfaces. It does not smooth out imperfections. Deep scratches, dents, or gouges will show through the paint.
- Fill Gaps: Use wood filler for deep scratches or holes. Apply the filler with a putty knife. Smooth it level with the surface.
- Let Dry and Lightly Sand: Allow the filler to dry completely. Drying times vary by product. Once dry, lightly sand only the filled area. Use fine-grit sandpaper (220-grit or higher). This creates a smooth patch. This is the only time you might need to sand a tiny area.
- Clean Filled Areas: Wipe away any sanding dust from the filled spots. Use a damp cloth followed by an alcohol wipe.
Taping Off Areas
Protect parts of the table you do not want painted. This creates clean lines.
- Use Quality Painter’s Tape: Apply painter’s tape along edges. Protect hardware or trim. Press down firmly to create a good seal. This prevents paint from bleeding underneath.
- Remove Before Fully Dry: It is often best to remove painter’s tape while the paint is still slightly wet. This prevents paint from peeling with the tape.
Protecting Your Workspace
Painting can be messy. Protect your floors and surrounding items.
- Lay Down Drop Cloths: Cover the floor underneath and around the table. Use plastic sheeting or canvas drop cloths.
- Move Furniture: Clear the area. Move other furniture away from your painting zone. This protects them from splatters. It also gives you room to work comfortably.
- Good Ventilation: Open windows or use fans. Good airflow helps paint dry faster. It also disperses fumes from cleaners and paint.
Proper preparation might take time, but it is an investment. It ensures your painted dining table looks professional and lasts for years.
Step-by-Step Guide to Painting Without Sanding
Now that your table is perfectly prepared, it’s time for the fun part: painting! This section outlines the step-by-step process. We will cover applying primer, paint coats, and drying times. Patience is key for a beautiful, smooth finish. Do not rush any step, especially drying.
Initial Cleaning and Degreasing
As discussed, this is critical. I cannot stress it enough.
- Wipe Down: Start with a thorough wipe using a mild detergent and warm water. Remove all surface dirt and grime.
- Degrease: Follow with a powerful degreaser like a TSP substitute. This removes hidden oils and residues. Rinse with clean water.
- Alcohol Wipe: Finish with a wipe down using denatured alcohol or rubbing alcohol. Let it dry completely. The surface must be bone dry and squeaky clean.
Applying Adhesion Primer (if using regular paint)
If you are not using an all-in-one paint like chalk or mineral paint, you need primer. An adhesion primer creates a sticky base for your topcoat.
- Stir Primer: Stir the primer thoroughly before use. Do not shake, as this can create bubbles.
- Apply Thin Coat: Apply a thin, even coat of adhesion primer. Use a high-quality synthetic brush or foam roller. Work in one direction for a smooth finish. Avoid thick application; thin coats adhere better.
- Allow to Dry: Let the primer dry completely. Check the product label for specific drying times. This is usually 1-4 hours. Do not rush to the next step.
First Coat of Paint
This first coat is often called a “grip” coat. It might look thin or uneven. Do not worry. Subsequent coats will build coverage.
- Stir Paint: Stir your chosen paint well. Ensure the color is fully mixed.
- Apply Thin, Even Coat: Apply your first coat of paint. Work in sections. Use long, even strokes. If using a roller, overlap slightly.
- Brush or Roll Direction: Always apply paint in the direction of the wood grain if visible. This helps reduce brush marks.
- Allow to Dry: Let this coat dry completely. Again, check the paint label for drying times. This can range from 2-4 hours, or longer in humid conditions. Ensure it is dry to the touch before proceeding.
Subsequent Coats
Most no-sanding paints need at least two coats. Darker colors or a drastic color change might require three.
- Apply Second Coat: Once the first coat is dry, apply a second thin coat. Repeat the same technique as the first coat. Work evenly across the surface.
- Check Coverage: After the second coat dries, assess the coverage. If you see streaks or unevenness, apply a third coat.
- Maintain Evenness: Focus on applying thin, consistent layers. This prevents drips and globs. It also ensures a smooth finish.
Drying Times Between Coats
Respecting drying times is paramount for paint adhesion and durability.
- Read Labels: Always follow the specific drying times on your paint can. Times vary by product, humidity, and temperature.
- Touch Test: Lightly touch a hidden area of the paint with a clean finger. If it feels tacky or sticky, it needs more time.
- Full Curing vs. Dry to Touch: “Dry to touch” means you can apply another coat. “Full cure” means the paint has fully hardened. This can take days or even weeks. Avoid heavy use of the table until it is fully cured.
By following these steps carefully, you will achieve a professional-looking, durable finish on your dining table without the hassle of sanding. This transforms your table. It can also help you learn how to make an old dining table look modern.
Sealing and Protecting Your Painted Dining Table
Painting a dining table without sanding is a great way to update its look. However, a dining table sees a lot of use. It gets spills, scratches, and daily wear. Without a strong protective layer, your beautiful new paint job will not last. Sealing your table is a vital step. It ensures durability and protects your investment.
Why Sealing Matters
A topcoat acts as a shield for your paint. It guards against common household damages.
- Durability: Dining tables are high-traffic items. They need protection from dishes, cutlery, and spills. A good topcoat makes the surface resistant to these daily abuses. It prevents chips, scratches, and fading.
- Water Resistance: Spills are common on dining tables. Paint alone might not be waterproof. A topcoat adds a crucial layer of water resistance. This protects the wood underneath from water damage. It also makes cleanup easier.
- Easy Cleaning: A sealed surface is smooth and non-porous. This makes it simple to wipe clean. Food spills and general dirt come off easily. This keeps your table looking new for longer.
- Enhanced Finish: Topcoats can also enhance the look of your paint. They can provide a matte, satin, or glossy finish. This choice allows you to further customize your table’s appearance.
Choosing the Right Topcoat
The type of topcoat you choose depends on your paint and desired finish.
- Water-based Polyurethane or Polycrylic: These are highly recommended for dining tables. They are very durable. They resist yellowing over time, especially polycrylic. They clean up with water. Apply at least 2-3 thin coats for best protection.
- Wax (for Chalk Paint): If you used chalk paint, furniture wax is a traditional topcoat. It creates a soft, matte finish. However, wax is less durable for a high-use surface like a dining table. It might require reapplication every 6-12 months. For a dining table, a water-based polycrylic over chalk paint provides superior durability.
- Varnish: Some paint brands have their own recommended varnish. Always check the paint manufacturer’s guidelines. These are often formulated to work perfectly with their specific paints.
Applying Topcoat Properly
Applying the topcoat requires care. A smooth, even application prevents streaks and bubbles.
- Ensure Paint is Cured: Do not apply topcoat until your paint is fully dry, ideally cured for 24-48 hours. Applying too soon can cause the paint to lift or blister.
- Stir, Don’t Shake: Stir the topcoat gently. Shaking creates bubbles. These bubbles will show on your finished surface.
- Use a Quality Applicator: Use a clean, high-quality synthetic brush or a foam applicator. These minimize streaks and leave a smooth finish.
- Apply Thin Coats: Apply thin, even coats. Thick coats can yellow, bubble, or take longer to cure. Work in the direction of the grain.
- Light Sanding Between Coats (Optional): For an ultra-smooth finish, lightly sand between topcoat layers with 400-grit sandpaper. Only do this if the product instructions allow. Clean dust before the next coat.
- Allow Adequate Drying Time: Let each coat dry completely. Refer to the product’s instructions. Applying too soon can ruin the finish. Usually, it’s 2-4 hours between coats.
- Final Cure Time: The table will be dry to the touch quickly. However, the topcoat needs several days, sometimes even weeks, to fully cure and harden. Avoid placing heavy objects or extreme heat on the table during this time. This ensures maximum durability.
By properly sealing your dining table, you protect your hard work. You ensure your beautiful, no-sand paint job lasts for many years.
Troubleshooting Common No-Sand Painting Issues
Even with careful planning, sometimes issues arise during a painting project. Knowing how to address them helps you achieve a professional finish. Here are some common problems you might encounter when painting a dining room table without sanding, and how to fix them.
Paint Peeling or Chipping
This is the most frustrating issue. It usually points to a preparation problem.
- Cause: The surface was not clean enough. There was grease, dirt, or residue. The paint did not bond properly. Or, the wrong type of primer/paint was used. Applying a topcoat too soon can also cause this.
- Fix: Scrape off any peeling or chipping paint. Clean the area thoroughly again. Use a degreaser and an alcohol wipe. Re-prime the area with a good adhesion primer. Then, repaint with thin coats. Ensure you use paint suitable for no-sanding applications.
Uneven Finish
An uneven finish can look streaky or blotchy.
- Cause: Paint applied too thickly in some areas. Insufficient stirring of paint. Using the wrong brush or roller. Not enough coats applied.
- Fix: For wet paint, gently smooth out with your brush or roller. For dry paint, you might need a very light sanding with 220-grit sandpaper over the uneven spots. Then, clean and apply another thin, even coat. Use a high-quality foam roller for flat surfaces to minimize streaks. Always stir paint thoroughly before and during use.
Brush Strokes
Visible brush strokes can detract from a smooth look.
- Cause: Using a low-quality brush. Applying paint too thickly. Not enough paint on the brush. Paint drying too quickly.
- Fix: Use a high-quality synthetic brush. Load the brush properly, but do not overload it. Work quickly and in long, even strokes. For large, flat areas, a foam roller often gives a smoother finish. If strokes are visible when dry, a very light sanding with fine-grit (220-400) sandpaper can smooth them. Clean the dust and apply another thin coat. Consider adding a paint conditioner if the paint dries too fast.
Dealing with Stains Bleeding Through
Sometimes, dark wood or old stains can show through your new paint. This is called “bleed-through.”
- Cause: Tannins in wood (especially oak, mahogany, cherry). Old water stains or grease stains.
- Fix: A normal primer might not stop bleed-through. You need a stain-blocking primer. Apply one or two coats of a shellac-based or oil-based stain-blocking primer. This creates a barrier. Once the primer is dry, you can apply your topcoat paint as usual. This is a critical step for preventing discolored patches on your finished table.
Troubleshooting is part of any DIY project. These solutions help you correct common mistakes. They ensure your no-sand dining table painting project ends with a beautiful, durable result.
Maintaining Your Newly Painted Dining Table
You have put effort into painting your dining table without sanding. Now, it is important to protect your hard work. Proper maintenance ensures your beautiful new finish lasts for many years. A little care goes a long way in preserving its look and durability.
Gentle Cleaning Habits
Avoid harsh chemicals that can damage the paint and topcoat.
- Wipe with Soft Cloth: For daily cleaning, use a soft, damp cloth. Wipe away crumbs and spills immediately.
- Mild Soap Solution: For tougher messes, use a very mild dish soap diluted in water. Dampen a cloth and wipe the area.
- Avoid Abrasives: Never use abrasive cleaners, scouring pads, or harsh chemical sprays. These can scratch the finish or break down the topcoat.
- Dry Immediately: Always dry the surface thoroughly after cleaning. Do not let water sit on the table, especially near seams or edges. Even a durable topcoat can be compromised by standing water over time.
Avoiding Harsh Chemicals
Many household cleaners contain strong chemicals. These can strip protective layers or damage paint.
- Check Labels: Read the labels of cleaning products before using them on your painted table. Avoid products with ammonia, bleach, or harsh degreasers.
- Natural Cleaners: A simple mix of water and white vinegar (diluted) can be effective for general cleaning. Test it in an inconspicuous area first.
Using Coasters and Placemats
Preventing damage is easier than repairing it.
- Heat Protection: Always use trivets or hot pads for hot dishes. Direct heat can melt, warp, or discolor your painted surface.
- Scratch Prevention: Use coasters under drinks. Use placemats under plates. These create a barrier. They protect against scratches from cutlery, dishes, and cups. They also catch spills.
- Avoid Dragging: Do not drag heavy or sharp objects across the table. Lift them instead.
Touch-Ups and Future Care
Even with care, small accidents happen.
- Keep Extra Paint: Save a small amount of your paint and topcoat. This allows for easy touch-ups if chips or scratches occur.
- Small Brush for Touch-Ups: Use a fine artist’s brush for tiny repairs. Apply a thin layer of paint, then seal with your topcoat.
- Re-sealing: Over many years, a high-traffic dining table might need its topcoat refreshed. If you notice the finish dulling or showing significant wear, you can clean and lightly reapply a topcoat. This breathes new life into your table.
By following these simple maintenance tips, your beautifully painted dining room table will remain a centerpiece in your home for many years to come.
FAQ Section
Q1: Can I paint any type of dining table without sanding?
A1: Most dining tables, including wood, laminate, or previously painted surfaces, can be painted without sanding. The key is using the right products. Chalk paint, mineral paint, or a strong adhesion primer followed by your chosen paint are essential. Always ensure the table is perfectly clean and grease-free for proper paint bonding.
Q2: What is the best type of paint for a dining table if I don’t want to sand?
A2: Chalk paint and mineral paint are excellent choices as they offer superior adhesion with minimal prep. All-in-one furniture paints are also popular. If you prefer standard latex or acrylic paint, you must use a high-quality bonding or adhesion primer first. This primer creates the necessary surface for the paint to stick.
- furniture painting
- no-sand paint
- DIY dining table
- table makeover
- chalk paint
- milk paint
- primer

Davia Murnell
Room Cleaning Expert
Before joining HEG, I spent over a decade running my own window cleaning business, where I perfected streak-free techniques and learned the ins and outs of specialty glass care. Now, I bring that expertise to a broader mission—helping homeowners maintain sparkling windows and beautiful outdoor spaces. From skylights and sliding doors to patio glass and outdoor furniture, I believe every surface deserves attention and care. I share practical tips and proven methods that make even the toughest cleaning jobs feel manageable. Whether you're battling pollen on the porch or smudges on high windows, I’m here to help you see your home in a whole new light—literally.