· Todd Martin · Home Improvement · 17 min read
How To Paint A Wood Table White
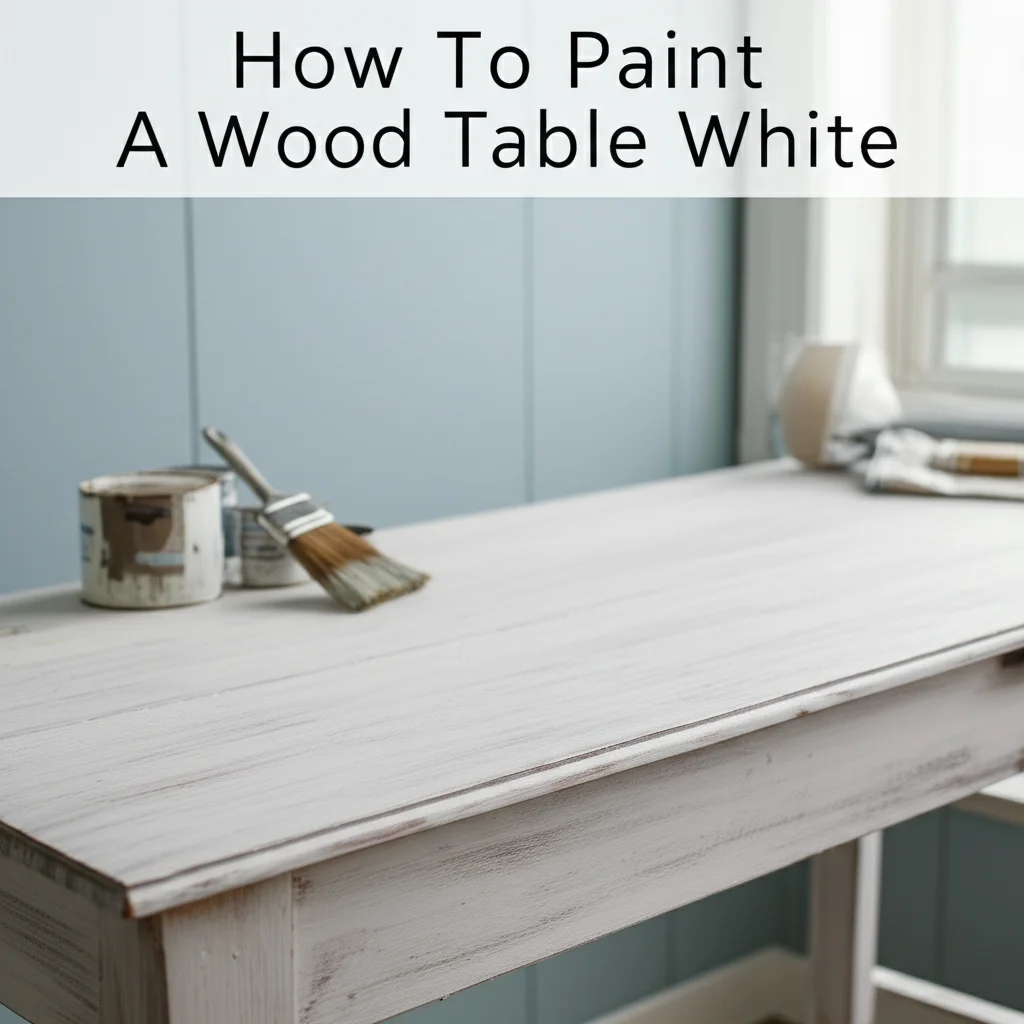
Transform Your Space: How To Paint A Wood Table White
Do you have an old wood table that needs a fresh look? Painting a wood table white can dramatically change its appearance. This simple DIY project offers a budget-friendly way to update your home decor. A crisp white finish brightens any room and creates a modern, clean aesthetic. You can turn a tired piece into a stunning focal point.
I know the desire to refresh a beloved but outdated item. White paint offers a versatile solution, fitting into many design styles. It makes small spaces feel larger and reflects light beautifully. This guide will walk you through each step of the process. We will cover preparation, painting, and protecting your newly finished table.
Takeaway
- Prepare Thoroughly: Clean, sand, and repair your table before painting.
- Prime Effectively: Use a good primer to ensure paint adhesion and prevent bleed-through.
- Apply Thin Coats: Build up thin, even layers of paint for a smooth, professional finish.
- Seal for Durability: Protect your painted surface with a durable topcoat.
To paint a wood table white, first clean and sand the surface to ensure proper paint adhesion. Apply a quality primer to block wood tannins and create a uniform base. Then, apply two to three thin coats of white paint, allowing each coat to dry completely. Finally, seal the table with a protective topcoat for durability and a lasting finish.
Preparing Your Wood Table for Painting
Proper preparation is the most important step when you paint a wood table white. A well-prepared surface ensures paint adheres correctly and lasts longer. Skipping this stage often leads to problems like chipping or uneven finishes. Taking your time here will save you effort later.
Start by clearing the table of all items. Remove any hardware like knobs or handles if possible. This makes the cleaning and painting process much easier. Lay down drop cloths or old newspapers to protect your work area from dust and paint. Good ventilation is also important, so open windows or work outdoors.
Essential Cleaning Steps
Your wood table needs thorough cleaning before you do anything else. Dust, grime, and old waxes can prevent paint from sticking. Use a mild all-purpose cleaner and a damp cloth to wipe down the entire table. For stubborn grease or residue, a degreaser might be necessary. Make sure to rinse the surface with clean water after using any cleaner. Let the table dry completely before moving on. A clean surface is key for proper adhesion. For more detailed cleaning tips, learn how to clean a wood table. If your table is a dining table, specific methods might apply to clean a wood dining table. If it has a sticky residue, you can also learn how to clean a wood table that is sticky.
The Importance of Sanding
Sanding prepares the wood for paint by creating a slightly rough surface. This rough surface gives the primer and paint something to grip onto. Start with a medium-grit sandpaper, like 120-grit, to remove any old finish or imperfections. Sand with the grain of the wood. This helps prevent noticeable scratches. Do not sand against the grain, as it can leave marks.
After the initial sanding, switch to a finer-grit sandpaper, such as 180 or 220-grit. This finer grit smooths out the surface further. It also creates an ideal base for painting. Wipe away all sanding dust with a tack cloth or a damp cloth. A dust-free surface is essential for a smooth paint application. If you have any deep scratches or dents, fill them with wood filler before sanding. Let the filler dry and then sand it smooth.
Choosing the Right White Paint and Primer
Selecting the correct paint and primer is crucial for a successful white finish. The right products ensure good coverage, durability, and a vibrant white color. There are many options available, so it helps to understand what works best for a wood table. I always recommend investing in quality products for better results.
Primer is your first line of defense. It prepares the wood for paint. It also blocks tannins from bleeding through the white paint. Wood, especially older pieces, contains natural oils and tannins. These can cause yellow or brown stains to appear through light-colored paint over time. A good primer prevents this discoloration.
Selecting Your Primer
Choose a high-quality, stain-blocking primer. Oil-based or shellac-based primers are excellent for preventing bleed-through on wood. They create a strong bond for the paint. Water-based primers can work too, but ensure they specify “stain-blocking” properties. Apply primer in a well-ventilated area. Follow the manufacturer’s instructions for drying times. One coat of primer is often enough, but a second coat might be needed for very dark or problematic wood.
Some wood types, like oak, have a prominent grain. If you want a smooth white finish without the grain showing, select a “high-build” or “filling” primer. These primers are designed to fill in wood grain. This creates a very smooth surface before painting. This method is similar to how you would paint oak cabinets white without grain showing.
Picking White Paint
For tables, you need a durable paint. Look for paints labeled for “furniture” or “cabinets.” Latex (water-based) and oil-based paints are common choices. Latex paints are easier to clean up and dry faster. Oil-based paints offer a very hard, durable finish, but they have a stronger odor and longer drying times. For a beginner, latex enamel paints are often a good choice. They combine durability with easier application.
Consider the sheen of the white paint. Common sheens include:
- Flat/Matte: Hides imperfections well, but less durable and harder to clean.
- Eggshell/Satin: A slight sheen, more durable than flat, and easier to wipe clean. This is a popular choice for furniture.
- Semi-Gloss: A noticeable shine, very durable and easy to clean. It highlights imperfections more.
- High-Gloss: A very reflective, shiny finish. Most durable and easiest to clean, but shows every flaw.
For a table that sees daily use, I often recommend an eggshell, satin, or semi-gloss finish. These provide a good balance of durability and ease of cleaning. Test a small, hidden area first if you are unsure about the color or sheen.
Sanding vs. No Sanding: Deciding Your Prep Method
The question of whether to sand or not to sand often comes up when painting furniture. While sanding is generally recommended for the best adhesion and smoothest finish, there are situations where you can paint a wood table white without extensive sanding. Your decision depends on the table’s current condition and the type of paint you choose.
Traditional methods always include sanding. This process removes old finishes, smooths out imperfections, and creates a surface texture that paint can grip. It leads to a more professional and durable result. However, newer paint technologies, like chalk paint or some all-in-one furniture paints, claim to adhere without sanding.
Benefits of Sanding
Sanding provides several clear advantages. It ensures maximum paint adhesion. This prevents chipping and peeling down the road. It also helps achieve a truly smooth surface by flattening out any raised grain or minor dents. For a truly professional, long-lasting finish, sanding is usually the best approach. It creates a perfect canvas for your white paint.
Sanding also allows you to address any surface imperfections. You can smooth out scratches or rough patches before priming. This step is critical if your goal is a flawless, modern white table. The effort put into sanding pays off in the final appearance and durability of your painted surface.
When No-Sanding Works
Some specialized paints, like chalk paint or mineral paint, are designed to adhere to surfaces with minimal or no sanding. These paints often have a matte finish and a specific texture. If you are using one of these paints, you might only need to clean the table thoroughly. Always read the specific product instructions. They will guide you on the necessary preparation steps.
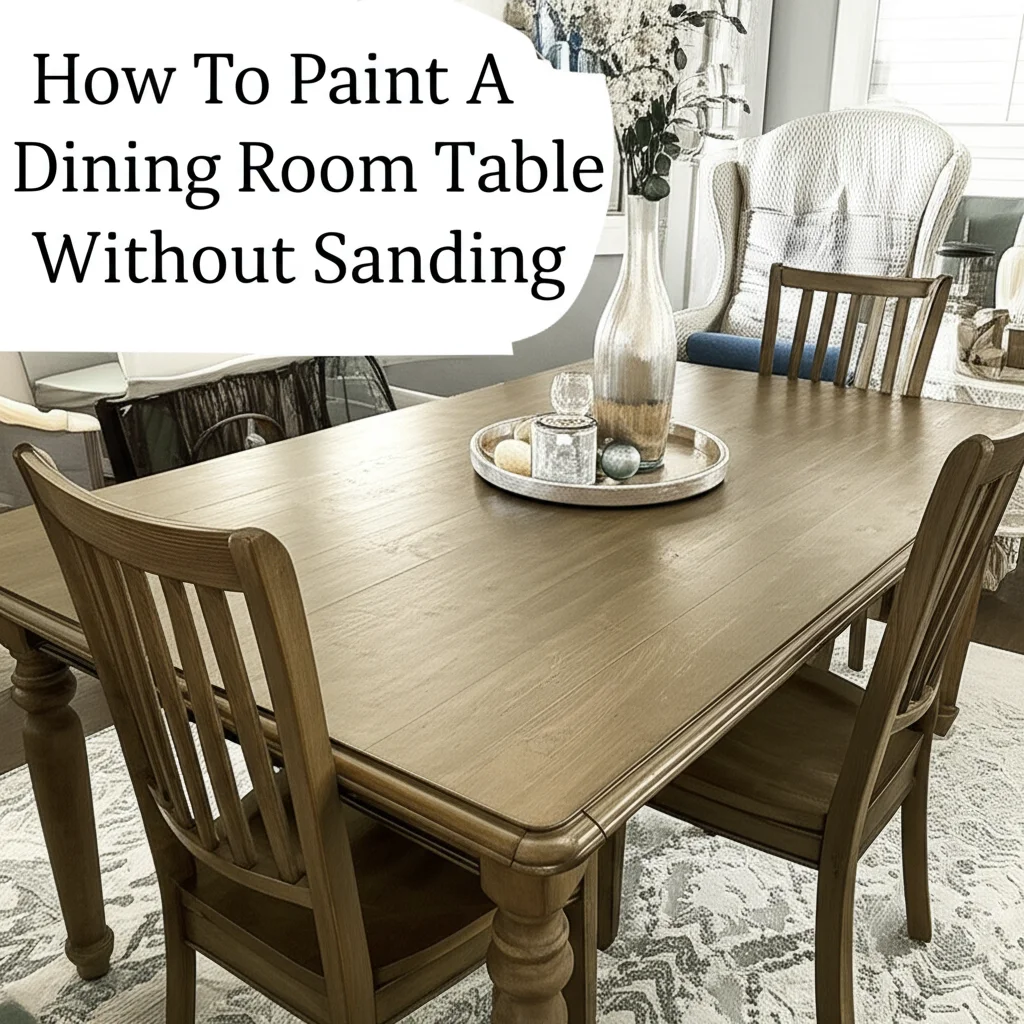
Painting without sanding can save time and effort. However, results can vary depending on the original finish of the table and the paint’s quality. For a quick refresh or a distressed look, it can be a good option. But for a highly durable, smooth, and long-lasting finish, especially on a high-traffic table, I still lean towards proper sanding and priming. You can explore how to paint a dining room table without sanding for more insights on this method.
Applying Primer: The Foundation for a Lasting Finish
After preparing your wood table, applying primer is the next critical step. Primer creates a uniform base for your white paint. It also ensures the paint adheres properly and prevents any issues like bleed-through from the wood’s natural tannins. Think of primer as the bridge between the wood and your paint. It ensures a smooth and consistent color.
Using a good quality primer is especially important when you paint a wood table white. Light colors like white are more susceptible to showing underlying wood tones or stains. A solid prime coat guarantees that your white paint looks pure and bright. It also helps achieve full coverage with fewer coats of your topcoat.
First Coat Application
Stir your primer thoroughly before you begin. Use a high-quality synthetic brush or a foam roller for application. For larger, flat surfaces, a roller provides a smoother finish and faster application. Use a brush for edges, corners, and detailed areas. Apply a thin, even coat of primer to all surfaces of the table.
Work in sections, following the grain of the wood. Avoid applying too much primer at once, as this can lead to drips or uneven drying. Ensure you cover every part of the table that will be painted. Pay attention to legs and undersides. Allow the first coat of primer to dry completely according to the manufacturer’s instructions. This usually takes a few hours.
Ensuring Even Coverage
Once the first coat of primer is dry, lightly sand the entire primed surface with a fine-grit sandpaper (220-grit or higher). This step is called “denibbing.” It smooths out any minor bumps or imperfections that might have appeared in the primer. It also helps the next coat adhere even better. Wipe away all dust with a tack cloth before proceeding.
For very dark wood, or if you notice any yellow or brown spots showing through, apply a second thin coat of primer. This ensures excellent stain-blocking. Allow the second coat to dry completely. A properly primed surface should look uniform in color and feel smooth to the touch. It is now ready for your white paint.
Painting Your Wood Table White: Tips for a Smooth Finish
Now comes the exciting part: applying the white paint! This step transforms your table and brings your vision to life. Patience and thin coats are the secrets to a smooth, professional-looking white finish. Rushing the painting process can lead to drips, uneven coverage, or visible brush strokes. Take your time to achieve the best results.
Choose a well-ventilated area for painting. Make sure the table is on a protected surface, like a drop cloth. Stir your white paint thoroughly before and during use. This ensures the color is consistent and the paint is properly mixed. Always use high-quality brushes and rollers designed for the type of paint you are using.
Applying Thin Coats
Applying several thin coats of paint is better than one thick coat. Thin coats dry more evenly and are less likely to drip or show brush marks. They also adhere better and create a more durable finish. Dip your brush or roller sparingly into the paint. Remove excess paint by tapping the brush against the can or rolling the roller on a tray.
Apply the paint in smooth, even strokes, following the direction of the wood grain. For larger flat surfaces, use a roller for a consistent finish, then a brush for edges or detail work. Ensure full coverage on each coat, but do not overload the surface. My tip is to always use less paint than you think you need. You can always add more if needed.
Drying Times and Recoating
Allow each coat of white paint to dry completely before applying the next. This is crucial. Check the paint can for specific drying times, but generally, allow several hours between coats. Humidity and temperature can affect drying times, so be patient. Applying a new coat too soon can cause the previous coat to pull up or create an uneven texture.
Most wood tables painted white will require two to three coats of paint. For a very opaque, solid white finish, three coats are often ideal. Lightly sand the table with a very fine-grit sandpaper (220-grit or higher) between coats, just like you did with the primer. This “denibbing” step removes any dust or imperfections and helps the next coat adhere smoothly. Wipe away all dust with a tack cloth before applying the next coat. Your efforts here will lead to a truly beautiful, crisp white table.
Sealing and Protecting Your Newly Painted White Table
Once your white paint has dried completely, the final and most important step is to seal the table. A protective topcoat is essential for durability, especially for a table that will see regular use. It protects the paint from scratches, spills, and general wear and tear. Without a sealer, your beautiful white paint could quickly chip or stain.
White paint, while stunning, can be prone to showing marks and scuffs. A good topcoat provides a protective barrier. It also makes the surface easier to clean and maintain. Do not skip this step if you want your painted wood table to last for years.
Choosing a Topcoat
Several types of clear topcoats are suitable for painted furniture. The best choice depends on the desired durability and finish.
- Polyurethane (Water-based): This is a very popular choice for painted furniture. It is durable, non-yellowing, and easy to clean up with water. It comes in various sheens, from matte to gloss. Water-based polyurethane is ideal for white paint because it will not yellow over time.
- Polycrylic: A brand name of water-based clear finish, similar to water-based polyurethane. It is also non-yellowing and durable.
- Wax: Furniture wax can provide a soft, low-sheen finish. It is often used over chalk paint. However, wax is less durable and offers less protection than polyurethane or polycrylic. It might not be ideal for a high-traffic table.
- Varnish: Offers excellent durability but can yellow over time, making it less suitable for pure white finishes.
For a dining or coffee table, I highly recommend a water-based polyurethane or polycrylic. These clear coats provide robust protection without altering the white color.
Applying for Durability
Ensure your final coat of white paint is fully cured before applying the sealer. This can take 24-72 hours, depending on the paint type and environmental conditions. Read the sealer’s instructions for exact drying times. Apply the sealer in thin, even coats using a high-quality synthetic brush or a foam applicator.
Work in sections, brushing or rolling with the grain of the wood. Avoid drips and puddles. Most sealers require two to three thin coats for optimal protection. Lightly sand between coats with a very fine-grit sandpaper (e.g., 400-grit) to ensure maximum smoothness and adhesion. Wipe off any dust with a tack cloth. Allow the final coat of sealer to cure completely before using the table. This curing period can range from a few days to a few weeks, depending on the product. Following these steps will help prevent issues like chipped paint on wood furniture in the future.
Finishing Touches and Ongoing Care
Once your white painted table is fully cured, you can enjoy its fresh new look. Adding finishing touches can enhance its beauty. Proper ongoing care will keep it looking great for many years. A newly painted white table can really brighten a room.
Think about how your table will fit into your space. Simple additions can make a big difference. Maintaining your white table is simpler than you might think. Regular cleaning prevents dirt buildup.
Adding Hardware
If your table has drawers or specific hardware, consider upgrading it. New pulls or knobs can add a modern touch or complement your chosen style. Silver or brass hardware can stand out against the white. This creates a custom look. It is a small detail that makes a big impact.
You can also consider distressing your table for a rustic or shabby chic look. Lightly sand the edges and corners to reveal small bits of the wood underneath. This technique adds character. It can make a brand-new white finish look like a cherished heirloom. Experiment with these touches to personalize your table.
Cleaning Your White Table
White furniture needs specific care to stay bright. Use a soft, damp cloth with mild soap and water for regular cleaning. Wipe up spills immediately to prevent stains. Avoid abrasive cleaners or harsh chemicals, as they can damage the paint and sealer. For general paint cleanup after your project, knowing how to clean a paint brush properly will save your tools for future projects.
For stubborn marks, a magic eraser can work wonders on durable finishes. Test it in an inconspicuous area first. Regular dusting also helps maintain the table’s pristine appearance. With proper care, your white painted wood table will remain a beautiful and functional part of your home for a long time.
FAQ Section
Do I need to sand a wood table before painting it white?
Yes, sanding is highly recommended. It creates a rough surface for paint adhesion and removes old finishes or imperfections. Skipping this step can lead to paint chipping or peeling. For best, long-lasting results, always sand thoroughly before priming and painting.
What is the best type of white paint for a wood table?
For durability and ease of cleaning, a high-quality latex or oil-based enamel paint designed for furniture or cabinets is best. Look for an eggshell, satin, or semi-gloss finish for a balance of durability and appearance. Water-based options are easier to clean up and less prone to yellowing.
How many coats of paint does a wood table need?
Typically, a wood table painted white requires two to three thin coats of paint. The exact number depends on the paint’s opacity and the original color of the wood. Always apply thin, even coats, allowing each to dry completely before applying the next for the smoothest finish.
How long does white paint take to dry on a wood table?
Drying times vary based on the paint type, humidity, and temperature. Generally, touch-dry time is 1-4 hours, and recoat time is 2-8 hours. The paint needs longer to fully cure (harden), often several days to weeks, before heavy use or applying a topcoat.
How can I prevent brush strokes when painting a wood table white?
To prevent brush strokes, use a high-quality synthetic brush or a foam roller for smooth application. Apply thin, even coats and avoid overworking the paint. Lightly sand between coats with fine-grit sandpaper to remove any imperfections, then wipe away dust before applying the next coat.
What type of sealer should I use for a white painted wood table?
A water-based polyurethane or polycrylic is the best choice for sealing a white painted wood table. These clear topcoats are highly durable, resistant to yellowing, and protect against scratches and spills. Apply two to three thin coats for optimal protection.
Conclusion
Painting a wood table white is a rewarding DIY project that can dramatically transform your home. We have covered every step, from meticulous preparation and choosing the right materials to applying paint and protecting your new finish. Remember that patience and attention to detail are key to achieving a professional, durable result.
By following these guidelines, you can give an old wood table a stunning new life. A crisp white finish brightens any room, making it feel fresh and modern. I hope this guide empowers you to tackle your next furniture painting project with confidence. Now, take that old table and start your transformation! Your newly painted white wood table will be a beautiful addition to your space.
- white paint
- wood table
- furniture painting
- DIY home
- table makeover

Todd Martin
Senior Writer
With over 15 years of experience in home renovation and design, I started HEG to share what I’ve learned with homeowners who want to create spaces that are both beautiful and functional. I’ve always believed in a hands-on approach, and over the years, I’ve picked up practical solutions that actually work. Through HEG, I aim to make home improvement more approachable, sharing real tips that help you create a home you truly love.