· Todd Martin · Home Improvement · 24 min read
How To Paint Furniture Without Brush Marks
Paint Furniture Without Brush Marks
Have you ever finished painting a piece of furniture, only to see unsightly brush marks marring your hard work? It is a common frustration for many DIY enthusiasts. Achieving a perfectly smooth, flawless finish without visible brush strokes can seem like a professional secret. I understand this struggle because I faced it many times myself.
This comprehensive guide will show you exactly how to paint furniture without brush marks. We will cover everything from essential preparation steps to choosing the right tools and mastering application techniques. You will discover the secrets to a professional-looking finish that will impress everyone. Say goodbye to streaks and hello to beautifully smooth furniture.
Takeaway
- Proper preparation is crucial for a smooth base.
- Choose the right paint, additives, and applicators.
- Apply multiple thin coats with consistent technique.
- Control your environment for optimal results.
- Sand lightly between coats and apply a protective topcoat.
To paint furniture without brush marks, properly prepare the surface by cleaning and sanding. Select self-leveling paints or add flow enhancers. Use high-quality foam rollers, paint pads, or a sprayer for application. Apply thin, even coats and allow proper drying between each layer.
Essential Preparation for a Flawless Finish
Starting with a clean and well-prepared surface is the most important step to achieve a smooth finish on your furniture. Skipping this part almost guarantees visible brush marks and an uneven result. Think of it as building a strong foundation for a beautiful house. I always take my time here.
Proper preparation ensures the paint adheres well and lays down smoothly. It eliminates imperfections that would otherwise show through your new paint job. This stage sets you up for success.
Cleaning the Furniture Surface
First, clean the furniture thoroughly. Dust, dirt, grease, and grime can all prevent paint from adhering properly. These contaminants also cause an uneven finish. I use a degreaser or a mild soap and water solution.
Wipe down the entire surface you plan to paint. Make sure to get into all crevices and corners. Rinse the furniture with clean water to remove any soap residue. Let the furniture dry completely before moving on to the next step.
Sanding for Smoothness
Sanding is a critical step for a professional, brush-mark-free finish. It smooths out existing imperfections and creates a textured surface for the paint to grip. For previously painted or varnished furniture, start with 120-grit sandpaper to rough up the surface. This step is called “scuff sanding.”
After the initial sanding, move to a finer grit, like 220-grit, to achieve a truly smooth surface. If the furniture is raw wood, start with 120-grit and then progress to 220-grit sandpaper. Always sand with the grain of the wood. After sanding, wipe away all dust with a tack cloth or a damp rag. Residual dust will create bumps under your paint.
Priming for Adhesion and Uniformity
Applying a primer is another non-negotiable step for a perfect finish. Primer creates a uniform base for your paint, improving adhesion and preventing existing colors or stains from bleeding through. It also helps the topcoat adhere better. This means fewer coats of paint are needed and the final finish will be smoother.
Choose a good quality primer suitable for your furniture material and topcoat paint. I often use a stain-blocking primer, especially for older pieces or those with knots. Apply a thin, even coat of primer. Allow it to dry completely according to manufacturer instructions before sanding lightly with 220-grit sandpaper. This light sanding removes any dust nibs and smooths the primed surface. Remember to wipe off dust after sanding the primer. This careful preparation prevents brush marks and ensures a beautiful, lasting finish.
Choosing the Right Paint and Additives
The type of paint and any additives you use play a huge role in achieving a brush-mark-free finish. Not all paints are created equal when it comes to smooth application. Selecting the correct products can make a significant difference. It is an investment in your project’s success.
I have learned that investing in good paint saves headaches later. Different paints have different properties. Some are naturally better for a smooth application.
Selecting Self-Leveling Paints
Self-leveling paints are formulated to spread out and smooth themselves as they dry. This property helps eliminate brush marks and roller textures. They contain special additives that reduce surface tension, allowing the paint to flow more evenly. These paints are often a bit thinner than traditional paints. This helps them settle without leaving ridges.
Look for paints specifically labeled as “self-leveling” or “cabinet and furniture paint.” Many high-quality acrylic or alkyd (oil-modified water-based) paints offer excellent self-leveling properties. Using these types of paints is often the easiest way to achieve a glass-like finish. They are designed for this purpose.
Understanding Paint Thinners
Sometimes, even self-leveling paints need a little help to flow perfectly. Paint thinners reduce the viscosity of the paint, making it thinner and easier to apply smoothly. This allows the paint to settle more evenly before it dries. It also extends the drying time slightly, giving the paint more time to level out.
For water-based paints (latex or acrylic), you can use a small amount of distilled water as a thinner. Do not use tap water, as minerals can affect the paint. For oil-based paints, use mineral spirits or paint thinner. Always add thinner sparingly, following the paint manufacturer’s guidelines. Adding too much thinner can reduce paint opacity and durability. I usually start with a very small amount and test it. You can find more specific guidance on thinning certain types of paint, such as how to thin Valspar cabinet and furniture paint.
Utilizing Flow Enhancers (Paint Conditioners)
Flow enhancers, also known as paint conditioners or extenders, are additives designed to improve paint flow and extend its open time. Open time is the period during which the paint remains wet and workable. This extra time allows the paint to level out more effectively before it starts to dry. Unlike thinners, flow enhancers do not significantly dilute the paint’s color or protective properties.
Popular brands like Floetrol for water-based paints or Penetrol for oil-based paints are excellent choices. I always add a small amount of Floetrol to my water-based furniture paints. Just a capful or two per quart can make a huge difference in the final finish. Follow the product instructions for the correct ratio. These additives are essential for a brush-mark-free result, especially when working in warmer, drier conditions where paint dries quickly.
Selecting the Best Applicators for a Smooth Finish
Choosing the right tool to apply your paint is just as important as the paint itself. The wrong applicator can undo all the benefits of good paint and preparation. Certain applicators are simply better at laying down paint smoothly without leaving marks. This choice significantly impacts the final result.
I have tried many different tools over the years. Some work much better than others. It is about matching the tool to the desired outcome.
High-Quality Synthetic Brushes
Even though the goal is “no brush marks,” a good quality synthetic brush still has its place, especially for cutting in edges or detailed areas. The key is using a synthetic brush with very fine, soft bristles. Natural bristle brushes are better for oil-based paints, but synthetic brushes work best for water-based paints. They hold their shape better and do not absorb water. This means they apply paint more smoothly.
Look for brushes labeled for “smooth finish” or “cabinet painting.” Angle sash brushes are great for control. When using a brush, load it with a moderate amount of paint and apply with light, long, even strokes. Do not press hard. The paint should flow off the brush, not be forced. After each use, it is crucial to clean your paint brushes thoroughly. Proper cleaning ensures they remain soft and effective for future projects. You can learn more about how to clean your paint brushes to keep them in top condition.
Foam Rollers for Seamless Coverage
Foam rollers are one of the best tools for achieving a smooth, brush-mark-free finish on flat surfaces. They do not have fibers that can leave lint or texture, unlike traditional napped rollers. High-density foam rollers are ideal for furniture painting. They pick up and release paint evenly. This helps spread the paint without creating bubbles or streaks.
Choose a roller with a very fine cell structure. These are often labeled for “smooth surfaces” or “cabinet painting.” Use a roller pan that allows for even loading of the roller. Apply paint with light, even pressure, rolling in one direction. Overlapping each pass slightly ensures full coverage. Using foam rollers on larger, flat surfaces reduces brush marks significantly.
Paint Pads for Even Distribution
Paint pads are another excellent option for smooth paint application on flat or slightly curved surfaces. They consist of a foam or felt pad attached to a handle. These pads apply a thin, even coat of paint without the texture that brushes or even some rollers can leave. They are especially good for large, flat panels like tabletops or cabinet doors.
Paint pads glide smoothly over surfaces, depositing paint uniformly. They are less likely to leave streaks or brush marks. Load the pad by dipping it into the paint tray. Ensure it is saturated but not dripping. Apply with steady, even pressure, using long, overlapping strokes. Paint pads are easy to control and offer great coverage. They are a valuable tool in the quest for a flawless finish.
Paint Sprayers for the Ultimate Smoothness
For the absolute smoothest, factory-like finish with zero brush marks, a paint sprayer is the champion. Sprayers atomize the paint into a fine mist. This mist applies an incredibly even and thin coat over the surface. There are no bristles or roller textures to worry about. HVLP (High Volume Low Pressure) sprayers are often recommended for furniture painting due to their control and efficiency.
Using a sprayer requires proper ventilation and masking off surrounding areas. You will also need to thin your paint more than if brushing or rolling. Always test the spray pattern on a scrap piece of wood first. This helps you get the right consistency and technique. While it has a learning curve, a sprayer delivers unparalleled smoothness. Consider investing in one if you plan many furniture projects. Proper cleaning of the sprayer after use is crucial. Learning how to clean a paint sprayer ensures its longevity and consistent performance.
Mastering Application Techniques
Even with the best paint and tools, your application technique determines the final outcome. Improper technique can quickly introduce brush marks or unevenness. Mastering these methods ensures a smooth and professional-looking finish. Consistency and patience are key in this stage.
I focus on careful, deliberate movements. Rushing always leads to mistakes. Each stroke counts.
Applying Thin, Even Coats
The most crucial rule for a brush-mark-free finish is to apply multiple thin coats of paint instead of one or two thick ones. Thick coats of paint are more likely to sag, drip, and show brush marks. They also take longer to dry. This extended drying time can attract more dust. Thin coats dry faster and level out more effectively.
Aim for coverage, not opacity, with your first coat. The goal is to lay down an even layer. The subsequent coats will build up the color and achieve full coverage. Using thin coats helps the paint self-level perfectly. This strategy reduces any texture from your applicator.
Consistent and Overlapping Strokes
Whether you are brushing, rolling, or using a paint pad, consistency in your strokes is vital. Apply paint with even pressure and consistent speed. For brushing, use long, smooth strokes in one direction, typically with the grain of the wood. Avoid back-and-forth scrubbing. For rolling, overlap each pass by about one-third. This ensures uniform coverage without creating lines where one pass ends and another begins.
The “wet edge” technique is important. Always work on a wet edge, meaning you apply new paint next to paint that is still wet. This allows the paint to flow together seamlessly. If the paint starts to dry, do not go back over it. Trying to smooth partially dried paint will create texture and brush marks. Let it dry completely and sand it if needed.
Allowing Proper Drying Time Between Coats
Patience is a virtue in furniture painting. Rushing the drying process between coats is a common mistake that leads to brush marks and poor adhesion. Each coat must be completely dry before applying the next. This allows the solvents to evaporate fully and the paint to cure. If you paint over a tacky surface, you will pull up the previous layer. This creates lumps and marks.
Refer to the paint manufacturer’s instructions for recommended drying times. These times can vary based on humidity and temperature. In humid conditions, paint takes longer to dry. Test a hidden area with your fingernail. If it leaves an impression, the paint is not dry yet. Waiting the full drying time ensures each layer cures properly and provides a stable base for the next. This also contributes to the paint’s overall durability and smooth appearance.
Controlling Your Painting Environment
The environment where you paint significantly affects how well your paint levels and dries. Factors like temperature, humidity, and dust can introduce imperfections and brush marks. Creating an ideal painting space helps the paint perform its best. I always check these conditions before I start.
A controlled environment makes the painting process smoother. It ensures a beautiful final product. You can do a lot to manage these factors.
Ideal Temperature and Humidity
Paint, especially water-based paint, is sensitive to temperature and humidity. The ideal temperature range for most paints is between 65°F and 75°F (18°C-24°C). Extreme temperatures can cause problems. If it is too cold, paint dries too slowly and may not level properly. If it is too hot, paint dries too quickly. This leaves less time for the paint to self-level before becoming tacky. This leads to brush marks.
Humidity also plays a major role. High humidity causes paint to dry very slowly. This increases the risk of drips and prolonged open time, which can attract dust. Low humidity makes paint dry too quickly. This gives it insufficient time to level out smoothly. Aim for a relative humidity between 40% and 60%. Use a dehumidifier in humid conditions or a humidifier in very dry conditions to manage this.
Ensuring a Dust-Free Space
Dust is the enemy of a smooth paint finish. Airborne dust particles can settle on your wet paint, creating tiny bumps and an uneven texture. This is especially noticeable on furniture. To minimize dust, clean your painting area thoroughly before you begin. Vacuum and wipe down surfaces. Allow dust to settle before painting.
Consider painting in a well-ventilated area that is not prone to dust. Close windows and doors to prevent outside dust from entering. You can also lightly mist the floor with water before painting. This helps to settle airborne dust. Wear clean clothes to avoid introducing lint. After sanding, use a tack cloth to remove all dust from the furniture itself. A dust-free environment is essential for a truly flawless finish.
Proper Ventilation
While minimizing dust is important, good ventilation is also crucial for safe and effective painting. Proper airflow helps carry away paint fumes and allows the paint to dry correctly. This process prevents solvents from lingering and affecting the paint’s leveling ability. It also makes the painting environment healthier.
Open windows and doors, or use fans to create a cross-breeze. Do not point fans directly at your wet furniture, as this can cause paint to dry too quickly. Place fans strategically to pull air across the area. Ensure fresh air replaces the fume-laden air. Good ventilation supports the paint’s drying and leveling process. It contributes to a smoother, more durable finish. It also protects your health during the project.
Sanding Between Coats and Applying Topcoats
Even when you apply thin coats, very light sanding between layers can take your finish from good to exceptional. This step addresses any minor imperfections and prepares the surface for the next coat. A protective topcoat is also key for durability and an ultra-smooth feel. These steps ensure a truly professional result.
I never skip these final details. They make all the difference in the look and feel of the finished piece. This is where patience truly pays off.
Light Sanding Between Paint Coats
After each paint coat has fully dried, perform a very light sanding with a super fine-grit sandpaper, such as 320-grit or 400-grit. This process is called “denibbing.” Its purpose is not to remove paint but to gently knock down any tiny dust specks or minor imperfections that may have settled on the surface. This creates an even smoother surface for the next coat to adhere to.
Use very light pressure and a sanding block for evenness. Sand just enough to feel smooth to the touch. Do not sand through the paint layer. After sanding, thoroughly wipe away all sanding dust with a tack cloth. Any remaining dust will create new imperfections. This step ensures each subsequent coat builds upon a perfectly smooth foundation. It significantly contributes to a flawless final look.
Applying a Smooth Topcoat for Durability
Once your final paint coat has dried completely (often for 24-48 hours), applying a protective topcoat is highly recommended. A topcoat, such as polyurethane or polycrylic, adds durability and protects your paint job from scratches, chips, and daily wear. It also helps achieve an even deeper, smoother finish. For water-based paints, use a water-based topcoat like polycrylic. It dries clear and will not yellow. For oil-based paints, use oil-based polyurethane.
Apply the topcoat using the same techniques you used for the paint. Use a high-quality foam roller or a good synthetic brush for smooth application. Apply thin, even coats. Avoid overworking the topcoat, as this can introduce bubbles or streaks. Allow each coat to dry completely before applying the next. You may also lightly sand between topcoat layers with 600-grit sandpaper for an extra smooth feel. This final layer of protection not only extends the life of your painted furniture but also enhances its smooth, professional appearance.
Troubleshooting Common Furniture Painting Issues
Even with the best preparation and techniques, issues can sometimes arise during furniture painting. Understanding how to address common problems like drips, uneven areas, or minor brush marks is important. Knowing how to fix these issues ensures a professional finish. It saves your project from frustration.
I have faced many challenges in my own projects. Learning how to correct them is part of the process. Do not get discouraged.
Dealing with Drips and Sags
Drips and sags happen when too much paint is applied in one area, or the paint is too thin. If you catch a drip while the paint is still wet, gently smooth it out with your brush or roller. If the paint has already dried, do not try to wipe it. This will make it worse.
Once dry, you will need to sand the drip flat. Use a fine-grit sandpaper (220-grit or 320-grit) and sand carefully until the drip is flush with the rest of the surface. Be careful not to sand through the paint. After sanding, wipe away the dust and apply another thin coat of paint to that area. This blends it seamlessly.
Correcting Uneven Areas or Missed Spots
Uneven areas can result from inconsistent application or paint drying too quickly. Missed spots, or “holidays,” are areas where paint was simply not applied. For uneven areas, first, allow the paint to dry fully. Then, lightly sand the raised or uneven spots to smooth them down.
For missed spots, simply apply another thin coat of paint over the entire surface, or at least the entire panel or section. Trying to touch up only the small missed spot will often result in a noticeable patch. Applying a full, thin coat over the area ensures uniform coverage and a smooth transition. This is why multiple thin coats are so important. They allow for easy correction. If you have chipped paint on wood furniture, there are specific steps to fix it before repainting. You can learn more about how to fix chipped paint on wood furniture for a seamless repair.
Addressing Minor Brush Marks
Despite your best efforts, you might notice very faint brush marks after the paint dries. If these marks are minor, there are ways to smooth them out. The most effective method is light sanding. Use a very fine-grit sandpaper (320-grit or 400-grit) and gently sand the entire surface. This flattens any raised texture from brush marks.
After sanding, wipe away all dust. Then, apply another thin coat of paint. This fresh coat will flow into the tiny valleys created by the sanding, leveling out the surface. For very stubborn marks, you might need to repeat this process once more. Always ensure the paint is fully dry before sanding. This technique works wonders to achieve that ultra-smooth finish you desire.
Creative Ideas for Your Next Furniture Project
Painting furniture without brush marks gives you a beautiful, professional base. Now, consider the possibilities for enhancing your pieces. Smooth finishes provide a perfect canvas for various design styles. Think beyond just a single color.
I enjoy exploring new looks for my furniture. A smooth finish makes any decorative technique look better. It adds to the overall quality.
Color Selection and Impact
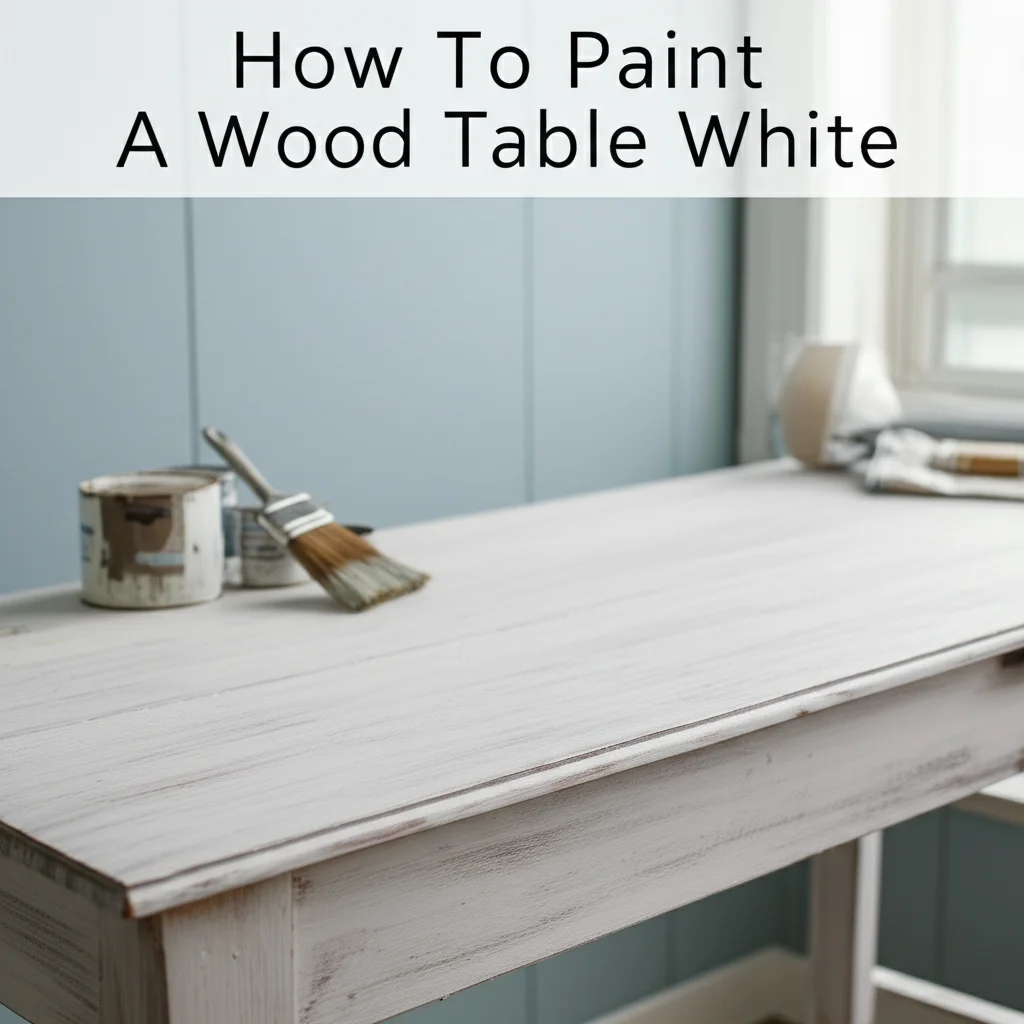
The color you choose dramatically impacts the furniture’s overall feel and how it fits into your space. A smooth, brush-mark-free finish allows the color to truly shine without distractions. Think about the existing decor and desired mood. Light colors like crisp whites or soft pastels can brighten a room and make furniture appear larger. Darker, rich tones can add drama and sophistication. For example, learning how to paint a wood table white can transform a dated piece into a modern statement.
Consider the undertones of the paint color. Warm undertones create a cozy feel. Cool undertones offer a calming effect. Do not be afraid to use bold colors on smaller accent pieces. This creates a focal point. A smooth finish ensures the chosen color looks intentional and high-end. If you are unsure which color to pick, explore resources like how to decide what color to paint furniture for inspiration.
Adding Hardware and Embellishments
New hardware can completely transform a painted piece. A smooth finish provides the perfect backdrop for stylish knobs, pulls, or hinges. Modern, minimalist hardware can update a traditional dresser. Ornate, vintage-inspired pulls can enhance a classic cabinet. The hardware should complement the furniture’s style and your room’s aesthetic.
Beyond hardware, consider other embellishments. Decorative appliques, stenciled patterns, or even simple painted details can add character. With a smooth base, these additions will stand out crisply. The lack of brush marks ensures a professional backdrop. This allows the embellishments to be the star.
Exploring Different Finishes and Effects
A smooth base does not mean your furniture has to look perfectly flat. You can apply various finishes over a brush-mark-free paint job to add depth and interest. For example, a matte topcoat can create a sophisticated, modern look. A high-gloss topcoat offers a reflective, luxurious appearance.
You can also experiment with techniques like glazing or distressing over your smooth paint. A glaze can add a subtle layer of color, enhancing carved details. Distressing can give furniture a worn, aged look, even with a smooth paint job underneath. These techniques require a clean, smooth base to look their best. This highlights the importance of the brush-mark-free first step.
Beyond Painting: Care and Maintenance
Achieving a smooth, brush-mark-free finish is a significant accomplishment. However, proper care and maintenance are crucial to preserve its beauty and durability. Protecting your newly painted furniture ensures it looks great for years to come. This final step is vital for longevity.
I always advise clients on how to care for their refreshed pieces. It is about protecting your hard work. Simple steps make a big difference.
Curing Time for Painted Furniture
Paint, especially water-based acrylic or latex paint, can feel dry to the touch within hours. However, it takes much longer to fully cure. Curing is the process where the paint hardens and reaches its maximum durability. This process can take anywhere from 7 to 30 days, sometimes even longer, depending on the paint type and environmental conditions. During the curing period, the paint is still somewhat vulnerable.
Avoid placing heavy objects or using the furniture roughly during this time. Be gentle with cleaning. This allows the paint to fully harden and create a resilient surface. Rushing the curing process can lead to nicks, scratches, or even imprints from objects. Patience here pays off in the long run.
Gentle Cleaning and Protection
Once your painted furniture has fully cured, cleaning should still be gentle. Avoid harsh chemical cleaners or abrasive scrubbers, as these can damage the paint finish. Instead, use a soft, damp cloth with a mild soap solution if needed. Wipe gently to remove dust and dirt. For specific types of furniture finishes, such as chalk paint, there are particular cleaning methods. You can learn more about how to clean chalk paint furniture to maintain its unique look.
Consider using furniture coasters or felt pads under items placed on the surface. This helps prevent scratches and water rings. For high-traffic surfaces like tabletops, a clear protective topcoat is essential for added durability. If you used one, ensure it is also fully cured before heavy use. Gentle care will keep your brush-mark-free furniture looking pristine.
Addressing Future Scratches or Chips
Even with the best care, life happens, and painted furniture may eventually get a scratch or chip. Do not worry. These can often be repaired seamlessly. For small nicks, a touch-up pen or a small artist’s brush with your leftover paint can work wonders. Apply a tiny amount of paint to fill the chip. Allow it to dry fully.
For larger chips or scratches, you might need to lightly sand the damaged area. Then clean it, reprime if necessary, and apply thin layers of paint. Blend the edges as much as possible. Having a small amount of your original paint saved from the project is very helpful for future touch-ups. Knowing how to fix minor imperfections keeps your furniture looking flawless over time.
FAQs About Painting Furniture Without Brush Marks
What type of paint is best for no brush marks?
Self-leveling acrylic or alkyd (oil-modified water-based) paints are best. These paints are designed to flow out and flatten as they dry, minimizing brush or roller marks. Adding a paint conditioner, like Floetrol for water-based paints, further enhances their self-leveling properties. This combination helps achieve a smooth, professional finish.
Can I get a smooth finish with a brush?
Yes, you can achieve a smooth finish with a brush. Use a high-quality synthetic brush with soft, fine bristles. Apply thin coats and use long, even strokes. Do not overwork the paint. Adding a paint conditioner also helps the paint level out before it dries, reducing visible brush marks.
How do professionals paint furniture so smoothly?
Professionals combine meticulous preparation, high-quality self-leveling paints, and often use paint sprayers. They apply multiple thin coats, sand lightly between layers, and control the painting environment (temperature, humidity, dust). This comprehensive approach ensures a factory-like, brush-mark-free finish.
Do foam rollers leave a smooth finish on furniture?
Yes, high-density foam rollers are excellent for achieving a smooth finish on furniture, especially flat surfaces. They do not have a nap, so they do not leave lint or texture. Apply paint with light, even pressure and consistent overlapping strokes to avoid creating lines.
What is the ideal temperature and humidity for painting furniture?
The ideal temperature for painting furniture is between 65°F and 75°F (18°C-24°C). The relative humidity should be between 40% and 60%. These conditions allow the paint to dry and level properly, preventing it from drying too quickly (which causes brush marks) or too slowly (which can lead to drips or dust issues).
Conclusion
Achieving a smooth, brush-mark-free finish on your furniture is completely within your reach. It involves a combination of careful preparation, smart product choices, and precise application techniques. Remember, patience and attention to detail are your best tools in this process. You are now equipped with the knowledge to transform your furniture from good to truly exceptional.
By following these steps—from thorough cleaning and sanding to selecting self-leveling paints, using the right applicators, and controlling your environment—you can say goodbye to unsightly brush marks forever. Embrace these methods, and you will consistently achieve that coveted professional finish. So, grab your supplies and confidently start your next project. Your furniture pieces are waiting to be transformed into beautiful, smooth works of art.
- Furniture Painting
- Smooth Finish
- DIY Home

Todd Martin
Senior Writer
With over 15 years of experience in home renovation and design, I started HEG to share what I’ve learned with homeowners who want to create spaces that are both beautiful and functional. I’ve always believed in a hands-on approach, and over the years, I’ve picked up practical solutions that actually work. Through HEG, I aim to make home improvement more approachable, sharing real tips that help you create a home you truly love.