· Todd Martin · Home Improvement · 14 min read
How To Restore Oak Dining Table

Breathe New Life Into Your Oak Dining Table
Your oak dining table holds countless memories. It serves as the heart of your home, witnessing family meals and celebrations. Over time, daily use can leave it looking tired and worn. Scratches, water rings, and a dull finish might make you consider replacing it. But what if you could bring back its original beauty?
You can absolutely restore your oak dining table. This project revitalizes your space. It also preserves a beloved piece of furniture. Learning how to restore oak dining table means giving it a second chance. This comprehensive guide will walk you through each step. We cover everything from assessing damage to applying a lasting finish. Get ready to transform your table and create new memories around its renewed surface.
Takeaway
- Assess Condition: Evaluate damage (scratches, watermarks, finish wear) and plan your restoration.
- Gather Tools: Collect necessary supplies like sandpaper, stripper, stains, and protective finishes.
- Strip Old Finish: Carefully remove the existing finish to reveal the bare wood underneath.
- Clean and Repair: Deep clean the wood and fix any dents, gouges, or cracks.
- Sand Thoroughly: Sand the entire surface progressively for a smooth, even base.
- Stain and Finish: Apply your chosen stain and a durable topcoat for protection and beauty.
- Maintain Regularly: Implement ongoing care to keep your restored table looking its best.
To restore an oak dining table, you must first remove the old finish. Then, sand the wood smooth and repair any damage. Apply a new stain for desired color. Finally, protect the surface with a durable finish like polyurethane. This process rejuvenates the table’s appearance and function.
Assessing Your Oak Dining Table’s Condition and Preparing for Restoration
Every restoration project begins with a careful evaluation. Take a close look at your oak dining table. Notice any specific areas of concern. This assessment guides your entire restoration process.
Identifying Damage and Planning Your Approach
Oak wood is very durable. However, it can show signs of wear. You might see light scratches from daily use. Deeper gouges from dropped items are also possible. Water rings or heat marks appear when spills are not cleaned quickly. The existing finish may look cloudy or chipped. The finish might feel sticky or rough. These issues are common on old tables. Pinpointing each type of damage helps you plan your steps. It ensures you address every problem effectively.
Think about the overall look you want. Do you want to keep the natural oak color? Or do you prefer a darker or lighter stain? This choice affects the type of stain you will buy. Planning ahead saves time and effort. A clear plan makes the restoration smoother.
Gathering Essential Tools and Materials
Before you begin, gather all your supplies. Having everything ready prevents interruptions. You will need safety glasses and gloves to protect yourself. A chemical stripper helps remove old finishes. Various grits of sandpaper are essential for smoothing. You will need wood filler for repairs. Stain and protective finishes are crucial for the new look. Brushes, rags, and tack cloths complete your material list.
- Safety Gear: Safety glasses, chemical-resistant gloves, respirator mask.
- Finish Removal: Chemical stripper, plastic scraper, steel wool (fine).
- Sanding Supplies: Orbital sander, sanding blocks, sandpaper (80, 120, 150, 180, 220 grit).
- Repair Materials: Wood filler, wood glue, clamps.
- Cleaning: Mineral spirits, denatured alcohol, tack cloths, clean rags.
- Finishing: Wood stain, clear protective finish (polyurethane, oil-based, water-based), natural bristled brushes or foam applicators.
Preparing thoroughly sets you up for success. You can also refer to guides on how to clean a wood dining table or how to clean oak furniture for initial cleaning tips before starting the stripping process. These resources offer valuable insights into preparing your surface.
The Art of Stripping and Cleaning Your Oak Table
Removing the old finish is a critical step. It prepares the wood for a fresh start. This process requires patience and attention to detail. It also ensures the new finish adheres correctly.
Safe Stripping Techniques for Old Finishes
Begin by placing your table in a well-ventilated area. Protect your floor with drop cloths. Apply the chemical stripper generously over a small section of the table. Follow the product instructions for application time. The old finish will start to bubble or soften. Use a plastic scraper to gently lift away the softened finish. Avoid digging into the wood itself. Work in small sections across the entire table top and legs. This method prevents the stripper from drying out.
Some stubborn spots might need a second application. Use fine steel wool with stripper for intricate areas. Once you remove most of the finish, clean the surface thoroughly. Wipe down the entire table with a rag dampened with mineral spirits. This step removes any stripper residue. It also lifts remaining grime and old finish particles. Proper ventilation is key during this stage. Remember to wear your safety gear.
Deep Cleaning the Bare Wood
After stripping, the wood will be exposed. It might still have embedded dirt or old wax. A deep clean ensures a pristine surface for sanding. Use a fresh rag with mineral spirits or denatured alcohol. Wipe down the entire table. Pay close attention to corners and carvings. The goal is to remove all contaminants. You want a clean, dry surface for the next steps.
This cleaning step reveals the true condition of the wood. It allows you to see any hidden damage. It also helps the sanding process be more effective. For general wood cleaning advice, you can consult articles like how to clean a wood table. If your table was particularly sticky from old finishes or spills, a guide on how to clean a wood table that is sticky might offer additional specific tips for that challenge. A truly clean surface is essential for a beautiful finish.
Sanding and Repairing Imperfections in Oak
Sanding is perhaps the most important part of wood restoration. It creates a smooth, even surface. This surface is ready for staining and finishing. Proper sanding brings out the beauty of the oak grain.
Step-by-Step Sanding for a Smooth Surface
Start with a coarser grit sandpaper. For very rough or damaged tables, begin with 80-grit. Use an orbital sander for large flat areas. Sand in the direction of the wood grain. This prevents cross-grain scratches. Once you remove all major imperfections, move to a finer grit. Progress through 120, 150, 180, and finally 220-grit sandpaper. Each grit removes the scratches from the previous one. Between each grit, wipe down the table with a tack cloth. This removes dust. Dust can cause new scratches during the next sanding pass.
The final pass with 220-grit creates a silky-smooth surface. This smoothness allows for even stain absorption. It also ensures a flawless finish. Take your time with sanding. It determines the quality of your finished table. Do not rush this step.
Addressing Dents, Scratches, and Gouges
After initial sanding, inspect the table closely for imperfections. Small dents can often be raised. Place a damp cloth over the dent. Iron it with a hot iron. The steam makes the wood fibers swell. Repeat this process until the dent minimizes. For deeper scratches or gouges, wood filler is necessary. Choose a filler that matches the natural color of oak. Apply it generously into the defect. Scrape off excess filler immediately.
Let the filler dry completely according to package directions. Once dry, sand the filled area smooth. Use fine-grit sandpaper for this. Ensure the repaired area blends seamlessly with the surrounding wood. For structural issues or significant warping, you might find valuable insights in resources like how to fix a warped table top. These steps help ensure your table’s surface is truly ready for its new look.
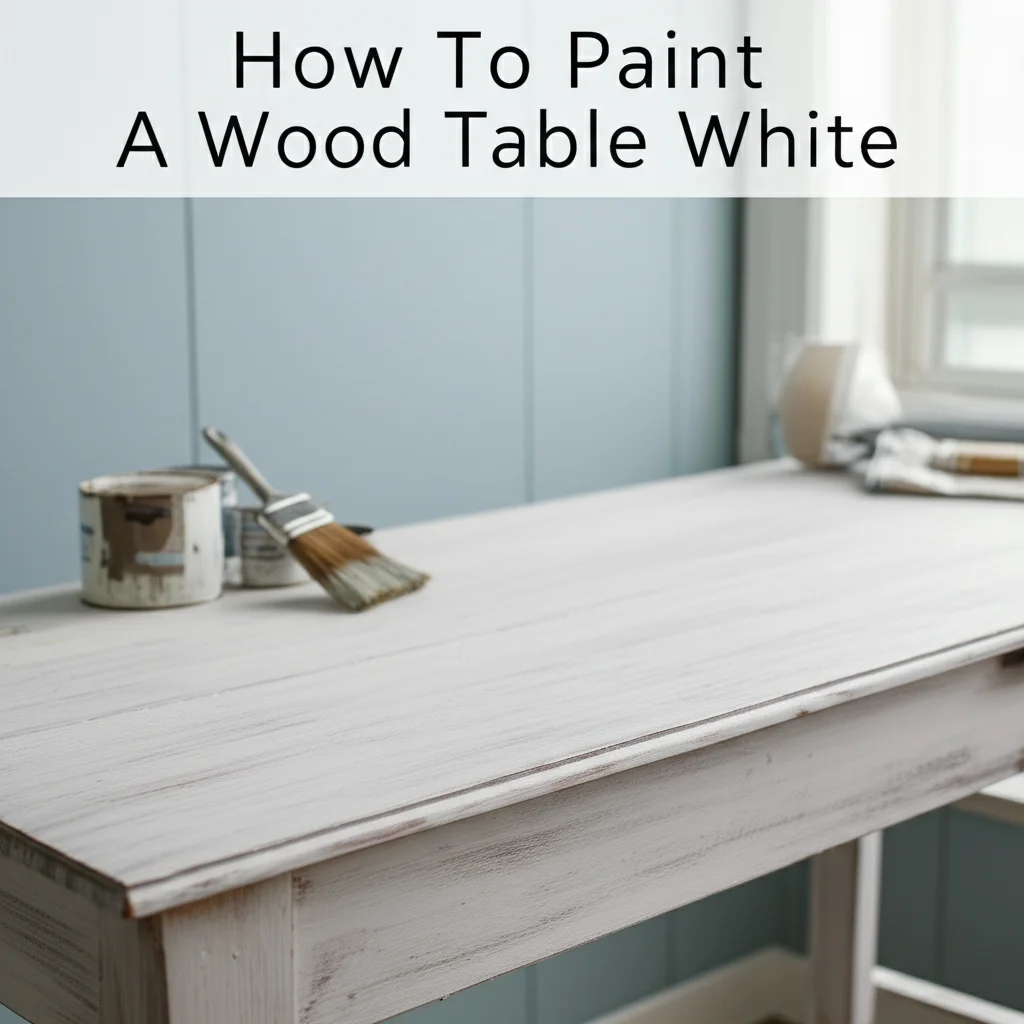
Staining and Finishing Your Restored Oak Table
Applying stain and a protective finish brings your oak table back to life. These steps add color and durability. They highlight the natural grain of the wood.
Choosing the Right Stain for Oak
Oak wood takes stain very well. You have many options for color. Consider the existing decor in your dining room. Do you want a light, natural look? A clear stain or a light oak tint works best. For a darker, richer appearance, choose a walnut or espresso stain. Always test the stain on an inconspicuous area first. The underside of the table is a good spot. This lets you see how the stain reacts with your specific oak. It ensures you like the color before applying it everywhere.
Apply stain with a clean cloth or foam applicator. Work in small sections. Apply an even coat, following the wood grain. Let the stain penetrate for a few minutes. Then, wipe off any excess with a clean rag. Wiping off excess stain prevents a blotchy appearance. It also allows the wood grain to show through. Apply additional coats for a darker color. Allow proper drying time between coats.
Applying Protective Finishes
The finish protects your table from daily wear. It also enhances its beauty. Polyurethane is a popular choice for dining tables. It creates a durable, water-resistant surface. Oil-based polyurethanes offer a warm amber tone. Water-based polyurethanes dry clear. Apply thin, even coats of your chosen finish. Use a quality brush or foam applicator. Sand lightly with 220-grit sandpaper between coats. This creates good adhesion. It also removes any dust nibs. Wipe clean with a tack cloth after sanding.
Apply at least three to five coats of finish for best protection. Allow ample drying time between each coat. Read the product label for specific instructions. Proper curing of the finish is important. It ensures maximum durability. For insights on protecting your table from heat, which is crucial for dining tables, refer to guides like how to protect dining table from heat. This step completes your table’s transformation.
Caring for Your Newly Restored Oak Dining Table
Your restored oak dining table looks beautiful. Now, the key is to keep it that way. Proper care ensures its longevity. Simple daily habits go a long way. This includes regular cleaning and protective measures.
Everyday Maintenance Tips
Wipe spills immediately. Even a durable finish can be compromised by standing liquids. Use a soft, damp cloth for daily cleaning. Avoid harsh chemical cleaners. These can strip the finish or damage the wood. A mild soap solution is acceptable for occasional deeper cleaning. Always dry the table thoroughly after cleaning. Do not let water sit on the surface.
Use coasters under drinks. Place placemats under plates. Use trivets under hot dishes. These items create a barrier. They protect the finish from heat and moisture. Rotate table decorations regularly. This prevents uneven fading or marks. Dust your table with a microfiber cloth. This prevents abrasive dust buildup. Regular care keeps the surface looking pristine.
Long-Term Protection Strategies
Consider adding a protective pad under your tablecloth. This offers an extra layer of defense. It guards against accidental impacts and spills. Reapply a protective wax or polish periodically. This depends on your chosen finish. Waxes can add a subtle sheen. They also provide a thin protective layer. Follow the manufacturer’s recommendations for your specific finish.
Avoid placing your table in direct sunlight for long periods. UV rays can fade wood and finishes over time. Maintain a stable humidity level in your home. Extreme changes can cause wood to expand or contract. This might lead to cracks. For more general advice on protecting wood surfaces, you might find tips in articles such as how to protect acacia wood dining table. For basic cleaning of dining surfaces, a general guide on how to clean dining table can also be helpful for quick refreshers. Consistent care will ensure your oak table remains a centerpiece for many years.
Troubleshooting Common Oak Restoration Challenges
Even with careful planning, challenges can arise. Knowing how to address them helps you achieve a perfect finish. Do not let minor setbacks deter you. Most common issues have simple solutions.
Dealing with Stubborn Stains and Watermarks
Sometimes, stripping does not remove all stains. Dark spots might remain, especially from old water damage or pet accidents. For these, try using oxalic acid. It is a wood bleach that can lift dark stains. Follow the product instructions carefully. Apply it to the stained area. Allow it to work for the recommended time. Then, neutralize and rinse the area. You might need to repeat this process. Always test in an inconspicuous spot first. This ensures it does not harm the wood.
Watermarks often appear as white rings. These happen when moisture gets trapped in the finish. You can often remove white rings without stripping. Use a cloth dampened with mineral spirits. Gently rub the watermark. For stubborn rings, try a non-gel toothpaste. Apply a small amount to a cloth. Lightly rub the mark in the direction of the grain. Wipe clean with a damp cloth. This can draw out the moisture.
Repairing Deep Cracks and Splits
Deep cracks and splits require more than just wood filler. These affect the table’s structural integrity. For larger gaps, you might need wood glue and clamps. Clean out the crack thoroughly first. Apply wood glue generously into the crack. Press the edges together. Use wood clamps to hold the pieces tightly. Wipe away any excess glue immediately. Let it dry completely for 24 hours.
After drying, the glued area might need sanding. Ensure it is smooth and flush with the rest of the table. For very wide gaps, you might insert a thin piece of oak wood. This piece should fit snugly. Glue it in place. Then sand it down. These repairs ensure your table is not just beautiful but also stable. Addressing these issues makes your restoration truly complete.
When to Call a Professional for Oak Table Restoration
DIY restoration is rewarding. However, some situations might require expert help. Knowing when to call a professional saves you time and prevents further damage. It ensures the best possible outcome for your cherished piece.
Recognizing Complex Damage
Some tables have damage beyond typical wear. Severe structural issues include wobbly legs or broken joints. Extensive warping can also be very difficult to fix. Deep gouges that affect the table’s stability are complex. Antique tables often have delicate inlays or veneers. These materials require specialized handling. Removing old, lead-based paints also needs professional expertise. Dealing with mold or rot is another reason to seek help. Professionals have tools and knowledge for these problems. They can assess the damage accurately. They provide solutions that DIY methods cannot.
Attempting complex repairs without experience can cause more harm. You might damage the table beyond repair. You could also incur higher costs in the long run. Recognizing your limits is a sign of good judgment. It protects your investment in the table.
Evaluating Time and Cost vs. DIY
Consider the time commitment. Full restoration can take many hours. Do you have the time and patience for this project? If not, a professional can complete the work efficiently. Think about the cost of materials. Strippers, sanders, stains, and finishes add up. Professional restorers buy supplies in bulk. They might also have access to higher quality products. Their labor costs money, but they guarantee the work.
Weigh the value of your table. If it is a family heirloom or a valuable antique, professional restoration is often the safer choice. They understand historical finishes and preservation techniques. They can maintain the table’s value. Get several quotes from reputable restorers. Compare their services and pricing. This helps you make an informed decision. Sometimes, the peace of mind from professional work is worth the expense.
Conclusion
Restoring an oak dining table is a deeply rewarding project. It allows you to breathe new life into a beloved piece of furniture. You transform a worn-out surface into a stunning centerpiece. We have covered every step, from initial assessment to the final protective finish. You learned how to strip old finishes, repair imperfections, and apply beautiful stains. You also know how to keep your restored table looking its best for years to come.
This process revitalizes your home. It brings back memories and creates new ones around a beautiful table. Embracing the journey of how to restore oak dining table empowers you. You gain valuable skills. You also achieve a sense of accomplishment. Your efforts will result in a durable, beautiful piece. It will stand proudly as the heart of your dining space. Don’t let your oak table lose its charm. Gather your tools, follow these steps, and begin your restoration journey today. Your oak dining table is waiting to shine again!
- oak dining table
- furniture restoration
- wood refinishing
- DIY home
- antique furniture care

Todd Martin
Senior Writer
With over 15 years of experience in home renovation and design, I started HEG to share what I’ve learned with homeowners who want to create spaces that are both beautiful and functional. I’ve always believed in a hands-on approach, and over the years, I’ve picked up practical solutions that actually work. Through HEG, I aim to make home improvement more approachable, sharing real tips that help you create a home you truly love.