· Todd Martin · Home Improvement · 12 min read
How To Hang Ikea Cabinets Without Rail
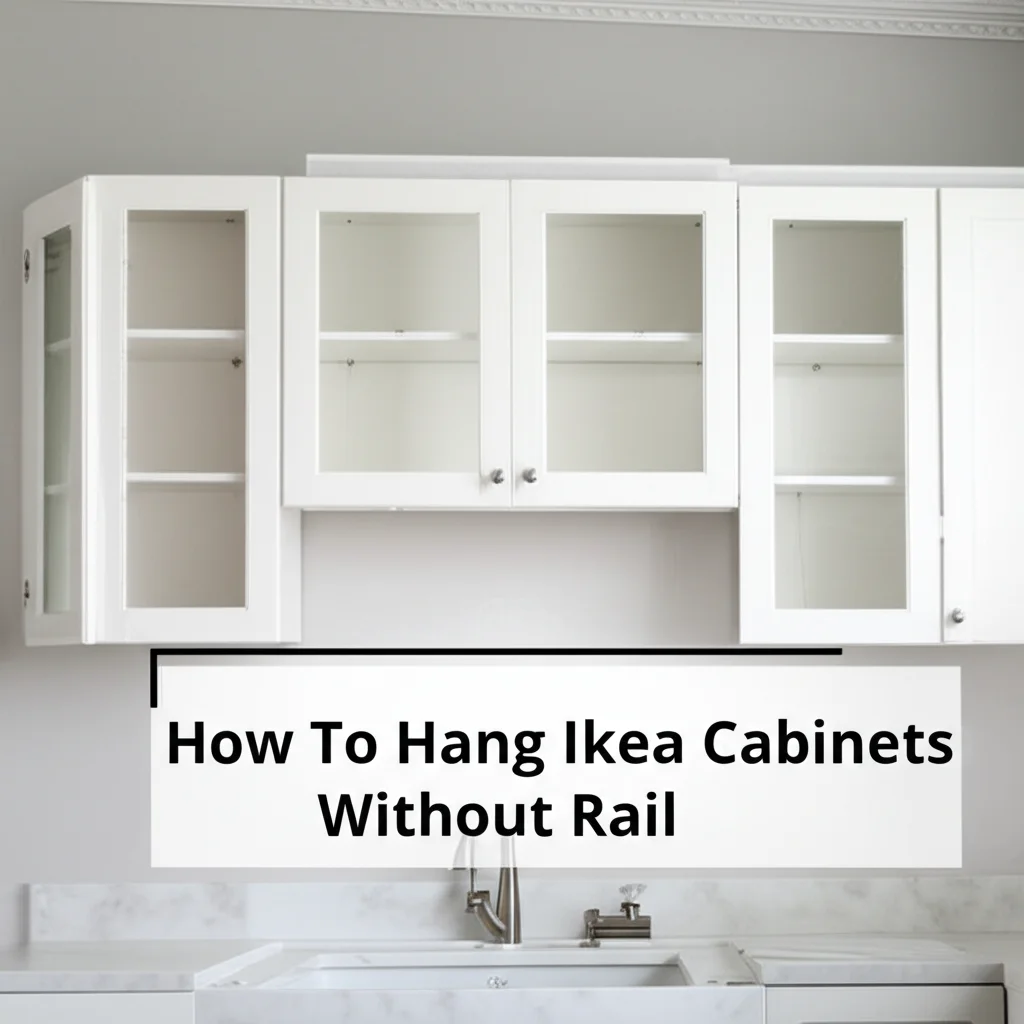
How To Hang Ikea Cabinets Without Rail: A DIY Guide
Thinking about installing new cabinets? You might have considered IKEA, known for its modular designs. Typically, IKEA cabinets use a suspension rail system for hanging. However, what if you need to hang IKEA cabinets without a rail? Perhaps you have older IKEA models, or your wall simply doesn’t suit the rail system. Maybe you just prefer a more traditional, direct mounting method. This guide will show you exactly how to hang IKEA cabinets without a rail, offering clear, step-by-step instructions. We will cover necessary tools, wall preparation, and precise installation techniques. By the end, you will feel confident tackling this project yourself.
Takeaway:
- IKEA cabinets can be securely installed without their suspension rail.
- Direct fastening to wall studs provides a strong alternative.
- Accurate measurements and a sturdy ledger board are key for successful installation.
To hang Ikea cabinets without a rail, you can directly screw them into wall studs using appropriate hardware. First, locate and mark studs. Then, create a level support line or temporary ledger board. Finally, secure the cabinets through their back panels into the studs with strong screws.
Why Skip the IKEA Suspension Rail? Understanding Your Options
Many people love IKEA cabinets for their affordability and modern look. The standard IKEA installation often involves a metal suspension rail. This rail mounts directly to the wall studs. Then, the cabinets simply hook onto this rail. It makes leveling and adjusting cabinets quite easy.
However, sometimes the rail system just does not work for your specific project. For example, older IKEA cabinet lines, like the AKURUM series, did not always use this rail system. You might also find yourself installing cabinets in a space with unusual wall structures. Metal studs, for instance, require special fasteners that might not pair well with the standard rail. Furthermore, some DIY enthusiasts simply prefer a more traditional method. They want to screw cabinets directly to the wall studs. This approach can feel more permanent and secure to them. It also allows for greater flexibility in cabinet placement and configuration. Understanding these alternatives is crucial for a successful installation.
Essential Tools and Materials for Rail-Free Installation
Before you begin hanging your IKEA cabinets without a rail, gather all necessary tools and materials. Having everything ready saves time and ensures a smooth process. You will need a reliable stud finder to locate wall framing. A good quality level, preferably a long one (4-6 feet), is essential for straight installations. A measuring tape is, of course, critical for accurate positioning. You will also need a drill with various bits, including one for pilot holes. Safety glasses are a must to protect your eyes from debris.
For materials, you will need strong wood screws or cabinet screws. Make sure they are long enough to penetrate the cabinet back and reach well into the wall studs (typically 2.5 to 3 inches). If you hit metal studs, you will need self-tapping metal screws. Wall anchors are necessary for areas where you cannot find a stud, but try to avoid these for primary cabinet support. Shims are small wedges that help level cabinets on uneven walls. You might also want a temporary ledger board, which is a straight piece of wood screwed to the wall to support upper cabinets during installation. This helps immensely when you are working alone.
Preparing Your Wall for Secure Cabinet Mounting
Proper wall preparation is the most important step when you hang IKEA cabinets without a rail. A solid foundation prevents future issues. Start by clearing the work area completely. Remove any old cabinets, shelves, or wall decor. Next, use your stud finder to locate all the vertical wall studs. These are the wooden or metal frames behind your drywall. Mark each stud’s location with a pencil from floor to ceiling. This gives you a clear map of your wall’s internal structure. Remember, studs are typically 16 or 24 inches apart, center to center.
Once studs are marked, determine the desired height for your cabinets. For upper cabinets, measure up from the floor and draw a perfectly level line across the wall. This line represents the bottom edge of your upper cabinets. Use a long level to ensure it is perfectly straight. For base cabinets, determine their top height. This is usually 34.5 inches from the floor, allowing for a standard countertop. Draw a level line at this height. If you are installing upper cabinets, consider temporarily screwing a straight 1x3 or 2x4 piece of lumber (your ledger board) along your bottom level line. This board will support the cabinet’s weight during installation. This simple step makes hanging much easier and safer. For walls with metal studs, ensure you use specific screws designed to bite into metal. If your wall is uneven, plan to use shims later to create a flush surface. For more guidance on wall preparation, especially with different wall types, you might find this article on how to hang cabinets on metal studs helpful.
Step-by-Step Guide: Hanging Base and Wall Cabinets Without a Rail
Now comes the actual hanging process. This part requires patience and precision. For base cabinets, position them along your marked line. If your floor is uneven, use shims underneath the cabinet base to achieve a perfectly level surface. Once level, use your drill to drive screws through the back of the cabinet and directly into the wall studs you marked. Use at least two screws per stud, one near the top and one near the bottom. This ensures a strong, secure connection. If you have multiple base cabinets, connect them to each other using cabinet connector screws. Drill pilot holes first to prevent splitting the wood.
Hanging wall cabinets without a rail can be trickier, especially if you’re working alone. This is where your temporary ledger board becomes invaluable. Rest the bottom of the first wall cabinet on the ledger board. This supports its weight while you secure it. Use a level to ensure the cabinet is perfectly straight. Then, drill pilot holes through the cabinet’s back panel and into the studs. Drive your long cabinet screws firmly into the studs. Again, use at least two screws per stud. If installing multiple wall cabinets, align them perfectly. Then, use cabinet connector screws to join them horizontally, creating a solid, continuous unit. For more tips on hanging cabinets in general, even above appliances, consider reading our guide on how to hang cabinets above washer and dryer. This method of joining cabinets together is similar to how you might install a shelf between two cabinets, creating a cohesive unit.
Ensuring Stability and Longevity: Final Touches
After successfully mounting all your cabinets, it is time for the final checks and adjustments. These steps ensure your cabinets are not only secure but also look professional and last for years. Double-check every cabinet with your level. Make sure both base and wall units are perfectly plumb and level. If you used shims, ensure they are securely in place and do not wobble. You can trim any excess shim material with a utility knife.
Next, install all doors and drawer fronts. Adjust the hinges as needed so that doors close properly and are aligned with each other. IKEA hinges usually have multiple adjustment screws for this purpose. Ensure all drawers slide smoothly on their glides. Finally, add any decorative trim pieces, kick plates, or filler strips. These details hide gaps and give your installation a finished look. Regularly check the screws over time, especially during the first few months. Wood can expand and contract, and screws might loosen slightly. Tightening them ensures long-term stability. Remember that proper maintenance, such as regular cleaning, also contributes to the longevity of your IKEA furniture. You can find more helpful information on how to clean IKEA furniture to keep your new cabinets looking their best.
Common Challenges and Troubleshooting Tips
Even with careful planning, you might encounter a few hurdles when hanging cabinets without the IKEA rail. Do not worry, most problems have simple solutions. One common issue is finding uneven walls. If your wall is not perfectly flat, your cabinets will not sit flush. Use shims behind the cabinet back to fill any gaps. Secure the cabinet firmly with screws, compressing the shims. This creates a solid, level surface.
Another challenge is finding studs. Sometimes, studs are not where you expect them. If your stud finder gives inconsistent readings, try using a small drill bit to make tiny test holes where you suspect a stud might be. Patch these small holes later. If you absolutely cannot hit a stud in a crucial spot, use heavy-duty toggle bolts or specialized drywall anchors. However, always prioritize screwing into studs for maximum support. Do not rely solely on drywall anchors for heavy wall cabinets. If a screw strips while you are driving it in, try a slightly larger screw. Alternatively, use a screw extractor to remove the stripped screw and try again in a slightly different spot or with a new pilot hole. Remember, taking a moment to identify the problem and choose the right solution saves time and frustration in the long run.
Alternatives to the IKEA Rail: Other Mounting Methods
While direct fastening to studs is the primary alternative to the IKEA rail, other methods exist that leverage similar principles for secure cabinet installation. One popular approach, already touched upon, is using a ledger board. This involves screwing a temporary, perfectly level wooden strip to the wall studs at the desired height of the bottom of your upper cabinets. The cabinet then rests on this ledger board, taking its weight while you mark and drive the screws through the cabinet back into the studs. This method is incredibly helpful for single installers, providing an extra “hand.” Once the cabinets are securely fastened, you can remove the ledger board.
For situations where studs are scarce or poorly spaced, heavy-duty wall anchors can be used, but with significant caution. These are not a replacement for stud mounting for entire heavy cabinets but can supplement in areas lacking direct stud access. Examples include toggle bolts or Molly bolts, which expand behind the drywall to create a secure hold. However, always check the weight rating of these anchors and ensure they meet or exceed the combined weight of your cabinet and its potential contents. Never hang a full run of heavy kitchen cabinets solely on drywall anchors. Ultimately, direct fastening into robust wall framing remains the most reliable and safest method for hanging cabinets. It ensures a stable and long-lasting installation, similar to how you would approach mounting any heavy object, like a heavy porch swing bed, where secure anchoring is paramount.
FAQ Section
Q: Can I hang Ikea SEKTION cabinets without the rail?
A: Yes, you can hang IKEA SEKTION cabinets without their suspension rail. The SEKTION system is designed for the rail, but you can still direct-mount them. You will need to screw through the cabinet’s reinforced back panel directly into wall studs. This method provides a very secure installation when done correctly.
Q: What type of screws should I use for hanging Ikea cabinets?
A: Use high-quality cabinet screws or strong wood screws. They should be at least 2.5 to 3 inches long to ensure they penetrate through the cabinet back and well into the wall studs. For metal studs, use self-tapping metal screws. Always use screws with a broad head for better holding power.
Q: How do I find studs accurately for cabinet installation?
A: Use a reliable electronic stud finder to locate the studs behind your drywall. Scan slowly across the wall, marking both edges of the stud and then its center. Cross-reference multiple scans if unsure. For a precise location, try lightly tapping the wall and listening for a solid sound, or using a small nail to confirm.
Q: Is it safe to hang heavy cabinets without a rail?
A: Yes, it is safe to hang heavy cabinets without a rail, provided you mount them correctly. This means securing them directly into wall studs using long, strong screws. The strength comes from the direct connection to the wall’s structural framing. Avoid relying solely on drywall anchors for heavy items.
Q: What if my wall isn’t perfectly flat?
A: If your wall is uneven, use shims to fill the gaps behind the cabinets. Place shims between the cabinet back and the wall where there are voids. Drive your screws through the cabinet and shims into the stud. This will ensure the cabinet sits level and plumb, preventing any rocking or instability.
Conclusion
Successfully hanging IKEA cabinets without their standard suspension rail is totally within your reach. You have learned that direct fastening to wall studs offers a robust and reliable alternative. We covered how to prepare your walls, select the right tools, and execute a precise, step-by-step installation for both base and wall units. Remember, meticulous wall preparation and accurate measurements are your best friends in this DIY adventure.
While the IKEA rail offers convenience, knowing how to hang IKEA cabinets without a rail provides you with more flexibility and control over your home projects. This method ensures your cabinets are securely mounted, providing stability and longevity for years to come. Do not let the absence of a rail deter you from creating your dream kitchen or storage space. With these guidelines, you possess the knowledge to achieve a professional-looking installation. Get ready to transform your space with confidence and skill!
- ikea cabinets
- cabinet installation
- no rail
- DIY cabinets
- kitchen renovation

Todd Martin
Senior Writer
With over 15 years of experience in home renovation and design, I started HEG to share what I’ve learned with homeowners who want to create spaces that are both beautiful and functional. I’ve always believed in a hands-on approach, and over the years, I’ve picked up practical solutions that actually work. Through HEG, I aim to make home improvement more approachable, sharing real tips that help you create a home you truly love.