· Todd Martin · Home Improvement · 20 min read
How To Fix Peeling Vinyl Cabinets
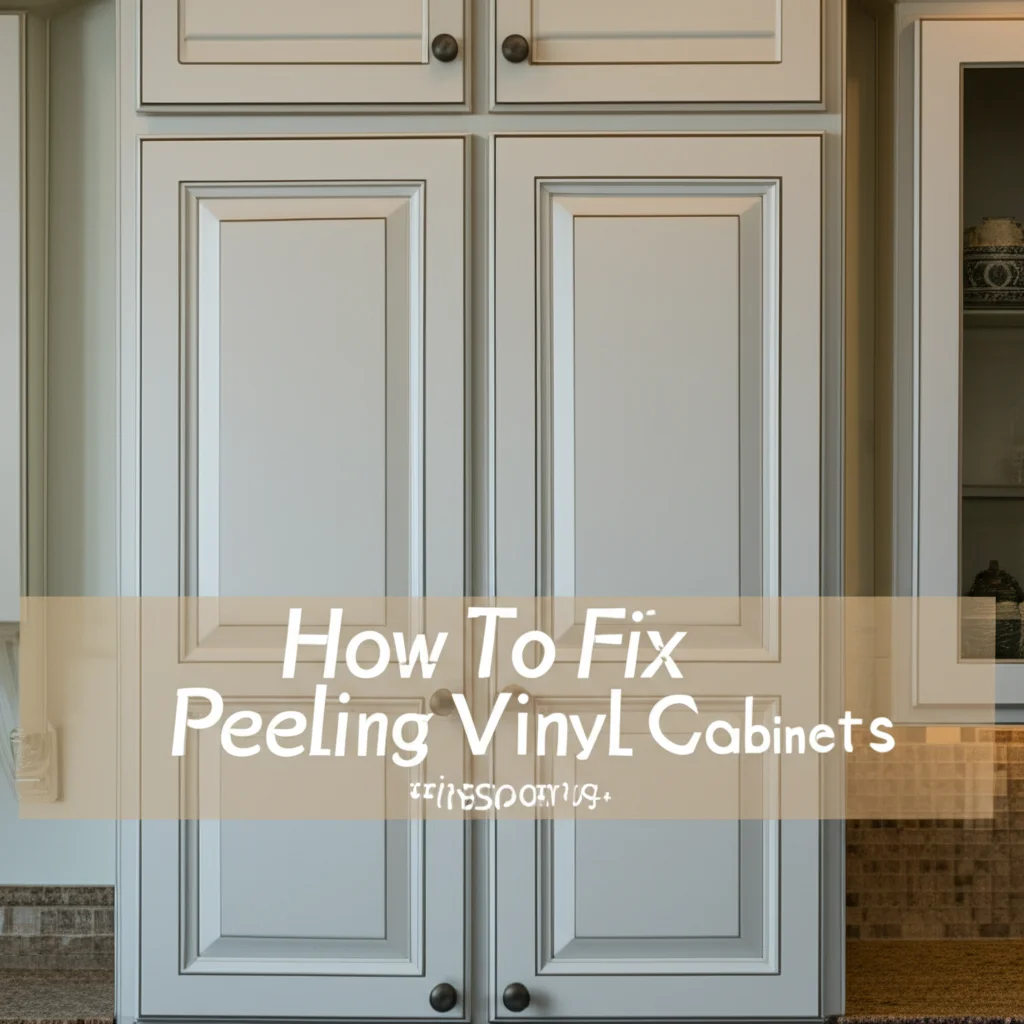
Restore Your Kitchen: How To Fix Peeling Vinyl Cabinets
Peeling vinyl cabinets can make your kitchen look tired and dated. I know the frustration of seeing those bubbles and flakes. This common issue affects many homes with thermofoil or laminate cabinetry. The good news is you do not need to replace your entire kitchen to fix this. You can repair peeling vinyl cabinets yourself. This guide will walk you through understanding why vinyl peels. We will cover the tools you need and the exact steps to repair them. You will also learn how to refinish them for a fresh look. We will discuss ways to prevent future peeling too. Get ready to give your cabinets a new lease on life.
Takeaway:
- Identify the cause of peeling to prevent future issues.
- Prepare cabinet surfaces thoroughly for best repair results.
- Re-adhere small peeling areas with appropriate adhesive.
- Remove severely peeled vinyl and consider painting or resurfacing.
- Maintain your cabinets to extend their lifespan.
You can fix peeling vinyl cabinets by cleaning the surface, re-adhering small peeled sections with a strong adhesive like contact cement, or completely removing the vinyl and refinishing the cabinets by painting or applying new veneer for a refreshed look.
Understanding Why Vinyl Cabinets Peel
Have you noticed your vinyl cabinets starting to bubble or peel? This problem is very common. Vinyl, often called thermofoil, is a type of finish applied to cabinet doors. It is a thin layer of PVC film. Manufacturers apply this film using heat and pressure. The film adheres to a medium-density fiberboard (MDF) core. This process creates a smooth, durable surface that mimics painted wood. It offers an affordable alternative to solid wood.
Several factors cause vinyl to peel over time. Heat is a major culprit. Cabinets near ovens, dishwashers, or toasters often show the first signs of peeling. The heat softens the adhesive holding the vinyl. This allows the vinyl to lift away from the MDF. Steam from dishwashers is particularly damaging. Moisture is another enemy. Water splashes or high humidity can weaken the adhesive bond. This leads to vinyl separation, especially around sinks.
Age also plays a role in vinyl peeling. Over many years, the adhesive can simply degrade. This natural aging process makes the bond less effective. Wear and tear from daily use contribute as well. Knocks, scratches, or harsh cleaning products can damage the vinyl surface. Once a small tear or crack appears, moisture and heat can penetrate more easily. This speeds up the peeling process. Knowing the cause helps you choose the right fix. It also helps prevent the problem from returning. Understanding these reasons is the first step in learning how to fix peeling vinyl cabinets effectively.
Assessing the Damage: When to Repair or Replace
Before you start any repair, you must look closely at your cabinets. Evaluate how bad the peeling is. Small bubbles or lifted edges are generally easy to fix. You can re-adhere these areas. This repair often involves less time and money. It is a good choice if the core MDF is still solid and dry. I often find that little sections around handles or corners are the first to go.
However, some damage is too severe for a simple repair. If large sections of the vinyl are peeling, removal might be the only option. This is true if the MDF core is swollen from water damage. When MDF gets wet, it expands and loses its shape. You cannot reattach vinyl smoothly to a warped surface. Signs of mold or mildew also suggest replacement or professional help. Fixing vinyl over mold will not solve the underlying issue. It can also be a health risk.
Consider the cost and effort. Repairing a few doors is much cheaper than buying new cabinets. If most of your cabinets show significant peeling, a full replacement might be more cost-effective in the long run. Replacing is a bigger project, but it gives a completely fresh start. If you are debating between fixing a few chipped areas on a different cabinet type, you might find this guide on how to fix chipped laminate cabinets helpful. For severe water damage on different cabinet types, such as wood, knowing how to fix water damage on wood cabinets could also be a relevant resource.
My advice is to aim for repair if only 20-30% of the cabinets show minor peeling. If it is 50% or more, or if the core material is compromised, think about a bigger project. You can choose to strip all the vinyl and paint the cabinet doors. This gives a uniform, updated look. This assessment helps you make the best decision for your home. It saves you from wasting time on unfixable damage.
Essential Tools and Materials for Vinyl Cabinet Repair
Gathering the right tools and materials makes the repair process smoother. You will need a few common household items and some specific products. Having everything ready saves time. It prevents interruptions once you start working.
Here is a list of what you will need:
Cleaning Supplies:
- Mild dish soap or degreaser
- Warm water
- Soft cloths or sponges
- Microfiber towels for drying
- Clean cabinets make a big difference in how well new finishes stick. You can get more details on how to clean greasy cabinets if your cabinets have a lot of buildup.
Adhesive:
- Contact cement (for larger areas)
- Strong all-purpose adhesive or construction adhesive (for smaller bubbles)
- Wood glue (if MDF core is exposed and needs sealing)
Application Tools:
- Plastic putty knife or scraper (to lift edges and spread adhesive)
- Roller or brayer (to press down vinyl)
- Small brush or syringe (for applying adhesive in tight spots)
Sanding and Smoothing:
- Fine-grit sandpaper (220-grit or higher)
- Sanding block (for even pressure)
- Tack cloth (to remove dust)
Protective Gear:
- Gloves (to protect hands from adhesive)
- Safety glasses (when working with chemicals)
- Mask (if sanding or using strong fumes)
Optional for Refinishing:
- Primer suitable for vinyl/laminate surfaces
- Paint (cabinet-grade, acrylic or enamel)
- Paint rollers and brushes
- Paint tray
- Drop cloths or painter’s plastic
- Painters tape
- For cleaning your cabinets before painting, you might want to look at how to clean cabinets for painting for thorough preparation. If you are considering painting your cabinets, especially if they are already painted, learning how to paint already painted cabinets can give you useful insights.
Having these items ready ensures you are fully prepared. You can tackle the task of how to fix peeling vinyl cabinets with confidence. This preparation makes the whole project more efficient.
Step-by-Step Guide: Preparing Your Peeling Cabinets
Proper preparation is the most important step for any lasting repair. It ensures the new adhesive sticks well. It also creates a smooth surface for any future finishes. Do not skip these steps. I always tell people that good prep makes the job 80% easier.
1. Remove Doors and Hardware
First, take the cabinet doors and drawer fronts off their hinges. Label each door and its corresponding hinge or hardware. This makes reinstallation simple. Place all screws and hardware in labeled bags. This prevents losing small parts. Work in a clean, well-lit area. This helps you see all the details.
2. Clean the Surfaces Thoroughly
Next, clean all surfaces of the cabinets, doors, and drawer fronts. Mix warm water with a mild degreaser or dish soap. Use a soft cloth or sponge to wipe down everything. Pay special attention to areas around handles, cooking zones, and near dishwashers. These spots often have grease and grime buildup. Grease prevents adhesive from sticking. Rinse with a clean, damp cloth. Dry surfaces completely with a microfiber towel. Make sure no residue remains. Keeping cabinets clean is crucial for adhesion. For general cleaning tips that apply to many surfaces, you can review how to clean vinyl furniture. If you are uncertain about cleaning wood cabinets, you can also look at how to clean wood cabinets.
3. Trim Loose or Excess Vinyl
Carefully inspect the peeling areas. If the vinyl is severely warped or brittle, you may need to trim it. Use a sharp utility knife or razor blade. Cut along the edge where the vinyl is firmly attached. Remove any loose or crumbling pieces. Be precise. A clean, straight edge is easier to re-bond. If the vinyl has peeled in tiny, flaky bits, remove them completely. You want to expose a smooth, stable surface. For more general issues like paint peeling off cabinets, understanding how to fix paint peeling off cabinets might provide broader insights into surface preparation.
4. Lightly Sand and De-gloss (If Refinishing)
If you plan to paint or apply new veneer, light sanding is essential. Use 220-grit sandpaper or a sanding block. Gently scuff the entire surface, including the intact vinyl. This creates a rough texture. It helps the primer and paint adhere better. If you only plan to re-adhere small sections, you may skip this step for the intact vinyl. However, sand any exposed MDF edges gently. After sanding, wipe down all surfaces with a tack cloth. Remove all dust. Dust is an adhesive’s worst enemy.
By following these steps, you prepare your cabinets for a successful repair. You lay the groundwork for a lasting fix. This ensures your efforts to fix peeling vinyl cabinets pay off.
Repairing Small Peeling Areas: The Basic Fix
For small areas where the vinyl has just begun to lift, a simple re-adhesion often works wonders. This method is quick and cost-effective. It stops the peeling from spreading further. I have used this technique many times with great success.
Here’s how to do it:
1. Lift the Peeling Edge
Gently lift the loose vinyl edge. Use a plastic putty knife or a thin spatula. Lift it just enough to expose the underside of the vinyl and the MDF core. Be careful not to tear the vinyl further. If it’s stiff, you can use a hairdryer on a low setting. Briefly warm the vinyl to make it more flexible. Hold the hairdryer a few inches away. Do not overheat it.
2. Apply Adhesive
Choose your adhesive carefully. For small bubbles or edges, a strong all-purpose adhesive or wood glue works well. If the area is larger or exposed to more heat, consider contact cement. If using contact cement, apply a thin, even coat to both the underside of the vinyl and the exposed MDF. For other glues, apply only to the MDF or the vinyl underside. Use a small brush or a syringe for precision. Spread the adhesive to cover the entire exposed area. Ensure you get close to the edge without getting too much on the visible surface.
3. Press and Secure
Once the adhesive is applied, carefully press the vinyl back into place. Start from the center of the peeled area. Work your way outwards. This pushes out any air bubbles. Use a roller, a brayer, or a clean, soft cloth to apply firm, even pressure. If you do not have a roller, a rolling pin can work. Hold the pressure for several minutes. Follow the adhesive manufacturer’s instructions for drying times. Some adhesives require clamping. You can use clamps with protective pads. You can also use heavy books wrapped in plastic. Leave them in place for at least a few hours, or overnight.
4. Clean Excess Adhesive
Wipe away any excess adhesive immediately. Use a damp cloth if the adhesive is water-based. Use mineral spirits or a designated adhesive remover for stronger glues. Always test a small, hidden area first. Make sure it does not damage the vinyl finish. Once dry, your small peeling areas will be fixed. This basic repair extends the life of your cabinets. It keeps them looking good. This process is how I handle minor cosmetic issues, saving the bigger jobs for later.
Addressing Larger Peeling Sections: Advanced Repair
Sometimes, the peeling is more extensive. Large sections of vinyl may have detached. They might be bubbled beyond simple re-adhesion. In these cases, you often need to remove the failing vinyl and refinish the cabinet. This is a more involved process. But it provides a more durable and aesthetically pleasing solution.
Here’s how to tackle larger peeling areas:
1. Remove All Peeling Vinyl
Begin by completely removing all loose or bubbled vinyl. Use a utility knife to score the vinyl around the edges of the cabinet door. Then, gently peel it away. If the vinyl is stubborn, use a heat gun or hairdryer on a low setting. Warm sections of the vinyl. This softens the adhesive. It makes the vinyl easier to peel off. Be careful not to overheat the MDF core. It can warp if exposed to too much heat. You want to remove the vinyl cleanly. Take your time with this step. For severe cases, I sometimes find myself peeling off the entire vinyl sheet from the door.
2. Scrape and Sand the Core
After removing the vinyl, the MDF core will likely have adhesive residue. Use a scraper or a plastic putty knife to remove any thick glue remnants. Be gentle not to gouge the MDF. Next, sand the entire exposed MDF surface. Start with 120-grit sandpaper to smooth out any rough spots. Then, move to 220-grit sandpaper for a fine finish. The goal is a completely smooth and even surface. This is critical for the next steps. It ensures paint or new veneer adheres properly. Wipe off all dust with a tack cloth after sanding.
3. Apply a Sealer to the MDF
MDF is porous. It will absorb moisture if left untreated. Apply a good quality shellac-based or oil-based primer/sealer to the exposed MDF. This seals the surface. It prevents moisture absorption. It also creates a good base for paint. Apply 1-2 thin coats. Allow each coat to dry fully according to the manufacturer’s instructions. This step is crucial for durability. If the MDF has signs of cracks, you might want to learn how to fix cracks in painted cabinets, as some techniques for filling could apply to MDF.
4. Choose Your Refinishing Method
Once the MDF is prepped and sealed, you have options for refinishing:
- Painting: This is the most common and often easiest method. Use a high-quality cabinet-specific primer. Then, apply two or more thin coats of durable cabinet paint. Apply paint with a foam roller for a smooth finish. Lightly sand between coats for the best results. For guidance on getting paint off cabinets, if you have any unwanted drips, check out how to get paint off cabinets.
- Applying New Veneer: You can buy rolls of self-adhesive or contact-cement-backed veneer. Apply it directly over the prepped MDF. This method is more complex. It requires precise cutting and careful application. It offers a look similar to the original vinyl.
Handling larger peeling sections requires more effort. However, it results in a strong, renewed surface. This significantly extends the life of your cabinets. This approach directly addresses how to fix peeling vinyl cabinets when the damage is extensive.
Refinishing Peeling Vinyl Cabinets: Painting & Resurfacing Options
After you have removed the peeling vinyl and prepped the cabinet surfaces, you have a blank canvas. This is your chance to update the look of your kitchen significantly. Painting and applying new veneer are two popular ways to refinish. Each has its own benefits and challenges.
Painting Your Cabinets
Painting is a versatile option. It allows for a complete color change. You can match any decor. It is often the most budget-friendly choice too.
Here’s a breakdown:
- Primer Selection: Start with a high-quality bonding primer. This is essential when painting over MDF or remaining vinyl. It creates a surface for the paint to adhere to. Look for primers specifically designed for laminate or “difficult” surfaces. Some people wonder if they can paint over peeling vinyl. You can, but it is better to remove the loose vinyl first.
- Paint Type: Choose a durable cabinet or furniture paint. Acrylic-alkyd hybrid paints are popular. They offer the easy cleanup of water-based paints. They also provide the hardness and durability of oil-based paints. Enamel paints also work well. They provide a smooth, hard finish.
- Application: Apply thin, even coats of paint. Use a fine-finish foam roller for large flat areas. Use a good quality brush for edges and details. Avoid heavy coats, which can lead to drips and uneven drying. Lightly sand with 220-grit sandpaper between coats after they are fully dry. Wipe away dust with a tack cloth before applying the next coat. Usually, two to three coats are enough for full coverage and durability.
- Curing Time: Paint needs time to cure, not just dry. This can take several days or even weeks. Be gentle with your cabinets during this period. Full hardness develops over time.
Painting gives you endless color possibilities. It completely transforms your kitchen’s feel. For optimal paint adhesion and finish, consider tips from how to clean painted cabinets or how to clean painted kitchen cabinets.
Applying New Veneer
Applying new veneer is another option. It offers a factory-like finish. This option requires more precision and skill.
- Types of Veneer: You can find vinyl veneer rolls or wood veneer. Vinyl veneer closely matches the original look. Wood veneer offers a natural wood grain. Both come in self-adhesive and contact-cement varieties. Self-adhesive veneers are easier for DIYers.
- Application Process:
- Measure and cut each piece of veneer precisely. Use a straight edge and a sharp utility knife.
- For self-adhesive veneer, peel back a small portion of the backing. Align the veneer carefully. Slowly press it down, working from one end to the other. Use a roller or brayer to press firmly. This prevents air bubbles.
- For contact cement veneer, apply cement to both the cabinet surface and the veneer backing. Let it dry to the touch. Then, carefully align and press the veneer into place. Contact cement bonds instantly. You only get one chance to position it right.
- Trim any excess veneer with a sharp knife. Use a block plane or file to smooth the edges.
- Edge Banding: For a seamless look, apply edge banding to the exposed sides of the cabinet doors. This gives a finished appearance.
Refinishing your cabinets, whether by painting or re-veneering, can dramatically improve your kitchen. It is an effective way to fix peeling vinyl cabinets permanently.
Maintaining Your Vinyl Cabinets: Preventing Future Peeling
You have put in the work to fix your peeling vinyl cabinets. Now, you want to keep them looking great. Proper maintenance helps prevent future peeling. It extends the life of your cabinet finish. A little ongoing care goes a long way. I always emphasize prevention as the best long-term strategy.
Here are key maintenance tips:
1. Control Heat and Moisture
Heat and steam are major culprits for vinyl peeling. Be mindful of appliances that generate heat:
- Dishwashers: Open your dishwasher door after the cycle finishes. Let the steam escape slowly. Do not let it blast directly onto your cabinet doors. Some dishwashers have a steam-drying cycle. You might want to let the dishes cool inside first.
- Ovens and Stovetops: Use your range hood fan when cooking, especially when boiling water or baking. This vents heat and steam away from cabinets.
- Small Appliances: Keep toasters, coffee makers, and slow cookers away from cabinet doors. The heat they produce can cause localized peeling. Consider placing them on an open counter space.
2. Gentle Cleaning Practices
Harsh cleaners can degrade vinyl and its adhesive. Always use mild cleaning solutions:
- Mild Soap and Water: A solution of warm water and a small amount of dish soap is usually sufficient. Wipe down cabinets regularly to remove grease and grime. For general cleaning, learning how to clean sticky kitchen cabinets can be useful for stubborn residue.
- Avoid Abrasives: Do not use abrasive scrubbers or harsh chemical cleaners. These can scratch the vinyl. They can also break down the surface, making it vulnerable to peeling.
- Dry Thoroughly: Always dry your cabinets completely after cleaning. Do not leave any standing water or dampness. This prevents moisture from seeping into edges.
3. Address Spills Immediately
Water and food spills are common in kitchens. Wipe them up right away. Pay close attention to spills that run down cabinet fronts or seep into seams. Even small amounts of moisture, if left for too long, can compromise the vinyl bond.
4. Monitor Cabinet Edges and Seams
Periodically inspect your cabinet doors. Look especially at the edges and seams. These are the most vulnerable areas. If you notice any small lifts or bubbles forming, address them immediately. A tiny bit of adhesive applied quickly can stop a big problem. This proactive approach saves you from larger repairs.
By following these simple maintenance steps, you protect your investment. You keep your “how to fix peeling vinyl cabinets” repair looking good for many years. Prevention truly is the best cure in this case.
Frequently Asked Questions (FAQs)
Q1: Why do vinyl cabinets peel, even if they’re not near heat?
Vinyl cabinets, often called thermofoil, peel for several reasons. High heat from appliances like ovens or dishwashers is a common cause. This heat softens the adhesive over time. However, peeling can also happen due to general aging of the adhesive itself. Normal wear and tear, moisture exposure from splashes or humidity, and even manufacturing defects can contribute to the vinyl lifting away from the MDF core, regardless of heat proximity.
Q2: Can I paint directly over peeling vinyl without removing it?
You can paint over vinyl without removing it, but it’s not ideal if it’s peeling. For best results, you must remove all loose, bubbling, or peeling vinyl first. Painting directly over unstable vinyl will lead to an uneven finish. The paint will eventually peel off along with the old vinyl underneath. After removing loose sections, you should clean, sand, and prime the remaining vinyl and exposed MDF for good paint adhesion.
Q3: Is it better to repair or replace peeling vinyl cabinets?
The decision to repair or replace depends on the extent of the damage. If only small areas or a few doors show minor peeling, repair is more cost-effective. It saves time and money compared to a full replacement. However, if most cabinets are severely peeled, or if the MDF core is water-damaged or warped, replacing or completely stripping and refinishing might be a better long-term solution.
Q4: How can I prevent my vinyl cabinets from peeling in the future?
Preventing future peeling involves managing heat and moisture. Always use your range hood fan when cooking to vent steam and heat. Avoid opening your dishwasher immediately after a hot cycle. Let the steam dissipate. Keep small heat-generating appliances away from cabinet doors. Clean cabinets regularly with mild soap and water, ensuring you dry them completely to prevent moisture damage.
Q5: What is the best adhesive to use for reattaching vinyl to cabinets?
For reattaching small areas of vinyl, a strong all-purpose adhesive or construction adhesive can work well. However, for more durable and larger repairs, contact cement is often recommended. Contact cement forms a strong, permanent bond. You apply it to both surfaces, let it dry to the touch, then press them together. Always follow the manufacturer’s instructions for curing times and ventilation.
Q6: How long does a DIY vinyl cabinet repair typically last?
The lifespan of a DIY vinyl cabinet repair varies. It depends on the repair’s quality, the adhesive used, and ongoing maintenance. A well-done repair on a small, isolated peel can last several years. If you address the underlying cause, like heat exposure, the repair will last longer. However, if the entire cabinet is prone to peeling, a full refinishing or replacement will offer a more permanent solution.
Conclusion
Seeing your vinyl cabinets start to peel can be disheartening. It makes your kitchen look worn. But as you have learned, you do not need to embark on a full-scale renovation immediately. Knowing how to fix peeling vinyl cabinets is a valuable skill. It empowers you to tackle this common household problem head-on.
We covered understanding why vinyl peels. We discussed how to assess the damage. We explored the essential tools and materials. You now have a clear, step-by-step guide for basic repairs. You also know how to handle more extensive peeling. You can confidently refinish your cabinets with paint or new veneer. Finally, you understand key maintenance practices to prevent future issues.
Taking action to fix peeling vinyl cabinets can save you money. It
- vinyl cabinet repair
- peeling cabinets
- DIY cabinet fix
- kitchen renovation
- cabinet resurfacing
- thermofoil repair


